
 English
 русский
 عربى
عربى
A set of design, research and development, production, sales, installation in one of the professional new decorative materials enterprises.
Content
- 1 How to Remove Scuff Marks on Walls: The Complete Practical Guide
- 2 Why Walls Scuff So Easily in the First Place
- 3 Tools and Supplies to Gather Before You Start
- 4 Step-by-Step Methods: From Lightest Touch to Most Aggressive
- 5 Special Situations: Textured Walls, Dark Colors, and Wallpaper
- 6 How to Prevent Scuff Marks from Returning
- 7 Decorative Wall Panels: A Long-Term Solution to Chronic Scuffing
- 8 Choosing Between Cleaning, Repainting, and Wall Panels: A Decision Framework
- 9 Common Mistakes That Make Scuff Marks Worse
- 10 Scuff Mark Removal on Specific Paint Brands and Formulas
- 11 Summary: The Right Method for Every Type of Wall Scuff
How to Remove Scuff Marks on Walls: The Complete Practical Guide
The fastest fix for most scuff marks on painted walls is a barely-damp magic eraser (melamine foam) wiped in light circular motions — no cleaning solution needed, no repainting required. For latex-painted surfaces, this single method resolves roughly 80% of everyday scuffs in under two minutes. Deeper black heel marks, crayon transfers, or marks on flat/matte finishes need a slightly different approach, which this guide covers step by step. If your walls keep scuffing in high-traffic zones, the second half of this article explains how Decorative Wall Panels permanently eliminate the problem at its source.
Scuff marks are surface-level abrasion transfers — material from a shoe sole, furniture leg, or bag rubbing off onto your wall's paint or finish. Unlike stains, scuffs usually sit on top of the paint film rather than penetrating it, which is why gentle mechanical action (not harsh chemicals) is almost always the right starting point.
Why Walls Scuff So Easily in the First Place
Understanding why walls scuff helps you both remove existing marks and prevent future damage. The main culprits are paint sheen, wall material, and traffic patterns.
Paint Sheen Is the Biggest Factor
Flat and matte paints absorb light beautifully and hide surface imperfections, but they have almost no protective resin layer. The pigment particles are loosely bound, which means even light contact from a backpack or shoe transfers a mark instantly — and because the surface is porous, the mark soaks in slightly rather than sitting cleanly on top. Eggshell paints are marginally better; semi-gloss and gloss paints contain more resin binders and are far more scuff-resistant because contaminants have less to grip onto.
According to Sherwin-Williams' consumer paint guides, semi-gloss and high-gloss finishes are recommended for hallways, stairwells, and children's rooms precisely because they can withstand repeated wiping. Flat paint is best reserved for ceilings and low-traffic living rooms where walls rarely get touched.
High-Traffic Zones Are Predictable
The same spots accumulate scuffs in almost every home: the wall alongside staircases (where bags and hands brush), the corners near doorways (where people and furniture turn), behind sofas and beds (constant low-level rubbing), and the lower 36 inches of hallway walls where shoes and luggage pass. These predictable zones are exactly where protective solutions — from scrubbable paint to decorative wall panel cladding — deliver the most return on investment.
Wall Material Makes a Difference
Standard drywall (gypsum board) is soft and relatively porous. A heavily scuffed drywall surface can develop micro-abrasions in the paint film that make future marks stick more easily. Plaster walls, by contrast, are harder and denser — they resist scuffing better. Brick and concrete walls almost never scuff because any rubber transfer wipes off their rough texture effortlessly.
Tools and Supplies to Gather Before You Start
Having the right materials at hand prevents the common mistake of grabbing whatever is nearby and damaging the wall surface. Here is a ranked toolkit from gentlest to most aggressive:
| Tool / Supply | Best For | Risk Level | Approximate Cost |
|---|---|---|---|
| Melamine foam (magic eraser) | Most latex/eggshell painted walls | Low (but dulls gloss) | $3–$8 per pack |
| Damp microfiber cloth | Fresh, light scuffs on semi-gloss | Very low | $1–$3 |
| Mild dish soap + warm water | Greasy or sticky marks | Low | Already in kitchen |
| Baking soda paste | Stubborn rubber shoe marks | Medium (mild abrasive) | Pennies |
| White toothpaste (non-gel) | Small tough marks on light walls | Medium | Already in bathroom |
| Isopropyl alcohol (70%) | Ink or dye-based transfers | Medium-High (can strip color) | $2–$5 |
| Touch-up paint + small brush | Marks that removed paint pigment | Low risk if color matches | $5–$15 |
One item that should never appear in this toolkit: abrasive scrubbing pads (green or brown scour pads). These will strip paint and leave permanent scratches in the wall surface. Steel wool is equally destructive. Even when a scuff looks severe, start with the gentlest option.
Step-by-Step Methods: From Lightest Touch to Most Aggressive
Method 1 — The Magic Eraser Approach (Works for Most Walls)
Melamine foam, sold under brand names like Mr. Clean Magic Eraser, is the most widely recommended first step. It works by acting as an ultra-fine abrasive — the foam structure is harder than paint film but softer than the wall itself, allowing it to mechanically lift rubber, shoe polish, and surface dirt without chemicals.
- Dampen the melamine foam pad with plain water until it is moist but not dripping.
- Test on a hidden area first — an inside corner or behind a piece of furniture. On flat/matte paint, melamine foam can create a shiny spot by slightly compressing and burnishing the paint surface.
- Apply the foam to the scuff with very gentle circular motions. Do not press hard. Use the foam's surface area, not pressure, to lift the mark.
- Blot the area with a clean dry cloth immediately afterward to absorb any moisture residue.
- Check the result in good light. On semi-gloss walls, a second pass often brings the surface back to near-perfect.
Important limitation: if your wall is painted with flat or chalk-finish paint, magic erasers will almost certainly leave a visible sheen difference — a shiny patch in a matte area. In that case, skip to Method 3 (soap and water) or Method 5 (touch-up paint).
Method 2 — Warm Soapy Water for Fresh Light Scuffs
When a scuff is recent — within hours of the incident — a simple solution of a few drops of dish soap in warm water applied with a soft microfiber cloth can remove the mark before it sets fully. The soap lifts any oily component in the transfer (shoe polish, rubber compounds) while the microfiber provides gentle mechanical action. Rinse the area with a second cloth dampened in clean water, then pat dry. This method is safe on almost all paint sheens including flat finishes.
Method 3 — Baking Soda Paste for Stubborn Rubber Marks
Black rubber heel marks — the dark curved streaks left by shoes dragging along a baseboard or lower wall — respond well to a mild abrasive paste. Mix two tablespoons of baking soda with just enough water to form a thick paste (roughly the consistency of toothpaste). Apply to the mark with a soft cloth or the tip of your finger, rub in circles for 20–30 seconds, then wipe clean with a damp cloth. The sodium bicarbonate particles are fine enough to abrade the rubber transfer without scratching painted surfaces — but still test in a hidden spot first on matte paints.
Method 4 — Isopropyl Alcohol for Ink or Dye-Based Transfers
Some scuffs are not just rubber abrasion — they contain dye or ink (from colored bag fabric, permanent marker contact, or dyed rubber soles). Soapy water alone will not dissolve these. Dampen a cotton ball or the corner of a microfiber cloth with 70% isopropyl alcohol and dab — do not rub aggressively — at the mark. Work from the outside edges inward to avoid spreading the dye. Alcohol evaporates quickly, which is an advantage, but it can also dull or slightly lift certain latex paints if left in contact too long. Keep the application targeted and brief, then blot dry within 30 seconds.
Method 5 — Touch-Up Paint When Removal Is Impossible
Some marks are genuinely too deep — the scuffing removed paint pigment rather than just depositing material on top. In this case, no cleaning method will restore the original appearance. You need touch-up paint. The critical factor is color and sheen matching. Even if you have the original paint can, paint dries slightly differently based on age and humidity conditions. Test any touch-up paint on a piece of cardboard first, let it dry fully (at least 2 hours), then hold it against the wall in natural light before committing to the application. Apply with a small artist's brush in thin coats, building up coverage rather than trying to cover in one thick stroke. Feather the edges outward to blend with the surrounding paint film.
Special Situations: Textured Walls, Dark Colors, and Wallpaper
Removing Scuffs from Textured Walls
Orange peel, knockdown, and popcorn textures trap scuff material differently than smooth surfaces. The key is using a soft-bristle brush (a clean toothbrush works well) rather than a flat cloth or foam pad. Dip the brush in soapy water and use short, light strokes in multiple directions to work into the texture without flattening it. A flat foam eraser pressed against a textured surface will skip over the recessed areas and flatten raised peaks — which creates an uneven appearance after cleaning. Take your time and work in small sections.
Dark-Colored Walls Require Extra Care
Deep charcoal, navy, or forest green walls scuff visibly because any light-colored rubber or dust deposit shows up sharply against the dark background. The cleaning approach is the same, but the risk of removing pigment and leaving a lighter patch is higher with dark colors. Be especially conservative with magic erasers on dark matte walls — even light use can cause visible burnishing. If soap and water do not fully remove the mark, a touch-up pen loaded with the matching dark color is often cleaner than trying to brush on touch-up paint, which can leave obvious edges on deep hues.
Wallpaper Needs a Completely Different Protocol
Vinyl-coated wallpapers (the most common type in modern homes) handle mild cleaning similarly to semi-gloss paint — a damp cloth or very gentle magic eraser pass will often lift scuffs. However, non-coated paper wallpapers and fabric wallcoverings are extremely sensitive to moisture. Applying any wet solution risks permanent water staining, delamination, or ink bleeding from the pattern. For these surfaces, a dry art eraser (the kind used for pencil drawings) is sometimes effective on fresh, light scuffs. When in doubt, contact the wallpaper manufacturer before attempting any cleaning.
How to Prevent Scuff Marks from Returning
Cleaning scuffs is reactive. If your walls scuff repeatedly in the same spots, a permanent preventive strategy saves time, money, and frustration. Several approaches address this at different scales and budgets.
Upgrade to a Scrubbable Paint Sheen
The simplest and cheapest long-term fix for scuff-prone areas is repainting with an eggshell, satin, or semi-gloss finish. Benjamin Moore's Aura line and Sherwin-Williams' Emerald Interior series are frequently cited in design forums for their durability on high-traffic walls — both use proprietary resin systems that create a harder, smoother film that resists marking and wipes clean repeatedly. The upgrade from flat to eggshell typically adds $5–$10 per gallon and can save many hours of remedial cleaning over the lifetime of the paint job.
Install Chair Rail or Wainscoting in High-Traffic Areas
Traditional wainscoting — paneling applied to the lower third or half of a wall — creates a physical barrier in the zone where scuffs most frequently occur (below 36 inches from the floor). The technique dates back centuries and remains popular in hallways, dining rooms, and stairwells precisely because it separates a durable lower surface from a more decorative upper wall. Modern implementations use MDF, PVC, or composite materials that are far more resistant to scuffing than painted drywall.
Apply Transparent Wall Protection Film
Clear adhesive wall protection film, sold in rolls, is an invisible solution for very high-scuff-risk areas. It adheres directly over existing paint and provides a tough sacrificial layer. When the film becomes scuffed or dirty, it can be cleaned or replaced without touching the paint beneath. This approach is common in commercial settings (hotel corridors, office hallways) and is increasingly used in residential applications near entryways and behind chairs.
Add Furniture Bumpers and Wall Guards
Many scuffs come not from people but from furniture — the back of a dining chair rubbing against the wall every time someone sits down, or a sofa pushed slightly too close. Clear rubber bumpers adhered to furniture corners and backs prevent the furniture from making direct contact with the wall. Alternatively, a thin baseboard protector strip or wall guard rail installed at chair height eliminates the problem entirely without any visible change to the room's appearance.
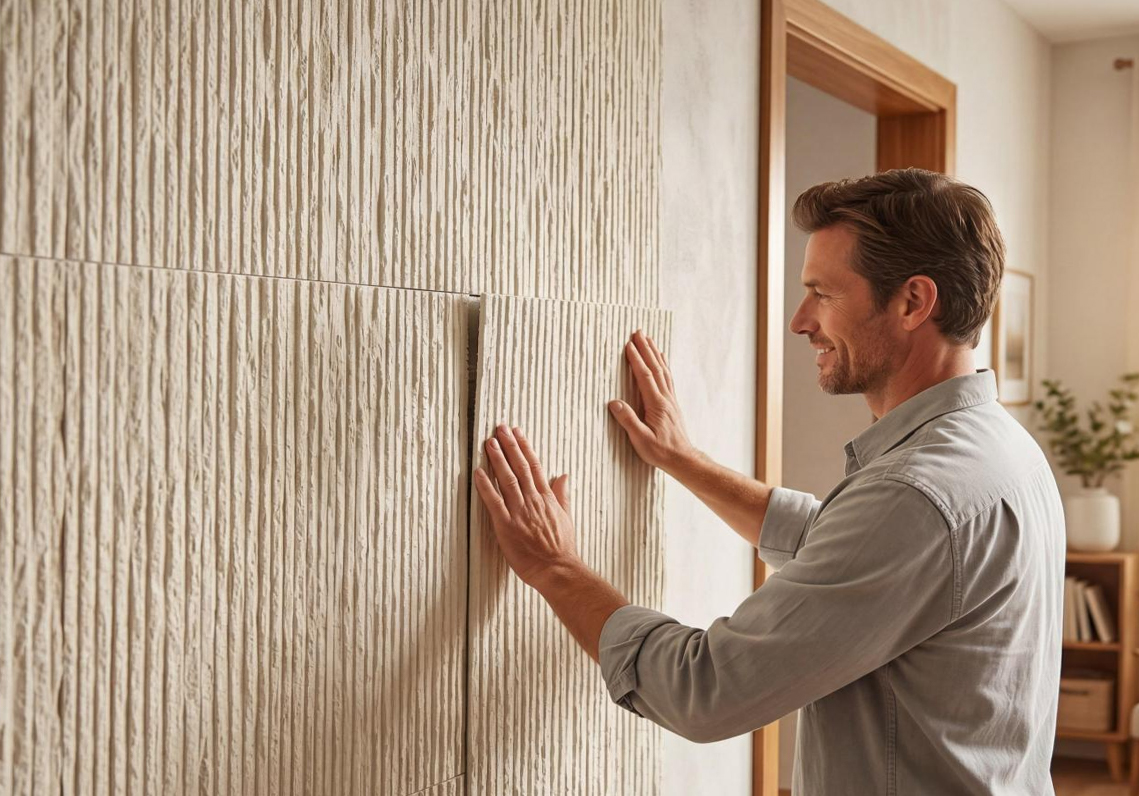
Decorative Wall Panels: A Long-Term Solution to Chronic Scuffing
For walls that face persistent, heavy-duty scuffing — in commercial kitchens, retail corridors, school hallways, healthcare facilities, or busy family homes — cleaning and repainting eventually becomes an unsustainable maintenance loop. Decorative Wall Panels solve this problem structurally rather than cosmetically, and they do so while significantly improving the visual quality of the space.
What Decorative Wall Panels Are Made From
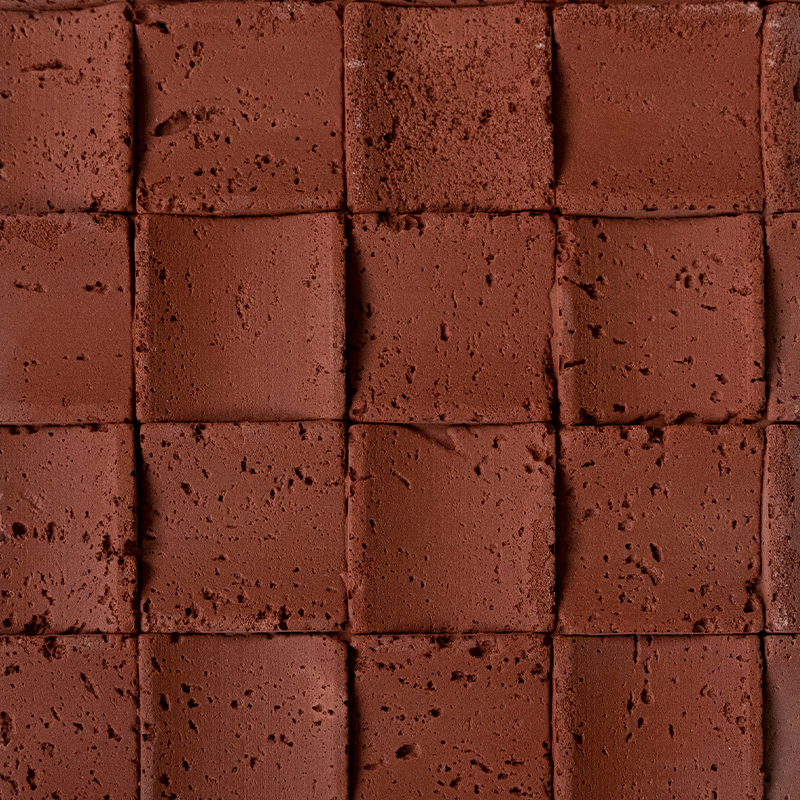
The term "decorative wall panel" covers a wide range of materials, each with different performance characteristics. The most scuff-resistant options for high-traffic use include:
- PVC Wall Panels: Rigid or semi-rigid polyvinyl chloride panels. Completely impervious to moisture, extremely easy to clean, and resistant to impact marking. Used extensively in commercial kitchens and food service environments because they meet hygiene standards and wipe down with almost any cleaning agent. Surface scuffs can usually be removed with a damp cloth alone.
- HPL (High-Pressure Laminate) Panels: Layers of resin-impregnated paper bonded under extreme heat and pressure to create a very hard, dense surface. HPL panels are the standard in commercial interior design for good reason — they resist scratching, impact, chemicals, and moisture. The surface hardness (rated by the Taber abrasion test) is significantly higher than any painted surface.
- Acrylic and Polycarbonate Panels: Transparent or translucent options that allow the underlying wall color or texture to show through while providing a protective layer. Polycarbonate is particularly impact-resistant — the same material used in safety glazing applications.
- Aluminum Composite Panels (ACP): A sandwich of thin aluminum sheets around a polyethylene core. Extremely lightweight for their rigidity, easy to fabricate into custom shapes, and virtually immune to scuffing. Common in retail interior fit-outs and commercial lobby spaces.
- Timber-Veneer and MDF Panels: Aesthetically rich option for offices, hospitality spaces, and upscale residential interiors. The hardwood veneer or painted MDF surface is more scuff-resistant than standard drywall paint, though not as tough as PVC or HPL. Often sealed with hard-wearing lacquer coatings for added protection.
Where Decorative Wall Panels Deliver the Most Value
Not every wall needs panel cladding. The areas where the investment genuinely pays off — both in maintenance savings and aesthetic improvement — follow a consistent pattern:
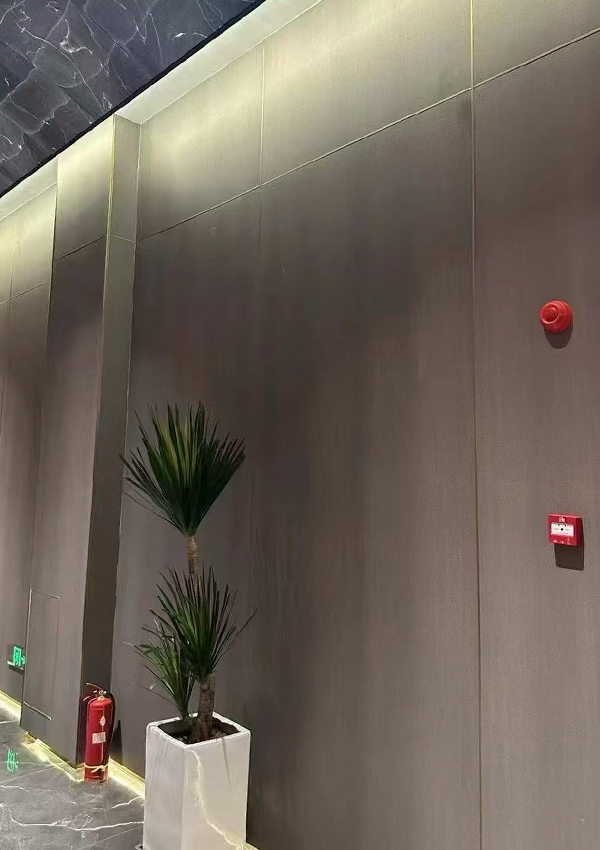
- Hallways and corridors: The single most scuff-prone location in any building. Luggage, clothing, bags, and shoulders all make contact with corridor walls. A PVC or HPL decorative wall panel system installed at shoulder height and below transforms a maintenance headache into a self-cleaning surface.
- Stairwells: High foot traffic combined with the diagonal movement of people carrying objects makes stairwells another chronic scuff zone. Wall panels installed on the lower half of stairwell walls are especially effective.
- Children's rooms and playrooms: Crayon, paint, and toy impact marks are a constant challenge. Wipe-clean decorative wall panels rated for wet cleaning eliminate the anxiety of wall damage during active play.
- Commercial reception and retail areas: First impressions matter enormously in commercial environments. A scuffed, patchy wall in a reception lobby undermines brand credibility. Decorative wall panels in these spaces stay presentable indefinitely with minimal maintenance.
- Behind kitchen counters and prep areas: Splashback-style wall panels behind food preparation surfaces handle moisture, grease, and impact from utensils — categories where standard drywall paint fails entirely.
Cleaning Decorative Wall Panels vs. Painted Walls
One of the most compelling reasons to switch to decorative wall panels in high-traffic areas is the dramatic reduction in cleaning effort. The following comparison illustrates the difference in practical terms:
| Scenario | Standard Painted Drywall | PVC / HPL Decorative Wall Panel |
|---|---|---|
| Black shoe scuff mark | Magic eraser + possible touch-up paint; 10–20 min | Damp cloth; 30 seconds |
| Repeated weekly scuffing | Gradual paint film degradation; repainting every 2–3 years | Surface unchanged; no repainting ever required |
| Crayon or marker transfer | Risk of paint removal; may require full section repaint | Isopropyl alcohol wipe; fully clean in 1 minute |
| Impact dent from luggage | Dent in drywall; requires filler, sanding, repainting | Rigid panels absorb impact; no visible damage in most cases |
| Moisture or condensation exposure | Paint bubbling, mold risk, drywall softening | Zero water absorption; wipe dry and done |
Installation Considerations for Wall Panels
Modern decorative wall panel systems are designed for straightforward installation over existing walls. Most residential and commercial PVC panel systems use a tongue-and-groove interlocking profile that clips together without exposed fasteners. The panels can be adhered directly to drywall using construction adhesive, or mounted on a batten framework for additional rigidity and ease of future removal or replacement.
Key installation measurements to note: standard wall panels range from 2400mm to 3000mm in height (covering full wall height in most residential rooms) and 250mm to 1200mm in width depending on the profile style. Thicknesses vary from 4mm for lightweight decorative options up to 12mm or more for acoustic or impact-resistant panel systems. For a corridor installation where scuff resistance is the primary goal, a panel thickness of 8–10mm in PVC or 6mm HPL provides excellent durability.
Choosing Between Cleaning, Repainting, and Wall Panels: A Decision Framework
Not every scuff situation calls for the same solution. A practical decision framework based on frequency, severity, and location helps clarify the most cost-effective path.
Clean the Mark (Don't Repaint or Reclad)
Use the cleaning methods described earlier when: the scuff is isolated and infrequent; the wall surface is in otherwise good condition; the paint sheen is semi-gloss or higher (which responds well to cleaning); and the mark is surface-level (no paint removal). This covers the majority of household scuff scenarios and requires nothing more than common household supplies or a pack of magic erasers.
Repaint the Section or Wall
Repainting makes sense when: the scuffs are numerous and scattered across a wide area, making spot-cleaning impractical; the underlying paint is already several years old and faded; you want to upgrade to a more scrubbable finish while refreshing the room's appearance. Upgrading to an eggshell or satin sheen at this point costs very little extra but meaningfully reduces future maintenance. A gallon of quality interior latex covers approximately 350–400 square feet, making a typical hallway repaint a one-gallon job.
Install Decorative Wall Panels
The panel solution pays for itself when: scuffs occur weekly or more frequently in the same area; the wall is in a commercial or semi-commercial setting where cleaning labor is a real cost; the location involves moisture (bathrooms, kitchens, utility rooms) where painted drywall is fundamentally unsuited; or the space needs a design upgrade and scuff resistance simultaneously. Decorative Wall Panels in these contexts are not just a maintenance decision — they are a design decision that happens to solve a practical problem. The available range of textures, colors, and panel profiles means the installation can match any aesthetic from industrial concrete-look to warm timber grain to sleek gloss white.
Common Mistakes That Make Scuff Marks Worse
Well-intentioned cleaning attempts frequently cause more damage than the original mark. These are the errors that turn a 5-minute fix into a repaint job:
- Scrubbing too hard with the magic eraser: Pressure removes the cleaning medium faster and increases the risk of burnishing matte paint. Use gentle passes — let the material's abrasive structure do the work, not your arm force.
- Using multi-surface sprays with bleach: Bleach-containing cleaners can strip colorants from latex paint, leaving a lighter patch that is more visible than the original scuff. Check any spray cleaner for bleach content before applying to walls.
- Wiping in one direction only: A single-direction wipe can smear the scuff material rather than lifting it. Work in small circles or use the dabbing/lifting motion to pull material away from the surface.
- Not testing first: Different paint brands and finishes react differently to the same cleaning agent. Five seconds of patch testing in a hidden spot saves considerable regret on visible wall surfaces.
- Over-wetting the wall: Excess moisture penetrates latex paint films and reaches the drywall paper below, causing the paper to soften, swell, and eventually delaminate. Wring cloths thoroughly and keep the cleaning area as dry as possible.
- Skipping the dry-blot step: After any wet cleaning method, leaving residual moisture on a painted wall allows water to wick under the paint at the cleaned edges. Always blot dry with a clean cloth after washing.
- Using acetone or nail polish remover: These solvents dissolve most latex and oil-based paints instantly. Reserved for stubborn sticker adhesive removal on glass or metal, never use them on painted walls.
Scuff Mark Removal on Specific Paint Brands and Formulas
Different paint formulations respond to cleaning with meaningful differences in outcome. Here is what real-world experience shows across common paint categories:
Washable and Scrubbable Paints
Major paint manufacturers offer paint lines marketed specifically as "washable" or "scrubbable." Dulux EasyCare, for example, claims resistance to over 10,000 wipes without paint film breakdown. These formulas use higher resin-to-pigment ratios and sometimes add silicone or ceramic microsphere additives that create a harder, smoother cured film. On these surfaces, magic erasers and soapy water work extremely well with no risk of burnishing, as the paint was specifically engineered to handle mechanical cleaning.
Traditional Flat Latex Paint
Flat latex is the most challenging to clean without leaving evidence of the cleaning itself. The low binder content means the paint film is relatively fragile; abrasive or chemical cleaning risks removing pigment along with the scuff. On flat latex, the recommended hierarchy is: damp cloth first; if that fails, very mild soap solution; if that fails, accept that touch-up paint is the correct next step rather than escalating the cleaning aggression.
Chalk Paint and Mineral Paints
Chalk-finish paints, used for their characteristically matte, powdery appearance, are especially vulnerable to scuffing and burnishing. The wax or topcoat applied over chalk paint determines the cleanability — an unsealed chalk paint surface should essentially not be touched with anything wet. Many chalk paint manufacturers recommend applying a furniture wax or polycrylic topcoat that significantly improves cleanability. Scuffs on sealed chalk paint can often be removed with a barely-damp cloth; on unsealed chalk paint, the only repair option is reapplication of the chalk paint and sealer in that spot.
Summary: The Right Method for Every Type of Wall Scuff
To bring together everything covered in this guide, here is a quick-reference decision map for the most common scuff scenarios:
- Light gray scuff on semi-gloss or satin wall: Damp magic eraser, gentle circular motion. Done in under 2 minutes.
- Black rubber heel mark on any paint: Baking soda paste, soft cloth, circular motion. Rinse clean, blot dry.
- Scuff on flat or matte paint: Mild soap and water only. Accept minor residual mark rather than risk burnishing.
- Colored dye or ink transfer: 70% isopropyl alcohol, dab don't rub, work inward from edges.
- Scuff that removed paint pigment: Touch-up paint matched carefully for color and sheen. Apply in thin coats, feather edges.
- Chronic scuffing in the same zone: Repaint with scrubbable finish, install wainscoting, or clad with Decorative Wall Panels for a permanent fix.
- Commercial or moisture-exposed environment: PVC or HPL Decorative Wall Panels — the only genuinely maintenance-free solution for walls that face constant physical contact.
Scuff marks are one of the most common and frustrating household maintenance issues, but they are also among the most predictable. Armed with the right cleaning hierarchy — starting gentle, escalating only when necessary — and a clear plan for chronic problem areas (whether that is a paint upgrade, wainscoting, or full decorative wall panel installation), you can keep walls looking fresh without spending excessive time or money on repeated remedial work.


 ++86-18906857262 / ++86-13754347028
 No.49, Tunnan Industrial Zone, Daohui Street, Shangyu District, Shaoxing City, Zhejiang Province, China