
 English
 русский
 عربى
عربى
A set of design, research and development, production, sales, installation in one of the professional new decorative materials enterprises.
Content
- 1 How to Take Down Wallpaper: The Direct Answer
- 2 Tools and Materials You Need Before Starting
- 3 Step-by-Step Guide to Removing Wallpaper
- 4 Wallpaper Type Comparison: Removal Difficulty at a Glance
- 5 Special Situations: Drywall vs. Plaster, Painted Wallpaper, and Older Homes
- 6 What to Do With Your Walls After Removing Wallpaper
- 7 Why Many Homeowners Switch to Decorative Wall Panels After Removing Wallpaper
- 8 Common Wallpaper Removal Mistakes and How to Avoid Them
- 9 Pro Tips for Faster, Cleaner Wallpaper Removal
- 10 Frequently Asked Questions About Taking Down Wallpaper
- 10.1 How long does wallpaper removal take for an average bedroom?
- 10.2 Can I use a steamer on drywall?
- 10.3 What is the best homemade wallpaper removal solution?
- 10.4 My walls are in poor condition after wallpaper removal. Do I need to replace the drywall?
- 10.5 How do I remove wallpaper border?
- 10.6 Can I paint directly over wallpaper instead of removing it?
- 10.7 Are Decorative Wall Panels difficult to remove in the future?
- 10.8 Is there anything that makes wallpaper removal completely impossible?
- 10.9 How do I get rid of all the wet paper scraps during removal?
- 10.10 What kind of primer should I use after wallpaper removal?
How to Take Down Wallpaper: The Direct Answer
Taking down wallpaper involves three core steps: score the surface, soak it with a removal solution, and peel it away in sheets. Most standard wallpaper removal projects take one to two days for an average-size room, depending on the number of layers and whether the walls were primed before the original installation. If the adhesive is old or the wallpaper has been painted over, the process requires more soaking time and patience.
Before you start pulling anything off the wall, it helps to understand what you are dealing with. Wallpaper typically falls into one of three categories: strippable (which pulls off in dry sheets), traditional (requiring moisture to loosen the adhesive), and fabric-backed vinyl (which usually comes off in two layers). Once the wallpaper is removed, many homeowners replace it with Decorative Wall Panels, which offer a cleaner installation process and a dramatically upgraded look without the mess of paste and paper.
Below is everything you need to know about taking down wallpaper safely and efficiently, followed by guidance on what to do with your walls afterward.
Tools and Materials You Need Before Starting
Gathering the right supplies before you begin will save you multiple trips to the hardware store. Having the wrong tool at the wrong moment — especially when wet drywall is exposed — can cause permanent damage to your wall surface.
Scoring Tools
- Paper Tiger or Zinsser scoring tool
- Scoring sponge (for delicate drywall surfaces)
- Utility knife with fresh blades
Soaking Equipment
- Garden pump sprayer or sponge
- Large buckets
- Fabric softener or commercial wallpaper remover (DIF is widely used)
- Warm water (hot water improves adhesive penetration)
Scraping and Cleanup
- 6-inch and 10-inch wide putty knives or broad knives
- Plastic sheeting and painter's tape
- Drop cloths
- Trash bags
- Sponges and clean rags
Wall Repair Supplies
- Joint compound or spackle
- Sandpaper (120-grit and 220-grit)
- Primer (oil-based preferred for post-removal walls)
- Paint roller and tray
According to Bob Vila's home improvement guides, a pump sprayer distributes solution more evenly than a sponge, which is especially useful for large walls. Working in 3-by-3-foot sections prevents the paper from drying out before you can peel it.
Step-by-Step Guide to Removing Wallpaper
Follow these steps in order. Skipping steps — particularly prep and scoring — is the most common reason wallpaper removal projects drag on for days longer than expected.
01
Prepare the Room
Turn off electricity to all outlets and switch plates in the room, then remove the faceplates. Lay plastic sheeting along the floor and tape it to the baseboard. This protects flooring from water damage, which is significant — a single gallon of removal solution soaking into hardwood can cause warping. Move all furniture to the center of the room or into an adjacent space.
02
Test for Strippable Wallpaper
Find a seam near a corner and gently pull the wallpaper away at a low angle. If it peels off in a large, dry sheet without tearing, you have strippable wallpaper. Strippable wallpaper can save you three to four hours of work because it requires no soaking. If it tears immediately, you have traditional paste-and-paper wallpaper and must wet it to remove it.
03
Score the Wallpaper Surface
Use a scoring tool to perforate the paper surface. This allows the removal solution to penetrate through to the adhesive layer beneath. Hold the scorer flat against the wall and move it in circular patterns. Do not press too hard — deep scoring gouges drywall, creating hours of repair work. On plaster walls, you can apply slightly more pressure. The scoring step is especially important for vinyl-coated or painted-over wallpaper, which is otherwise nearly waterproof.
04
Apply the Removal Solution
Mix your wallpaper removal solution according to label directions. A common DIY recipe is one cap of liquid fabric softener per quart of hot water. Commercial products like DIF Wallpaper Remover Concentrate are formulated to break down wheat paste and clay-based adhesives more aggressively. Spray or sponge the solution onto a manageable section — no more than 3 feet wide — and allow it to soak for at least 5 to 10 minutes. If you see the paper beginning to bubble away from the wall, the adhesive is releasing and you can begin peeling.
05
Peel and Scrape
Starting at a seam or corner, use your fingers or a putty knife to lift a corner of the paper and pull it away at a shallow angle — ideally 10 to 20 degrees off the wall surface. Pulling at a steep angle tears the paper into small pieces that are harder to remove. Use the broad knife to scrape away paper that does not peel cleanly. Work your way across the wall in sections, re-wetting any area that begins to dry before you can peel it. Double-layered wallpaper will require two passes through this process.
06
Remove the Adhesive Residue
After the paper is off, a layer of dried adhesive almost always remains. This must be removed before you paint or install anything new. Apply another round of warm water and scrub the wall surface with a coarse sponge. Adhesive residue left on the wall will cause paint to bubble and peel within months. Rinse the wall twice with clean water to remove all solution and dissolved adhesive.
07
Repair the Wall Surface
Inspect for gouges, torn drywall paper, and divots. Apply joint compound to all damaged areas, let it dry fully (typically 24 hours), and sand smooth. For walls with extensive damage, a skim coat over the entire surface creates a uniformly smooth result before priming. Apply an oil-based primer before painting — water-based primer over unprimed drywall can cause the paper facing of the drywall to lift, creating a rough, bumpy texture.
Wallpaper Type Comparison: Removal Difficulty at a Glance
Not all wallpaper is created equal. The type installed in your room directly affects how long removal will take and how much damage you might find underneath.
| Wallpaper Type | Removal Method | Difficulty Level | Avg. Time Per Room | Wall Damage Risk |
|---|---|---|---|---|
| Strippable Vinyl | Dry peel | Easy | 2–4 hours | Low |
| Traditional Paper | Score + wet + scrape | Moderate | 6–10 hours | Moderate |
| Fabric-Backed Vinyl | Two-layer peel + wet | Moderate–Hard | 8–14 hours | Moderate |
| Painted-Over Wallpaper | Heavy scoring + steam | Hard | 12–20 hours | High |
| Multiple Layers | Repeat full process per layer | Very Hard | 1–3 days | Very High |
Special Situations: Drywall vs. Plaster, Painted Wallpaper, and Older Homes
Removing Wallpaper from Drywall
Drywall — also called gypsum board or sheetrock — is the most common wall surface in homes built after 1950. The challenge is that drywall has a paper facing, and that paper facing is absorbent. If you over-wet the wall during wallpaper removal, you can dissolve the paper facing of the drywall itself, leaving a fuzzy, bubbled surface that is very difficult to repair.
The key is to work in small sections, apply only as much moisture as necessary, and move quickly. Many contractors recommend wetting one section while scraping the previously wetted section, keeping a rhythm that prevents over-soaking. If you notice the wall surface becoming soft or fuzzy, stop adding water and let it dry before continuing.
Removing Wallpaper from Plaster
Plaster walls are found in homes built before about 1950. Plaster is much harder and more water-resistant than drywall, which means you can apply more moisture without risk of surface damage. You can also use a wallpaper steamer on plaster walls without the same concern about damaging the wall surface. However, be aware that older plaster is brittle and can crack if subjected to heavy scraping pressure.
One major benefit of plaster walls is that the adhesive layer typically releases more cleanly, leaving a smoother surface after removal. This makes plaster walls a better candidate for direct painting without extensive skim coating.
Dealing with Painted-Over Wallpaper
Painted wallpaper is the most difficult scenario. Each coat of paint acts as a moisture barrier, so the removal solution cannot reach the adhesive. You have two options: use a wallpaper steamer, which forces steam through the paint layer, or score the wallpaper very aggressively and soak it repeatedly over several applications.
In extreme cases — multiple layers of wallpaper with multiple coats of paint — it may be more practical to hang new drywall directly over the existing surface, or to cover the walls entirely with Decorative Wall Panels designed for installation over existing surfaces. Many panel systems are engineered specifically for this use case, attaching directly to imperfect or layered walls.
Using a Wallpaper Steamer
A wallpaper steamer is an electric appliance that generates continuous steam, which you hold against the wall for 20 to 30 seconds per section. The steam penetrates the paper and softens the adhesive, making scraping significantly easier. Steamers are available for rent at most home improvement stores for approximately $30 to $50 per day.
The main risks of a steamer are burns from the steam, damage to drywall through over-wetting, and the potential to loosen plaster from its lath keys if held in one spot too long. Always keep the steam plate moving and wear gloves and long sleeves when operating one.
What to Do With Your Walls After Removing Wallpaper
Once the wallpaper is off and the walls are clean and dry, you have several options for finishing them. The condition of your walls will largely determine which options are feasible.
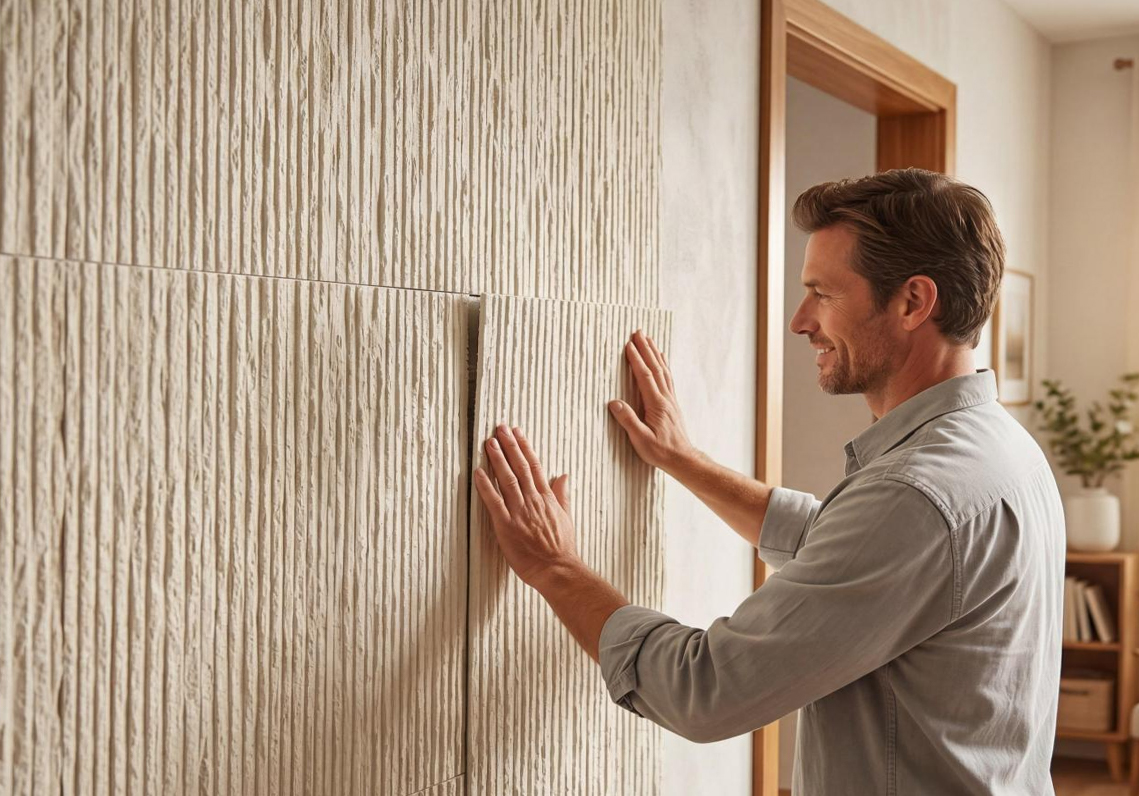
Why Many Homeowners Switch to Decorative Wall Panels After Removing Wallpaper
The experience of removing wallpaper — especially if it is difficult, multi-layered, or leaves the walls in rough condition — often motivates homeowners to look for a more durable, low-maintenance wall finish for their next installation. This is one of the main reasons Decorative Wall Panels have grown in popularity as a direct successor to traditional wallpaper.
What Are Decorative Wall Panels?
Decorative Wall Panels are rigid or semi-rigid panels manufactured from a range of materials — including MDF (medium-density fiberboard), PVC, real wood veneer, bamboo, WPC (wood-plastic composite), and high-pressure laminate. They are designed to cover walls as a finished surface, providing both aesthetic and functional benefits. Unlike wallpaper, they do not require paste, they are not damaged by moisture exposure on their own surface, and they do not peel at seams.
Panel sizes vary by product line. Common dimensions include 4-by-8-foot sheets (standard in North America), narrow planks (4 to 6 inches wide, 8 to 12 feet long) for shiplap or linear wood effects, and smaller modular tiles (12-by-12 or 12-by-24 inches) for geometric and 3D surface designs.
Types of Decorative Wall Panels
| Panel Material | Best Used In | Moisture Resistance | DIY-Friendly | Approximate Cost (per sq. ft.) |
|---|---|---|---|---|
| MDF with Laminate | Living rooms, bedrooms | Low–Moderate | Yes | $3–$12 |
| PVC / Foam | Bathrooms, kitchens | High | Yes | $2–$8 |
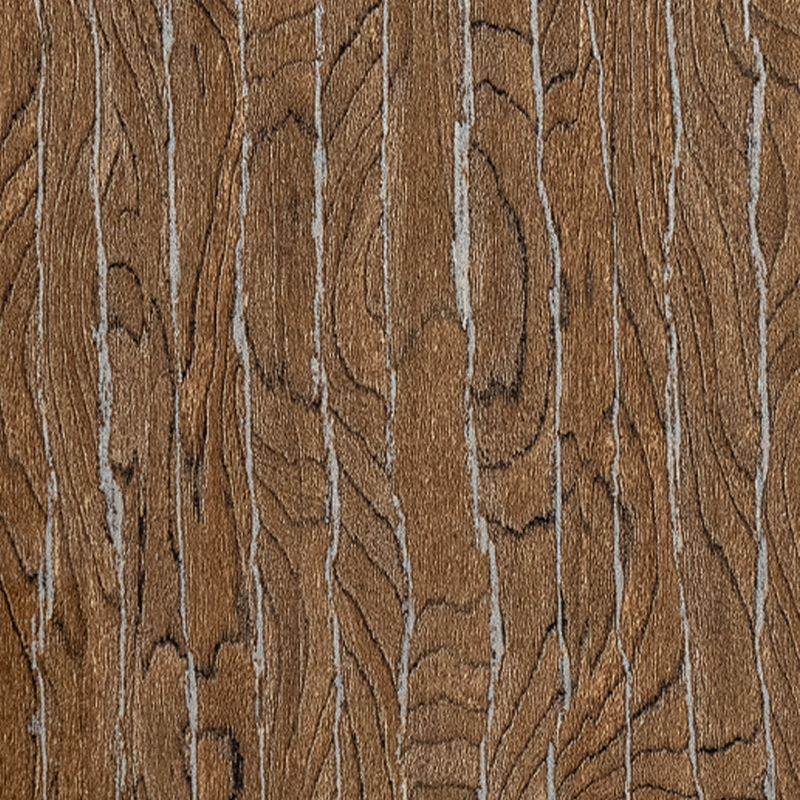
| Real Wood Veneer | Feature walls, offices | Low | Moderate | $8–$30 |
| WPC (Wood-Plastic Composite) | Basements, bathrooms | Very High | Yes | $4–$15 |
| Stone Veneer / Faux Stone | Fireplaces, accent walls | Moderate–High | Moderate | $6–$25 |
How to Install Decorative Wall Panels After Wallpaper Removal
Most Decorative Wall Panels can be installed by a confident DIYer with basic tools. The process depends on the panel type and weight, but the general workflow is as follows:
- Clean the wall thoroughly and allow it to dry for at least 48 hours after wallpaper removal.
- Apply oil-based primer to stabilize the wall surface, particularly where drywall facing was damaged.
- Measure and mark a level starting line at the wall's base or an established height.
- Cut panels to size using a circular saw, jigsaw, or utility knife depending on the panel material.
- Apply construction adhesive (such as Liquid Nails Heavy Duty) in an S-pattern to the back of the panel, or use the manufacturer's recommended clip or track system.
- Press the panel firmly against the wall and hold in place with bracing or panel nails as needed.
- Leave a 1/8-inch gap between panels to allow for thermal expansion.
- Finish edges with matching trim or color-matched caulk.
For heavier materials such as stone veneer or thick wood panels, mechanical fasteners (screws into studs) are recommended in addition to adhesive. Always locate your wall studs before beginning installation.
Common Wallpaper Removal Mistakes and How to Avoid Them
The most expensive part of a wallpaper removal project is usually not the materials or the labor — it is the wall repair work that follows when the job is done carelessly. Understanding the most common mistakes before you start protects your walls and your budget.
Mistake 1
Skipping the Score
Applying removal solution directly to un-scored wallpaper is inefficient at best and useless at worst, especially with vinyl-coated or painted-over paper. The scoring perforations are what allow moisture to reach the adhesive. Without them, you are simply wetting the surface of the paper without loosening the bond. Always score first.
Mistake 2
Over-Scoring on Drywall
The opposite error is scoring too aggressively. A handheld scoring tool set to maximum pressure will cut through the drywall paper facing, leaving gouges that require skim coating to repair. Use a gentle, even pressure and let the scoring tool do the work rather than forcing it.
Mistake 3
Not Protecting the Floor
Water from the removal process runs down the wall, pools at the base, and soaks into flooring gaps. A single poorly protected corner can lead to cupped hardwood planks or moisture trapped under laminate, both of which are expensive to fix. Use heavy-duty plastic sheeting — not just drop cloths — and tape it directly to the baseboard with painter's tape.
Mistake 4
Skipping the Adhesive Removal Step
Many homeowners stop after the paper is off and proceed directly to priming, only to find their primer and paint bubble and peel within weeks. Dried paste residue must be dissolved and wiped away completely. Run your hand over the dry wall surface — if it feels rough, gummy, or crinkly, there is still adhesive present.
Mistake 5
Using Water-Based Primer Too Soon
Applying a water-based latex primer to bare or damaged drywall after a wet removal process can raise the grain of the drywall paper, creating a rough texture that shows through paint. Allow walls to dry for 24 to 48 hours, then apply an oil-based primer first. The oil-based primer seals the surface and does not reactivate any remaining adhesive.
Mistake 6
Not Testing a Small Area First
Before committing to a removal method for the entire room, test it in a small inconspicuous area — ideally behind a door. This reveals whether the wallpaper is strippable, how the walls respond to moisture, and whether the adhesive is water-soluble or requires a stronger commercial solution.
Pro Tips for Faster, Cleaner Wallpaper Removal
These are the techniques that experienced painters and renovation contractors use to get through wallpaper removal projects more efficiently than the average DIYer.
1
Heat the solution. Hot water (around 140°F / 60°C) dissolves wallpaper adhesive significantly faster than room-temperature water. Adding fabric softener or a commercial remover to hot water produces the most effective soaking solution for standard paste.
2
Work top-to-bottom. Applying solution at the top of the wall and working downward uses gravity — the solution runs down and pre-soaks the area below as you work, effectively doing double duty on large wall surfaces.
3
Use a wide scraper. A 10-inch broad knife removes significantly more material per stroke than a standard putty knife. Angle it at about 30 degrees to the wall and apply steady, even pressure. Never gouge with the corner of the blade.
4
Work in sections. Attempting to wet the entire room at once and then scrape it all is inefficient because the first sections dry out before you reach them. Wet a 3-by-3-foot section, let it soak, scrape, then move to the next section.
5
Use a spray bottle for touch-ups. A small spray bottle filled with the removal solution is useful for re-wetting sections that begin to dry before you get to them, without over-soaking the area.
6
Score seams separately. Seams are the thickest parts of the wall — two layers of paper overlap there. Score seam areas with extra passes to ensure adequate moisture penetration.
Frequently Asked Questions About Taking Down Wallpaper
How long does wallpaper removal take for an average bedroom?
For a standard 12-by-12-foot bedroom with a single layer of traditional wallpaper on drywall, expect the removal process to take 6 to 10 hours, including setup, soaking, scraping, adhesive removal, and initial cleanup. If the wallpaper is strippable or on plaster walls, the time may be closer to 3 to 5 hours. Multiple layers or painted-over paper can push the project to a full weekend or longer.
Can I use a steamer on drywall?
You can use a steamer on drywall, but you must be more careful than you would be on plaster. Keep the steam plate moving constantly — do not hold it in one spot for more than 20 to 25 seconds. Extended steam exposure softens the gypsum core of drywall and can cause it to crumble. Always test a small area first and watch for signs of the wall surface becoming soft.
What is the best homemade wallpaper removal solution?
The most widely used DIY removal solution is one cap of liquid fabric softener mixed into one quart of hot water. The fabric softener acts as a surfactant that helps water penetrate the paper more effectively. Some people substitute white vinegar for the fabric softener, which has a mild acid action on certain types of paste. Both work reasonably well on standard wallpaper paste. For heavier-duty paste or painted-over wallpaper, commercial products like DIF Wallpaper Remover Concentrate are more reliable.
My walls are in poor condition after wallpaper removal. Do I need to replace the drywall?
Not necessarily. Minor to moderate damage — torn paper facing, small gouges, rough patches — can be repaired with joint compound and skim coating. For walls with extensive damage, a complete skim coat (applying a thin layer of joint compound over the entire wall surface) and sanding produces a smooth, paintable result. Only in cases of severe structural damage — large holes, soaked and crumbling gypsum, mold behind the wallpaper — is drywall replacement the best option. Another practical solution for walls with significant cosmetic damage is installing Decorative Wall Panels directly over the surface, which conceals imperfections entirely.
How do I remove wallpaper border?
Wallpaper borders are usually installed with a stronger adhesive than full-wall wallpaper, and they are narrower, which makes scoring and wetting more precise work. Use a spray bottle rather than a roller or sponge for applying solution to borders, and allow a longer soak time — at least 10 to 15 minutes. A plastic scraper or credit card-style tool can be used instead of a metal putty knife to reduce the risk of scoring the wall surface beneath the border.
Can I paint directly over wallpaper instead of removing it?
Painting over wallpaper is not recommended as a long-term solution. The moisture in paint can cause the wallpaper to bubble and peel, seams become visible through the paint, and future removal becomes significantly harder. If you absolutely cannot remove the wallpaper — for example, because it is holding crumbling plaster in place — prime with an oil-based primer, skim coat with joint compound to hide seams, and then paint. But wherever removal is feasible, it produces far better long-term results.
Are Decorative Wall Panels difficult to remove in the future?
Compared to wallpaper, most Decorative Wall Panels are significantly easier to remove, particularly those installed with clip systems or minimal adhesive. Panels installed with construction adhesive require a pry bar to remove and may take some drywall paper with them, similar to the challenges of wallpaper removal. Clip-and-track systems are the most renovation-friendly option if you anticipate future changes.
Is there anything that makes wallpaper removal completely impossible?
In most residential scenarios, wallpaper removal is possible with enough time and the right technique. The closest thing to an impossible situation is wallpaper installed directly on unprimed drywall — in this case, the paper backing bonds so completely with the drywall facing that removal often destroys the drywall surface. If you encounter this situation, the most practical solutions are skim coating over the old wallpaper (if it is fully adhered with no loose areas) or installing new drywall or Decorative Wall Panels over the top.
How do I get rid of all the wet paper scraps during removal?
As you scrape, let wet paper fall onto the plastic sheeting on the floor. Periodically roll up sections of the sheeting with the wet paper inside and transfer it to a garbage bag. Trying to collect paper scraps into a bucket while also working overhead is awkward and slows you down. Keeping the floor protected with sheet plastic allows you to work quickly and clean up efficiently at the end of each section.
What kind of primer should I use after wallpaper removal?
Oil-based primers are the first choice after wallpaper removal. They dry to a hard, sealed surface that does not reactivate old adhesive and does not cause drywall paper to bubble. Zinsser BIN (shellac-based) and Zinsser Bulls Eye 1-2-3 (water-based, but formulated for problem surfaces) are also widely used options. Never apply a standard latex primer directly to bare drywall that has been exposed to a lot of moisture during removal — the result will be a fuzzy, rough surface that requires additional sanding.


 ++86-18906857262 / ++86-13754347028
 No.49, Tunnan Industrial Zone, Daohui Street, Shangyu District, Shaoxing City, Zhejiang Province, China