

 English
 русский
 عربى
عربى

A set of design, research and development, production, sales, installation in one of the professional new decorative materials enterprises.
Content
- 1 What Determines Whether You Can Panel Directly Over a Wall
- 2 Tools and Materials Checklist
- 3 Acclimation: The Step Most People Skip
- 4 Preparing the Wall Surface
- 5 Measuring and Cutting Panels
- 6 Adhesive, Nails, or Both?
- 7 Step-by-Step: Putting Panels on the Wall
- 8 Fitting Around Outlets, Windows, Doors, and Wires
- 9 Finishing Touches That Make the Wall Look Professional
- 10 Frequently Asked Questions
- 10.1 Can I install wood paneling directly over drywall?
- 10.2 Should I use adhesive, nails, or both?
- 10.3 How long does the adhesive take to cure before I can hang things on the paneled wall?
- 10.4 Do panels need a gap at the top and bottom?
- 10.5 What is the best way to cut wood paneling without chipping the finished face?
- 10.6 How do I hide the seams between panels?
- 11 A Final Word on Paneling Installation
Wood paneling changes the feel of a room faster than almost any other wall treatment, and installing it yourself is a realistic weekend project for most moderately handy homeowners. The short answer to how to put up wood paneling on walls is: flatten the wall, cut the panels about 1/8 inch short, apply adhesive in vertical beads, press each panel into place, and reinforce with finishing nails at every stud location. For a clean 4-by-8-foot panel, that process takes about 15 to 20 minutes once the wall is prepped. As a manufacturer of wood veneer paneling, we have watched installers and project teams trip over the same problems again and again — skipped acclimation, missed studs, or adhesive alone holding a large panel. This guide explains the method we recommend for consistently flat, gap-free results.
 Custom Wood Veneer Wall Paneling Suppliers, OEM/ODM CompanyShaoxing Mingyou Decoration Materials Co., Ltd is a China wood veneer wall paneling suppliers and company, OEM/ODM custom wood veneer wal...View Product →
What Determines Whether You Can Panel Directly Over a Wall
Before you buy a single sheet, check two things: the surface behind the wall and the thickness of the panel. Both decide whether the job takes one day or requires an extra preparation round.
Panel Thickness and the Backing It Needs
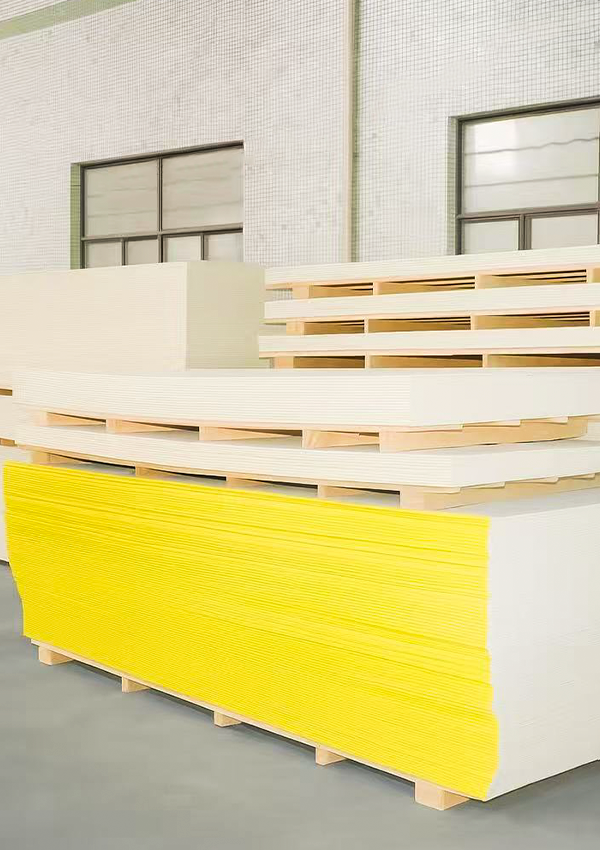
Decorative wood panel systems are typically 1/8 to 1/2 inch thick. The rule that matters: panels thinner than 1/4 inch need a solid, flat backing such as drywall or plaster, because they will flex and telegraph any imperfection in an open stud wall. Panels 1/4 inch and thicker have enough stiffness to span studs or furring strips without visible movement. That is why a panel built on a stable structural core, such as our wood veneer paneling base board, tends to behave more predictably over time than a thin flexible sheet. The construction details and material choices are covered in our wood veneer paneling knowledge encyclopedia.
 Base Board of Wood Veneer Paneling- Shaoxing Mingyou Decoration Material Co., LtIntroductionBase Board of Wood Veneer Paneling is a category of interior and exterior surface cladding solutions produced using advanced ...View Product →
Wall Conditions That Change Your Installation Plan
The same paneling method does not fit every wall. Use this table to match your wall condition to the correct fastening approach.
| Wall Surface | Can You Panel Over It? | Fastening Recommendation |
|---|---|---|
| Flat drywall or plaster | Yes, ideal base | Adhesive plus 1-1/4 in. finishing nails into studs |
| Textured or damaged drywall | Only after sanding or skim coating | Repair and sand flat, then adhesive plus nails |
| Open stud framing | Yes, if panels are at least 1/4 in. thick | Adhesive on the studs, nails into every stud |
| Brick, block, or concrete | Yes, with furring strips | Fix furring strips 16 in. on center, then panel as usual |
Tools and Materials Checklist
Having everything ready before the first panel goes up can cut installation time by nearly half. Here is the set we recommend for a standard room, based on what our production and installation teams use.
Tools
- Tape measure and pencil
- 4-ft and 2-ft spirit levels
- Electronic stud finder
- Circular saw with an 80-tooth finish blade
- Jigsaw with a fine wood-cutting blade
- Caulking gun for adhesive cartridges
- Rubber mallet
- Nail set (1/16 in.)
- Chalk line and utility knife
Materials
- Prefinished wood paneling, count estimated from the wall area
- Panel adhesive cartridges (a high-strength construction adhesive rated for wall panels)
- 1-1/4 in. finishing nails; use 1-1/2 in. if the wall has thick drywall or plaster
- Wood putty in a color that matches the panel finish
- Furring strips (nominal 1x2 or 1x3) for masonry or uneven walls
- Baseboard, casing, and quarter-round for the finishing stage
Acclimation: The Step Most People Skip
Acclimation is the cheapest insurance you can buy, and it is the step most often skipped on job sites. Wood-based paneling contains fibers that absorb and release moisture as the surrounding humidity changes. Install a panel stored in a damp warehouse into a dry room, and the panel shrinks; install it into a humid room, and it expands. Both movements show up as gaps or buckles at the seams.
The fix is simple: stand the panels upright on their long edges around the room for at least 24 hours in an above-grade room, or 48 hours in a below-grade area, spacing them slightly apart so air can circulate between faces, according to the long-standing guidance in Millard Lumber's paneling installation guide. If space is tight and you stack panels flat, place plenty of wooden sticks between each panel to keep airflow going. Do this in the same room where the panels will be installed — a hallway or garage has different humidity and defeats the purpose.
Preparing the Wall Surface
Wall preparation determines roughly 80 percent of the final result. Paneling hides nothing: every bump, hollow, and dust-filled groove in the base wall will transfer to the face. Follow this sequence in order.
- Strip the room. Remove baseboards, ceiling moldings, and window or door casings. Work slowly if you plan to reuse any of these pieces; the trim often costs more than the paneling.
- Cut power to the room and remove outlet and switch cover plates. You will need access to mark and cut openings for the boxes before installing the last panels.
- Find and mark the studs. Framing normally runs vertically on 16-inch or 24-inch centers. When you find one stud, measure over and locate the rest. Draw vertical lines at each stud, then extend the lines onto the ceiling and floor with a chalk line so they remain visible after the panels cover the wall.
- Repair the base wall. Fill holes and cracks with a setting-type filler, reattach loose drywall with drywall screws, and sand high spots. The wall must be flat, not just vertical.
- Clean the surface. Vacuum the dust and wipe the wall with a dry cloth. If the wall has grease or heavy grime, wash it with a mild detergent and let it dry completely. Adhesive does not bond well to dusty or greasy surfaces.
Measuring and Cutting Panels
Estimating the Number of Panels
Measure the total width of all walls in feet and divide by 4 for a standard 48-inch-wide panel. For each full door, deduct half a panel; for each window, deduct a quarter panel. For ceilings higher than 8 feet, divide the extra height by 8 to determine how many top extension pieces you can cut from a single sheet. Buy at least one extra sheet to allow for cutting waste and mistakes — the cost of one panel is far lower than a second trip to the supplier. This estimating method follows the approach in Millard Lumber's installation guide.
Planning the Layout Before Cutting
Decide where the vertical seams will land before you bring the first sheet to the wall. For 48-inch panels installed over studs spaced 16 inches on center, the seams should fall on every third stud. If the first panel must be trimmed, shift the starting point so the following full boards still land on studs. A vertical seam floating between studs is where the panel will flex and, over time, crack along the joint. Map the room wall by wall on paper, write the cut width for each panel, and label the panels with a pencil before cutting.
Cutting Techniques That Keep Edges Clean
The cutting approaches described here — circular saw, handsaw, and saber saw — are the standard methods outlined in The Wood Veneer Hub's installation guide. Each has a specific job.
- Circular saw — the first choice for long straight cuts. Fit it with a fine-tooth finish blade (60 teeth or more), clamp a straightedge as a guide, and support the panel on sawhorses so it does not sag. Cutting with the finished face down reduces chipping on the visible side.
- Jigsaw, or saber saw — the right tool for outlet openings and odd shapes. Mark the opening, drill an 8 mm starter hole in the waste area, and cut slowly along the line with a fine blade on low orbital action.
- Handsaw — usable for a single cut or a tight spot, but expect a slower and rougher edge. If you use one, cut on the waste side of the line and clean the edge with fine sandpaper.
Adhesive, Nails, or Both?
Some installers choose one fastening method to save time. Our recommendation is to use both, because they do different jobs: adhesive provides continuous support across the panel face so the panel cannot flex or drum, while nails lock the panel in position while the adhesive cures.
| Method | Where It Works Best | Main Benefit | Watch Out For |
|---|---|---|---|
| Adhesive only | Flat, solid walls with thin veneer panels | No nail heads to fill on the panel face | Panel follows every wall wave; full adhesive cure takes about 24 hours |
| Nails only | Open stud walls and furring strips | Immediate hold; panels can be pulled and repositioned | Nail heads visible; panel can bow between studs |
| Adhesive plus nails | Most walls — the recommended method | Full-surface support and immediate locking | Slightly more work; nails must land in studs |
Adhesive Application and Nail Spacing
Run the adhesive in a 1/8-inch bead using a zigzag or vertical wave pattern so the beads fall roughly 3 to 4 inches apart, keeping the edge beads about 1 inch away from the panel perimeter to avoid squeeze-out at the seams. Millard Lumber's paneling guide describes the same technique with 1/8-inch beads and stresses full coverage across the panel field. For nails, drive 1-1/4-inch finishing nails at every stud location: about 6 to 8 inches apart along the panel edges and roughly 12 inches apart in the interior field. Set each head just below the surface with a nail set; the small indent disappears under wood putty.
When You Can Get Away with Less Fastening
On a perfectly flat drywall wall with thin, lightweight panels, many installers skip the nails and rely on adhesive alone, holding the panel in place with temporary braces until the bond sets. The trade-off is time: you wait 24 hours for the adhesive to cure before releasing the panel. It works only when the wall is visibly flat and the panel has no tendency to curl. For everything else, adhesive plus nails is the safer play.
Step-by-Step: Putting Panels on the Wall
Working panel to panel, the sequence stays the same. Follow it in order, and the wall comes out flat, plumb, and secure.
- Start in the most visible corner. Check the corner with a level; corners are rarely perfectly square. If the corner is out of plumb, trim the first panel's inner edge to match so the adjacent panel starts from a true vertical line.
- Cut the first panel about 1/8 inch shorter than the floor-to-ceiling height. That small clearance absorbs expansion without causing visible buckling.
- Apply the adhesive. Use the 1/8-inch bead pattern described above. Work in vertical passes so each bead stays continuous.
- Press the panel onto the wall. Start at the bottom edge and tilt the panel up, then push it flat against the full face. Tap the surface with a rubber mallet or a padded block to bring every part of the panel into contact with the adhesive.
- Confirm plumb. Place the 4-ft level along the panel's outer edge. If the panel is leaning, ease it into position before the adhesive grabs.
- Nail the panel. Drive finishing nails at the marked stud lines: top edge, bottom edge, and every stud in between. Keep nails about 6 to 8 inches apart on the edges and 12 inches in the field.
- Match the next panel joint. Align the tongue-and-groove or shiplap profile, then tap it closed with a rubber mallet through a scrap block. If the panel resists, stop and check for adhesive that has squeezed into the joint; clean it before continuing.
- Work across the wall and check levelness at every panel. Small drift left uncorrected compounds into a visibly tilted seam by the fifth or sixth panel.
- Fit the final panel. Measure the remaining gap at the top, middle, and bottom. Mark the width onto the panel, cut the strip, and scribe the outer edge against the adjoining wall so it follows any unevenness.
- Let the adhesive cure. Leave the wall undisturbed for at least 12 to 24 hours before installing trim, shelves, or anything that applies load to the panel face.
Fitting Around Outlets, Windows, Doors, and Wires
Electrical Outlets and Switches
Measure the distance from the floor to the bottom of the outlet box and from the edge of the last installed panel to the side of the box. Transfer both numbers to the back of the new panel, drill a starter hole inside the outline, and cut the opening with a jigsaw. Make the opening about 1/8 inch larger than the box so the cover plate does not bind against the panel edge.
Windows and Doors
Run panels under the window and meet the casing rather than cutting tightly to the window frame. Measure the opening width, cut the panel so it ends at the casing line, and continue the next panel below the window. Doors get the same treatment: start paneling from the door side and work outward so any accumulated cutting error lands in the least visible corner of the room.
Inside and Outside Corners
At inside corners, let the first wall's panel run into the corner, then butt the next wall's panel against it using a piece of panel off-cut to keep the gap even. At outside corners, fix a wooden corner trim or a ripped strip of the panel material to the corner height before installing the final edge panel. This gives the corner a clean line and protects the panel edge from impact damage.
Hiding Wires Behind Panels
Plan cable routes before any panel is fixed. Secure wires to the face of the framing or inside a low-profile conduit so they do not bulge outward, then make sure the panel presses flat against the wall without squeezing the wire. Mark the route on the wall with a pencil so you know where to drill if you add fixtures later.
Finishing Touches That Make the Wall Look Professional
The Finishing Sequence
- Reinstall baseboard, window casing, and door casing. Use quarter-round to cover the 1/8-inch expansion gap at the floor.
- Fill nail holes with color-matched wood putty. Apply the putty with a small putty knife, press it well into the hole, then wipe the excess level with the surface.
- Check the seams for dried adhesive. After the adhesive cures, trim any squeeze-out with a razor knife and clean the joint with a dry cloth.
- If the panels are unfinished, apply the first coat of finish before installation and the final coat after the panels are fixed and cured. Prefinished production panels, like the wood veneer wall paneling we manufacture, skip this step entirely.
Mistakes That Lead to Failed Installations
- Skipping acclimation — panels shrink after installation, opening visible seams.
- Applying adhesive to a dusty or greasy wall — the bond fails within months.
- Nailing into the panel but missing the stud — the nail holds nothing, and the panel pops on its own line.
- Over-driving nails — surface dimples that wood putty cannot hide.
- Cutting panels tight at the top and bottom — when the wood expands, it buckles. The 1/8-inch gap is not a defect; it is a requirement.
- Ignoring the level between panels — small tilts compound into an obvious slope by mid-wall.
If you are comparing wood paneling with a stone, brick, or textured finish, the installation workflow is nearly identical: flexible stone wall panels use the same adhesive-and-nail logic, and our flexible stone wall paneling guide runs through the differences in cutting and seam treatment.
Custom Flexible Stone Wall Panel Suppliers, OEM/ODM CompanyShaoxing Mingyou Decoration Materials Co., Ltd is a China flexible stone wall panel suppliers and company, OEM/ODM custom flexible stone ...View Product →Frequently Asked Questions
Can I install wood paneling directly over drywall?
Yes. Drywall that is flat, clean, and free of moisture is the best base for decorative wood paneling. Use panel adhesive plus finishing nails so the panel gets both full-surface support and a secure lock at every stud. If the drywall has water marks or soft spots, repair or replace those areas first.
Should I use adhesive, nails, or both?
Both. Adhesive stops the panel from flexing and drumming; nails hold it tight while the adhesive cures. This combination is the standard recommendation across the industry, including Millard Lumber's installation guide. Adhesive alone works only on perfectly flat solid walls, and nails alone leaves visible heads and allows panel movement between studs.
How long does the adhesive take to cure before I can hang things on the paneled wall?
Most construction adhesives reach handling strength within 12 hours and full cure in about 24 hours. Wait the full 24 hours before installing shelves, TV brackets, or anything that puts load on the panel face. Nails do not carry vertical load the way a bracket anchor does.
Do panels need a gap at the top and bottom?
Yes. Leave about 1/8 inch at the top and bottom so the panel can expand and contract with humidity without buckling. Baseboard and crown molding cover the clearance, so it will not be visible in the finished room.
What is the best way to cut wood paneling without chipping the finished face?
Use a circular saw with a fine-tooth finish blade and cut with the finished face down so the blade exits on the hidden side. Clamp a straightedge to the panel for a dead-straight line, and apply painter's tape over the cut line for extra chip protection. For outlet openings, use a jigsaw with a fine blade and drill the starter hole from the finished face.
How do I hide the seams between panels?
The seam treatment depends on the panel profile. Tongue-and-groove and shiplap panels are designed to create a shadow-line joint that reads as intentional; butt-joint panels need consistent pressure during installation so one edge does not sit proud. After fixing, run a color-matched wood filler along any uneven seam, wipe the excess, and sand lightly once dry.
A Final Word on Paneling Installation
Putting up wood paneling is not complicated, but it rewards preparation. Acclimate the panels, flatten the wall, mark the studs, apply adhesive in even beads, and always back it up with nails. Those five fundamentals have been the same for decades, and they are still the difference between a wall that looks factory-installed and one that develops gaps within a year.
If you are sourcing panels for a renovation project, take the time to confirm the panel construction and the base board material before you buy. A stable core makes installation easier and keeps the wall flat for years.


 ++86-18906857262 / ++86-13754347028
 No.49, Tunnan Industrial Zone, Daohui Street, Shangyu District, Shaoxing City, Zhejiang Province, China