

 English
 русский
 عربى
عربى

A set of design, research and development, production, sales, installation in one of the professional new decorative materials enterprises.
Content
- 1 Quick Answer: How to Repair a Plaster Wall
- 2 Understanding How a Plaster Wall Is Built
- 3 Full Restoration or a Quick Patch? How to Decide
- 4 Identifying the Type of Plaster Damage You Have
- 5 Tools and Materials You Need Before Starting
- 6 Step-by-Step: Repairing Hairline Cracks
- 7 Step-by-Step: Patching Small to Medium Holes
- 8 Repairing Large Holes and Sagging or Detached Plaster
- 9 Repairing Corners, Ceiling Junctions, and Corner Bead Damage
- 10 Drying Times, Sanding, and Getting a Seamless Finish
- 11 Plaster Repair vs Drywall Repair: Key Differences
- 12 How Much Does Plaster Wall Repair Cost
- 13 Repairing Plaster in Humid Climates and Older Homes
- 14 Preventing Future Plaster Damage
- 15 Finishing a Repaired Wall with 3D Flexible Stone Wall Panels
- 16 Common Mistakes That Ruin a Plaster Repair
- 17 Frequently Asked Questions
- 17.1 Can I repair plaster with drywall joint compound instead of plaster?
- 17.2 How do I know if a crack is cosmetic or a sign of a structural problem?
- 17.3 Why does my plaster patch keep showing through the paint?
- 17.4 Is it better to repair plaster myself or hire a professional?
- 17.5 How long should I wait before painting over a plaster repair?
- 17.6 Do I need to remove wallpaper before repairing plaster underneath?
- 17.7 Can I install a 3D flexible stone wall panel directly over a freshly repaired wall?
Quick Answer: How to Repair a Plaster Wall
To repair a plaster wall, first identify whether the damage is a hairline crack, a small hole, or a large section of sagging or crumbling plaster, since each requires a different fix. Hairline cracks are widened slightly and filled with joint compound or a flexible crack-repair compound. Small holes are patched with plaster or joint compound over mesh tape. Large holes or sagging plaster usually mean the lath behind the surface has failed, and the damaged section needs to be cut out and rebuilt before the wall is sanded smooth and repainted.
Most minor plaster damage can be repaired in a single afternoon, while structural lath repairs typically take two to three days once drying and sanding time between coats is factored in. If you plan to redecorate the wall afterward, many owners now cover a repaired section with a 3D Flexible Stone Wall Panel instead of repainting, since the panel masks minor surface imperfections that remain after patching.
Understanding How a Plaster Wall Is Built
Before repairing anything, it helps to know what is actually behind the painted surface. Traditional plaster walls are not a single material but three thin layers applied over a supporting lath, and a repair that ignores this layered structure rarely holds up long-term.
When plaster fails at the surface only, such as a hairline crack or a small dent, the finish coat is the only layer that needs attention. When a wall sags, bulges, or sounds hollow when tapped, the failure has usually happened between the scratch coat and the lath, which is why surface patches alone do not hold on that type of damage.
Full Restoration or a Quick Patch? How to Decide
A Quick Patch Is Enough When
- The wall feels solid and does not flex when pressed
- Cracks are hairline and stay a consistent width
- Holes are smaller than a fist and edges are firm
- Tapping the surrounding area produces a solid, dull thud
A Full Restoration Is Needed When
- Tapping the wall produces a hollow, echoing sound
- Sections visibly sag, bulge, or have detached from the lath
- Water staining or crumbling plaster is present
- Cracks radiate diagonally from door or window corners
Identifying the Type of Plaster Damage You Have
Plaster walls fail for different reasons, and matching the repair method to the actual cause is what determines whether the fix lasts for years or reopens within a few months. Press gently along the damaged area with your fingertips before buying materials. A solid, immovable surface points to a cosmetic crack or hole. A surface that flexes, bounces, or sounds hollow usually means the lath or the keying between plaster coats has broken loose.
| Damage Type | Likely Cause | Recommended Fix |
|---|---|---|
| Hairline cracks | Settling, seasonal humidity changes, minor vibration | Widen slightly, fill with flexible compound |
| Small holes and dents | Impact damage, removed fixtures | Mesh tape and joint compound patch |
| Sagging or bulging plaster | Failed keying between plaster and lath | Re-secure or remove and rebuild section |
| Water-stained or crumbling plaster | Roof or plumbing leaks, condensation | Fix leak source, cut out and replace damaged plaster |
| Large holes | Furniture impact, wiring or plumbing access | Patch panel plus plaster or joint compound layers |
| Corner or edge cracking | Damaged or missing corner bead | Replace corner bead, re-skim edge |
Tools and Materials You Need Before Starting
Gathering the right supplies before opening the wall saves repeated trips and keeps the compound from drying out mid-repair. The list below covers what is needed for most residential plaster jobs, from a single crack to a section that needs new lath.
Basic Hand Tools
- Utility knife or crack-widening tool
- Putty knife and 6-inch taping knife
- Wire brush or stiff-bristle brush
- Sanding sponge, 120 to 150 grit
- Dust mask and drop cloths
Repair Materials
- Setting-type joint compound or plaster patch mix
- Self-adhesive fiberglass mesh tape
- Bonding agent or plaster conditioner for old walls
- Metal lath or patch panel for larger holes
- Primer, matching paint, or a decorative panel for finishing
Step-by-Step: Repairing Hairline Cracks
Hairline cracks are the most common form of plaster damage and, in most cases, do not point to a structural problem. Filling them without first widening the crack is the single most frequent mistake, since a thin skim of compound over a tight crack tends to pop back open within a season as the wall continues to move slightly with temperature and humidity.
Step-by-Step: Patching Small to Medium Holes
Holes up to roughly the size of a fist, whether from a doorknob impact or a removed fixture, can usually be repaired without cutting out lath. The key is building the patch in thin layers rather than trying to fill the entire depth in one pass, since a thick single application is far more likely to crack as it dries.
- Clean loose material from the edges of the hole and lightly dampen the surrounding plaster so it does not pull moisture out of the patch too quickly.
- For holes larger than about 2 inches, press self-adhesive mesh tape across the opening so it bridges the gap and gives the first layer of compound something to bond to.
- Apply the first layer of setting-type compound, filling to roughly two-thirds of the wall's depth, and let it cure completely.
- Apply a second layer flush with the surrounding wall, feathering the edges 3 to 5 inches beyond the hole in all directions.
- Sand the dried patch smooth, checking with a flashlight held at a low angle to catch any ridges the eye misses in normal light.
- Prime the patch before painting, since unprimed compound absorbs paint differently than the surrounding plaster and can leave a visible flat spot known as flashing.
Repairing Large Holes and Sagging or Detached Plaster
When a section of plaster sags, bulges, or sounds hollow, the problem is almost always at the lath layer rather than the visible surface coat. Patching over a section that is still detached from the lath behind it is a temporary fix at best, since the weight of the new material accelerates the eventual collapse of the loose area.
Tap the wall in a grid pattern around the visible damage before you start cutting. A dull, hollow sound over an area larger than the visible crack or bulge means the detachment extends further than it appears, and the repair boundary should be moved out to solid, securely keyed plaster.
For a full rebuild, remove the damaged plaster down to the lath using a hammer and cold chisel, working carefully to avoid widening the damage into sound plaster. If the wood or metal lath itself is broken, cut it back to the nearest stud and screw in a section of new metal lath before applying a scratch coat, a brown coat, and a finish coat, allowing each to cure according to the product's stated timeline, typically 24 hours for setting-type compounds and several days for traditional lime-based plaster. Many repair crews now substitute a rigid patch panel or a layer of plaster board for the scratch and brown coats on residential jobs, which shortens the project by a day or more while still providing a solid base for the finish coat.
Repairing Corners, Ceiling Junctions, and Corner Bead Damage
Corners and the junction between a wall and ceiling take more impact and movement stress than flat wall areas, and they usually crack along the metal or vinyl corner bead embedded in the plaster rather than through the plaster itself.
Cracking along a corner
Cut back the loose plaster to expose the corner bead, check whether it is bent or rusted, and replace it if damaged before re-skimming both sides of the corner with two thin coats.
Wall-to-ceiling separation
A gap that opens and closes seasonally usually needs a flexible caulk rather than rigid compound, since rigid fillers crack again as the framing shifts with humidity.
Rounded or bullnose corners
Match the existing radius with a flexible corner bead before skimming, and feather the compound further than on a square corner to hide the curve transition.
Drying Times, Sanding, and Getting a Seamless Finish
Rushing the drying stage is the second most common reason plaster repairs fail. Setting-type compounds change from a wet to a hard state chemically and are generally ready to sand within the time printed on the bag, often 20 to 90 minutes depending on the formula, while traditional plaster and lightweight all-purpose compounds dry by evaporation and can take a full day or longer per coat depending on humidity and layer thickness.
| Material | Typical Dry Time | Best Used For |
|---|---|---|
| Setting-type joint compound | 20 to 90 minutes per coat | Cracks, small to medium holes |
| Lightweight all-purpose compound | 24 hours per coat | Final skim and feathering coats |
| Traditional lime or gypsum plaster | 2 to 5 days per coat | Full-depth rebuilds over new lath |
Sand between coats with progressively finer paper, and wipe the wall with a slightly damp cloth before priming to remove dust that would otherwise show through as a rough texture under paint or a light finish.
Plaster Repair vs Drywall Repair: Key Differences
Older homes are often a mix of original plaster walls and drywall added during later renovations, and knowing which material you are working with changes both the technique and the cost.
| Factor | Plaster | Drywall |
|---|---|---|
| Wall thickness | Usually thicker, harder surface | Thinner, softer surface |
| Structure behind surface | Wood or metal lath | None, panel is self-supporting |
| Typical repair cost | $20 to $120 per square foot | Generally lower per square foot |
| Common failure mode | Keying failure at the lath | Punctures and seam tape failure |
How Much Does Plaster Wall Repair Cost
Cost depends heavily on whether the job is a surface patch or a full rebuild down to the lath. According to 2026 home-improvement cost data from Angi, professional plaster repair averages around $48 per square foot, with hairline cracks and nail holes falling closer to $20 to $30 per square foot and larger crack or hole repairs running $90 per square foot or more. Separate 2026 estimates from HomeAdvisor put a typical single-hole repair between $500 and $1,000, while stress-crack repairs alone average $100 to $150. DIY material costs are far lower, with a bucket of plaster and the tools needed for a basic patch typically totaling around $70 or more, according to the same HomeAdvisor data.
| Repair Scope | Professional Cost |
|---|---|
| Hairline crack or nail hole | $20 to $30 per square foot |
| Stress crack, single repair | $100 to $150 |
| Medium hole | $500 to $1,000 |
| Large crack or hole | $90 to $120 per square foot |
| Full room re-plastering | $1,500 to $9,000 |
Beyond the size of the damage, a few other factors move the price: ceiling repairs run higher than wall repairs because of scaffolding and overhead work, matching a decorative or textured finish adds labor time, and mold remediation behind water-damaged plaster adds its own separate cost on top of the patch itself.

Repairing Plaster in Humid Climates and Older Homes
Climate and building age both change how a plaster repair should be approached. Coastal and humid regions put more moisture-driven stress on plaster, while homes built before the mid-20th century often used lime-based plaster rather than the gypsum compounds sold today.
Humid or coastal climates
Allow extra drying time between coats, run a dehumidifier in the room during the repair, and avoid painting the same day a coat feels dry to the touch, since trapped moisture underneath causes bubbling later.
Older or historic homes
Test a small area with a bonding agent first, since new gypsum-based compound can bond unevenly to old, lime-based plaster, and consider a lime-compatible patching product for wide cracks in a historic wall.
Preventing Future Plaster Damage
Most repeat plaster damage traces back to moisture or ongoing structural movement rather than a poor initial repair. Addressing the root cause protects the new patch and the surrounding wall.
- Control indoor humidity swings with a dehumidifier or consistent HVAC use, since plaster expands and contracts with moisture changes.
- Fix roof, gutter, and plumbing leaks before repairing any water-stained plaster, since untreated moisture will cause the new patch to fail again.
- Use felt pads or door stops to prevent recurring impact damage near door handles and furniture corners.
- Inspect older plaster walls once a year for early hairline cracking, since catching movement early keeps repairs small and inexpensive.
Finishing a Repaired Wall with 3D Flexible Stone Wall Panels
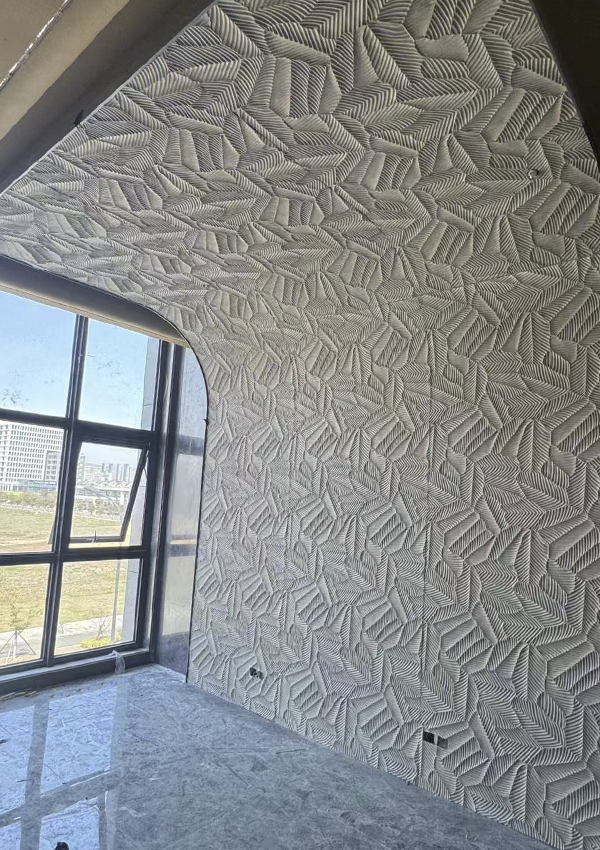
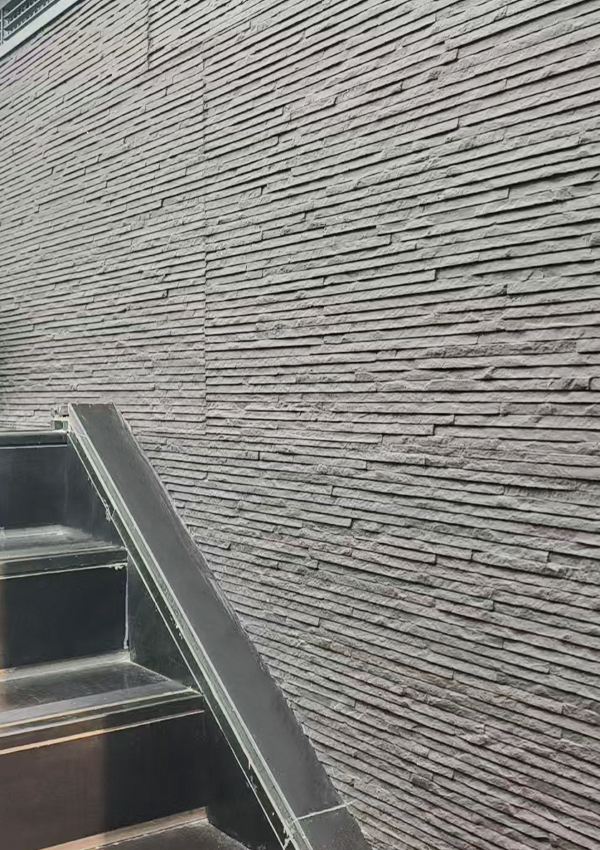
Even a carefully feathered plaster patch can leave a faint variation in texture or sheen once painted, especially on older walls where the surrounding plaster has aged unevenly. Rather than repainting the entire wall to hide a patch, many homeowners and contractors now install a 3D Flexible Stone Wall Panel over the repaired section, since the raised, textured surface disguises small imperfections that flat paint would reveal under side lighting.
Why a flexible stone panel works well over repaired plaster
- The lightweight, bendable backing conforms to minor surface irregularities left after patching, unlike rigid natural stone tile.
- Panels install with adhesive directly over cured, primed plaster, so there is no need to achieve a perfectly flat skim coat before finishing.
- The 3D textured surface adds an extra layer of impact resistance to a wall area that has already been damaged once.
- A single accent panel section can visually frame a repaired area, turning a patch into a deliberate design feature rather than a visible repair.
Before installing any flexible stone wall panel, the plaster patch still needs to be fully cured, primed, and free of loose dust, since adhesive bonds poorly to chalky or damp compound. Once the wall is sound and dry, a flexible panel section can typically be trimmed and set in place within an hour, considerably faster than matching and blending a full repaint.
Common Mistakes That Ruin a Plaster Repair
| Mistake | Result | Better Approach |
|---|---|---|
| Filling a crack without widening it | Crack reopens within months | Widen into a shallow V before filling |
| Applying one thick layer of compound | Shrinkage cracking as it dries | Build up two or three thin layers |
| Skipping mesh tape on wider cracks | Patch cracks along the same line | Use tape on anything over 12 inches |
| Painting before the patch fully cures | Visible flat spot or texture mismatch | Prime only once the patch is fully dry |
| Patching over detached, hollow plaster | Patch collapses as it adds weight to loose plaster | Remove to solid lath before rebuilding |
Frequently Asked Questions
Can I repair plaster with drywall joint compound instead of plaster?
Yes, setting-type joint compound is widely used for plaster repairs on hairline cracks and small to medium holes, since it bonds well, sands smoothly, and shares a similar finished texture once painted. Traditional lime or gypsum plaster is generally reserved for larger structural rebuilds or historic restoration work where matching the original material matters.
How do I know if a crack is cosmetic or a sign of a structural problem?
Thin, hairline cracks under about 1/8 inch wide that stay a consistent width along their length are usually cosmetic. Cracks wider than 1/4 inch, cracks that run diagonally from window or door corners, or cracks paired with a sloping floor or a door that no longer closes properly are worth having assessed by a structural professional before repairing the surface.
Why does my plaster patch keep showing through the paint?
This is usually caused by skipping primer, since compound and plaster absorb paint at a different rate than the surrounding wall, creating a visible flat spot known as flashing. Priming the patch with a stain-blocking primer before the topcoat resolves most flashing issues, and a light skim coat over a wider area can help blend the texture if the surrounding paint has a slight sheen.
Is it better to repair plaster myself or hire a professional?
Hairline cracks and small holes are well within reach of most DIYers with basic tools, and materials for a small patch generally cost well under $100. Larger holes, sagging sections, water-damaged plaster, or repairs on ceilings are better handled by a professional, since these jobs often involve rebuilding the lath and require experience to blend the texture and finish invisibly.
How long should I wait before painting over a plaster repair?
Setting-type compounds are usually paintable within a day once fully hardened and sanded, while traditional plaster or lightweight compounds should be given several days to a week to dry through completely, especially in humid conditions, since trapping moisture under paint leads to bubbling and discoloration later.
Do I need to remove wallpaper before repairing plaster underneath?
Yes, wallpaper should be removed and the surface cleaned of adhesive residue before patching, since compound will not bond reliably to paper or old paste, and any repair applied over wallpaper is likely to bubble or separate soon after.
Can I install a 3D flexible stone wall panel directly over a freshly repaired wall?
The patch needs to be fully cured, sanded, and primed first, since adhesive does not bond reliably to damp or chalky compound. Once the surface is dry and stable, a flexible stone panel can be trimmed to size and set with panel adhesive directly over the repaired area, offering a fast way to finish and reinforce the wall without matching paint texture.


 ++86-18906857262 / ++86-13754347028
 No.49, Tunnan Industrial Zone, Daohui Street, Shangyu District, Shaoxing City, Zhejiang Province, China