Industry News

Home / News / Industry News / How to Remove Marks from Walls Without Damaging Paint?

A set of design, research and development, production, sales, installation in one of the professional new decorative materials enterprises.

How to Remove Marks from Walls Without Damaging Paint?

2026-06-01

Content

Home Improvement Guide

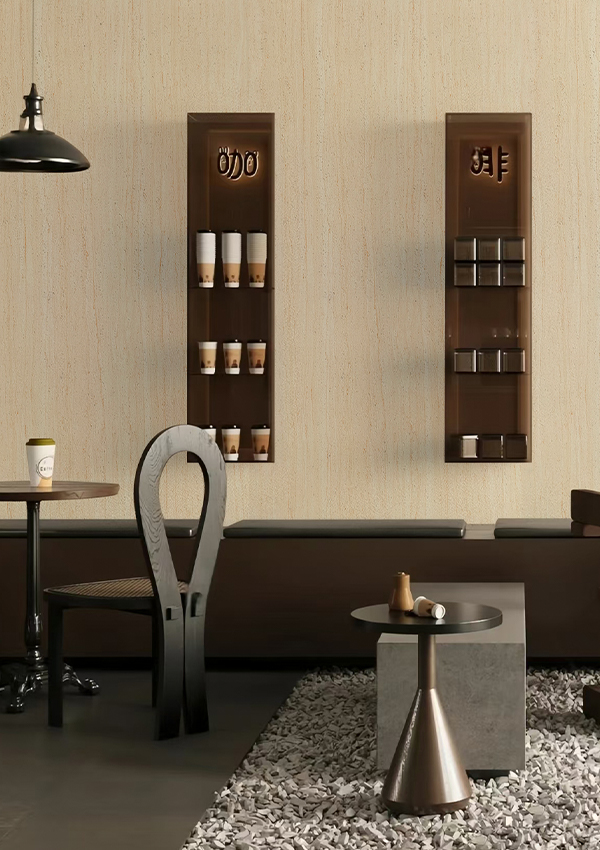
The fastest, safest answer: a mixture of warm water and a few drops of dish soap on a microfiber cloth removes the majority of everyday wall marks without stripping paint. For tougher scuffs, a paste of baking soda and water applied gently does the job. If your walls are marked frequently — especially in high-traffic corridors, hallways, or children's rooms — upgrading to Decorative Wall Panels can eliminate the problem at the source, since most panel surfaces resist stains and wipe clean effortlessly.

Why Wall Marks Happen — and Why the Paint Matters

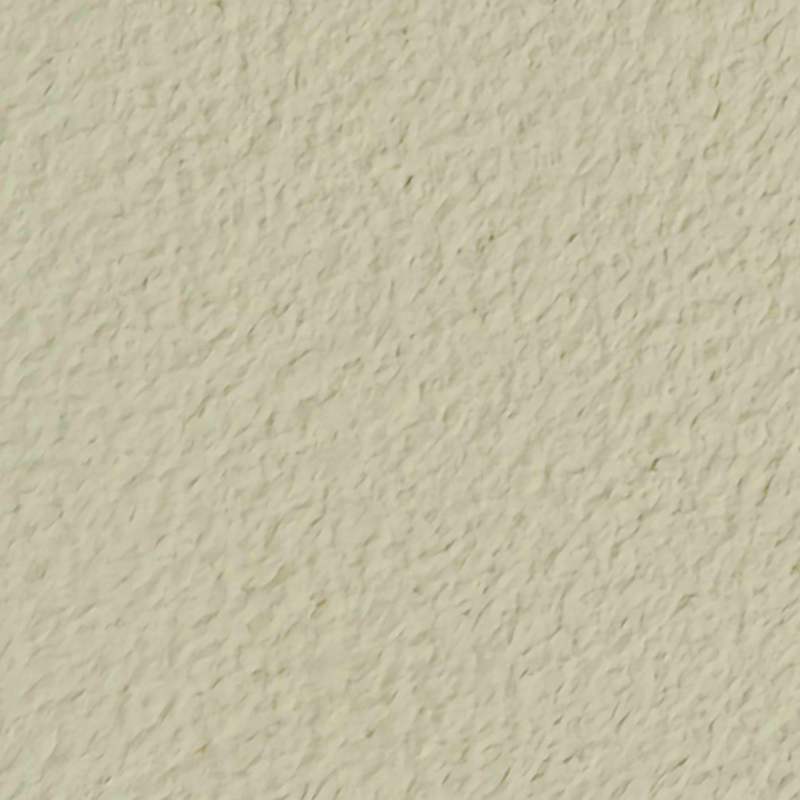
Before reaching for any cleaning product, understanding the surface you are dealing with changes everything. Paint finishes behave very differently under mechanical or chemical stress. Applying the wrong technique to the wrong finish can turn a small scuff into a patchy, dull eyesore that requires repainting the entire wall.

Paint finishes broadly fall into five categories:

  • Flat / Matte — absorbs light, hides imperfections, but is the most delicate to clean
  • Eggshell — slight sheen, more washable than flat, common in living rooms
  • Satin — gentle luster, durable, widely used in kitchens and bathrooms
  • Semi-gloss — highly reflective, very washable, used on trim and doors
  • Gloss — extremely durable, easy to clean, but shows every surface flaw

Flat paint is so porous that scrubbing can permanently dull the surface even without removing any paint. Semi-gloss and gloss paints, by contrast, tolerate moderate scrubbing well. Always start with the gentlest method and escalate only if needed.

Common marks include: pencil and crayon from children, scuff marks from shoes and furniture, grease from hands near light switches, ink and marker stains, water stains from condensation, and sticky residue from tape or stickers. Each type responds to different treatments.

5 Paint Finish Types
80% of marks removed with soap + water alone
3 min average cleaning time per mark

Tools and Supplies You Need Before You Start

Gathering the right materials before you begin prevents mid-clean mistakes. You do not need expensive specialty products — most of what you need is already at home.

Microfiber Cloths

Microfiber is the gold standard for wall cleaning. Its ultra-fine fibers lift dirt and grease without abrading the paint surface. Avoid paper towels and sponge abrasive pads — both are too rough for painted walls.

Mild Dish Soap

A solution of 1 teaspoon of dish soap per 1 liter of warm water is the universal starting point. It cuts through grease and general grime without being harsh enough to strip paint binders.

Baking Soda

Mixed with just enough water to form a thick paste, baking soda acts as a mild abrasive that tackles scuff marks and crayon without the chemical harshness of commercial cleaners.

White Eraser / Magic Eraser

Melamine foam erasers (sold as "Magic Erasers") work by acting as micro-abrasives. They are highly effective but must be used with very light pressure on flat paints — too much pressure removes the paint itself.

White Vinegar Solution

Diluted white vinegar (equal parts vinegar and water) cuts through greasy fingerprints and light mildew. Do not use undiluted vinegar — its acidity can dull certain paint finishes over time.

Rubbing Alcohol (Isopropyl)

70% isopropyl alcohol on a cotton ball removes ink, marker, and permanent pen marks from semi-gloss and satin finishes. Test in a hidden spot first on any other finish type.

Step-by-Step Method: How to Remove Marks Without Damaging Paint

Follow this sequence regardless of the type of mark. The logic is always the same: start gentle, escalate gradually, dry thoroughly after each step.

01

Test an Inconspicuous Area First

Before applying anything to the visible mark, apply your chosen solution to a hidden area — behind a door, inside a closet, near the baseboard. Wait 60 seconds, then wipe. If the paint discolors, dulls, or comes away on the cloth, stop and use a gentler product.

02

Blot, Don't Rub

The single most common mistake people make is rubbing aggressively. Rubbing spreads the stain outward and drives it deeper into porous paint. Instead, press the damp cloth against the mark and hold it for 10 to 15 seconds, then gently dab in a small circular motion. Work from the outside of the mark inward to prevent spreading.

03

Use the Gentlest Solution That Works

Start with plain warm water. If that fails after two attempts, move to the soap-water solution. If that fails, try baking soda paste. If that fails, try the appropriate specialized cleaner for the stain type (see the table below). Never jump straight to strong chemicals.

04

Rinse the Area with a Clean Damp Cloth

After removing the mark, wipe the area again with a clean cloth dampened with plain water. This removes soap residue, which can attract dirt and cause the area to look darker than the surrounding wall within a few weeks if left behind.

05

Dry Immediately and Thoroughly

Moisture left on a painted wall can cause bubbling, peeling, or mildew, particularly on older paintwork. Use a dry microfiber cloth to absorb all moisture immediately after rinsing. In humid conditions, a fan aimed at the wall for 15 minutes ensures complete drying.

06

Check in Natural Light

Artificial lighting can mask subtle sheen differences left by cleaning. After the wall dries completely, check the area in natural daylight from an angle. A patch that looks different in sheen — even if the stain is gone — will be noticeable. If this happens, a light coat of matching paint applied with a small brush usually blends it back seamlessly.

Stain-Specific Removal Methods: Quick Reference

Different marks require different approaches. Using the wrong cleaner wastes time and risks damaging the paint. The table below matches common stain types to the best removal method and any important warnings.

Match your stain type to the correct method to avoid accidental paint damage
Stain Type Best Removal Method Works On Warning
Pencil marks White art eraser, then damp cloth All finishes Very light pressure only
Crayon Baking soda paste or WD-40 (small amount) Satin, semi-gloss, gloss Avoid on flat paint
Grease / fingerprints Dish soap solution, then rinse All finishes Rinse fully to avoid residue
Ink / ballpoint pen 70% isopropyl alcohol on cotton ball Satin, semi-gloss, gloss Test first; avoid flat paint
Scuff marks (shoes/furniture) Magic Eraser with very light pressure Eggshell and above Can dull flat paint permanently
Marker (permanent) Hand sanitizer or rubbing alcohol Semi-gloss, gloss May require touch-up paint after
Water stains Vinegar-water solution, air dry All finishes Fix moisture source first
Sticky tape residue Warm soapy water, then cooking oil Satin, semi-gloss, gloss Wipe oil off fully afterward

How Different Paint Finishes React to Cleaning

This is the knowledge most guides skip — and it is the most important factor in avoiding damage. Here is a detailed breakdown of how each finish responds to cleaning so you can calibrate your technique correctly.

Most Delicate

Flat / Matte Paint

Flat paint has no protective sheen coating. Its surface is essentially millions of microscopic open pores. Any friction, even from a soft cloth, can create a shiny rubbed patch by compressing those pores. This is called "burnishing." Never use anything stronger than plain water and a barely-damp cloth on flat paint. For most stains on flat paint, touching up with a small brush and matching paint is genuinely faster and less risky than cleaning.

Moderate

Eggshell Paint

Eggshell has a slight gloss that provides limited protection. The soap-water solution works well here. Use light pressure and always blot rather than scrub. Avoid Magic Erasers on eggshell — their micro-abrasive nature removes the sheen unevenly, creating visible patches.

Good Durability

Satin Paint

Satin is the most forgiving finish for everyday cleaning. It tolerates the soap-water solution, baking soda paste applied gently, and light use of a Magic Eraser. Most household marks come off satin walls without any risk of damage as long as pressure remains gentle.

Most Durable

Semi-Gloss and Gloss Paint

These finishes are designed for high-traffic areas and wet environments. They can handle all cleaning methods listed above, including isopropyl alcohol for ink stains. The hard binder in these paints resists both chemicals and abrasion. They are, however, very reflective — any variation in sheen from uneven cleaning is immediately visible, so rinsing and drying uniformly is still important.

When Cleaning Is Not Enough: The Case for Decorative Wall Panels

If you find yourself cleaning the same sections of wall repeatedly — hallways, playrooms, kitchens, stairwells — the problem is not cleaning technique. The problem is using the wrong wall surface for that environment. This is exactly where Decorative Wall Panels provide a lasting solution rather than a temporary fix.

Unlike painted drywall, most modern wall panel surfaces are non-porous or have protective coatings that make marks either not stick in the first place or wipe off with a single damp cloth. There is no risk of burnishing, no risk of paint stripping, and no ongoing cycle of cautious cleaning.

Types of Decorative Wall Panels and Their Cleanability

Not all panels are equal when it comes to mark resistance. The material matters significantly.

  • PVC Wall Panels: Fully waterproof and non-porous. Grease, marker, crayon, and scuff marks wipe off with a damp cloth. Extremely popular in kitchens and bathrooms. Cost ranges from $2 to $8 per square foot installed.
  • Acrylic / High-Gloss Panels: Mirror-like surface resists staining and is easy to clean. Scratches can show on very high-gloss versions if abrasive cleaners are used, but marks from everyday use simply do not penetrate the surface.
  • MDF Decorative Panels with Laminate Facing: The laminate layer protects the MDF core from moisture and staining. Not suitable for genuinely wet areas but excellent for living rooms, hallways, and dining rooms. Marks clean off the laminate surface easily.
  • Fabric-Covered Decorative Wall Panels: Used for acoustic treatment or feature walls. These are the exception — they stain more readily and require spot-cleaning with upholstery cleaners. Not recommended for high-traffic areas.
  • Stone-Effect and Tile-Effect Panels: These textured decorative wall panel options mimic natural materials while offering the cleanability of PVC or acrylic. Popular for feature walls, bathrooms, and entryways.

A practical example: a family with young children who repainted their hallway every 18 months due to crayon and scuff damage switched to PVC decorative wall panels. After three years, the panels still look new, and the family reports that marks wipe off in under 30 seconds with a damp cloth. The initial panel cost paid for itself within the first paint cycle avoided.

Commercial Cleaning Products: What Works and What to Avoid

The market is full of wall-cleaning products that promise a lot. Some genuinely work. Others are too aggressive for painted surfaces. Here is an honest evaluation.

Products That Are Generally Safe

  • Mr. Clean Magic Eraser — effective on satin and above; use minimal pressure
  • Krud Kutter (diluted 4:1 with water) — cuts through grease and grime on washable paints
  • Simple Green (diluted per instructions) — biodegradable, gentle enough for most surfaces
  • Method All-Purpose Cleaner — plant-based, safe on eggshell and above
  • Lestoil Concentrated Heavy Duty Cleaner — specifically good for stubborn grease marks on semi-gloss

Products to Avoid on Painted Walls

  • Bleach-based cleaners — strip paint binders and discolor pigments, especially on colors
  • Ammonia-based window cleaners — soften latex paint films over time
  • Abrasive powders (Ajax, Comet) — microscopically scratch and dull all paint types
  • Undiluted vinegar — mild acidity damages some paint formulations with repeated use
  • Acetone / nail polish remover — dissolves paint, not just the stain; avoid entirely

Tackling Specific Problem Stains in More Detail

Some marks require more nuance than a simple product recommendation. Here are detailed protocols for the trickiest common stains.

A

Crayon on Walls — The Complete Protocol

Crayon contains wax and pigment. The wax is the harder problem — it binds the pigment to the surface. Heat actually helps: holding a hair dryer 6 inches from the mark for 20 seconds on low heat softens the wax so it can be blotted away more easily with a microfiber cloth. After blotting, apply a small amount of WD-40 or mayonnaise (both are oils that dissolve wax), leave for 2 minutes, then wipe away. Follow with the soap-water solution to remove the oil residue. On flat paint, skip the oil step entirely and use just the hair dryer and gentle blotting — then repaint if needed.

B

Permanent Marker — Managing Expectations

Permanent marker on painted walls is one of the hardest marks to remove completely without damaging the paint. The best approach on semi-gloss or gloss finishes is 70% isopropyl alcohol applied with a cotton ball in a gentle dabbing motion. This works because the alcohol re-dissolves the marker's solvent-based ink carrier. Multiple applications are typically needed, and the mark may fade rather than fully disappear. On flat or eggshell finishes, the realistic outcome is a touch-up paint job — attempting to remove permanent marker from these finishes without damaging the paint is not reliably achievable with household products. This is another reason why wall panel systems designed to resist marker staining are worth considering in rooms used by children.

C

Scuff Marks from Furniture or Shoes

Scuff marks are often not actually a stain — they are a transfer of the rubber or material that struck the wall. Because of this, the cleaning approach should be mechanical before chemical. A soft pencil eraser rubbed very lightly often removes a fresh scuff entirely, lifting the transferred rubber without touching the paint. For older or more embedded scuffs, a small amount of non-gel white toothpaste applied with a cloth in a circular motion works as a very mild abrasive cleaner. Toothpaste is gentler than baking soda paste and less likely to affect the paint sheen on satin finishes. Rinse with a clean damp cloth and dry immediately.

D

Grease and Oil Stains Near Kitchens

Kitchen walls accumulate cooking splatter that bonds grease, protein, and water-soluble compounds together. The dish soap method remains the best first approach — dish soap is specifically formulated to break down cooking grease. For heavy accumulation, a paste of cornstarch and water applied and left for 5 minutes can absorb excess grease before the soap-water clean. On semi-gloss kitchen walls (the most common finish in this area), a diluted solution of TSP (trisodium phosphate) substitute is safe for periodic deep cleaning. Do not use TSP or its substitutes on eggshell or flat paint.

Prevention Strategies That Reduce Cleaning Frequency

The best way to remove marks from walls without damaging paint is to reduce how often marks appear. These practical strategies genuinely make a difference.

Choose the Right Paint Finish for Each Room

This is the single highest-impact decision. Flat paint in a hallway used by children is asking for repeated cleaning battles. Use satin or semi-gloss in any high-traffic area. Reserve flat paint for ceilings and formal rooms with minimal physical contact with the walls. Upgrading a hallway from flat to satin paint reduces cleaning frequency by an estimated 60 to 70% for the same traffic level.

Apply a Wall Protective Coating

Clear water-based wall coatings like Polycrylic (by Minwax) or dedicated wall sealers can be applied over existing paint to add a washable layer without changing the wall's appearance. This is particularly useful if you love the color of your existing flat paint but want better cleanability. One coat takes about 2 hours to dry and makes the surface far more resistant to marks.

Install Decorative Wall Panels in Problem Areas

Covering the lower half of hallway walls with wainscoting-style decorative wall panel systems — historically popular as beadboard — is both aesthetically pleasing and highly practical. The panel surface takes the daily wear; the painted upper wall remains clean. Modern decorative wall panel designs range from traditional raised-panel profiles to clean, contemporary grooved styles that suit almost any interior aesthetic.

Use Chair Rails to Protect High-Impact Zones

Chair rails, installed approximately 30 to 36 inches from the floor, protect the wall area most commonly struck by chair backs, bags, and children's hands. Combine them with a more durable paint or wall panel material below the rail, and your most vulnerable wall area becomes far more resilient.

Address Marks Immediately

Fresh marks are almost always easier to remove than dried, set marks. A grease splash cleaned within an hour needs only the soap-water solution. Left for a week, the same grease bonds to the paint surface and requires more aggressive treatment. Building a habit of cleaning marks within 24 hours cuts the effort required by an average of 50% per incident.

Keep Touch-Up Paint for Quick Repairs

For flat-painted rooms and any areas where deep cleaning would risk more damage than the mark itself, keeping a small supply of matching touch-up paint is practical. Store it in an airtight container with a dated label. Most latex paints remain usable for 2 to 5 years if stored correctly at room temperature. A touch-up applied with a small brush and feathered at the edges is invisible once dry.

Frequently Asked Questions About Wall Mark Removal

Can I use a Magic Eraser on all wall types?

No. Magic Erasers are melamine foam micro-abrasives. On flat and matte paint, they will create visible shiny patches that cannot be undone without repainting. Use them only on satin, semi-gloss, and gloss finishes, and always with minimal pressure. Test in a hidden area first, every time.

Will cleaning leave a shiny patch on my flat wall?

Possibly, yes. Any friction on flat paint can burnish the surface. This is a fundamental limitation of the finish. If the mark is small, touching up with a dry brush and matching paint usually blends better than cleaning. If the shiny patch from cleaning already exists, the only fix is a fresh coat of flat paint over that section — ideally the full wall to avoid patchy appearance.

Is it better to clean walls or use decorative wall panels in a child's room?

For rooms used actively by children under 10, decorative wall panels on at least the lower 48 inches of wall are a significantly better long-term solution than any painted surface. The cleaning burden is substantially lower, the durability is incomparably higher, and the cost typically pays for itself within 2 to 3 years compared to periodic repainting. Many modern decorative wall panel options are available in playful colors and textures that work well in children's spaces aesthetically.

How do I remove marks from wallpaper without damaging it?

Wallpaper requires even more caution than paint. Most vinyl-coated wallpapers can handle light cleaning with a barely-damp cloth and very mild soap. Non-coated paper wallpapers should only be dry-cleaned — use a dry white eraser for pencil and a dry rubber for light scuffs. Never use water on uncoated wallpaper. For significant stains on uncoated wallpaper, replacement of the affected panel is often the only viable option.

What should I do if cleaning removes some paint?

Stop cleaning immediately. Let the area dry completely — at least 2 hours. Then assess the size of the exposed area. For areas smaller than a coin, touch-up paint applied with a small brush feathered outward at the edges usually blends well. For larger areas, prime the exposed section first before repainting, or the new paint will look obviously different in sheen and texture. If you have the original paint, use it — even paint stored for 2 years matches better than a color-matched repurchase.

Final Takeaways

Removing marks from walls without damaging paint comes down to three principles: know your paint finish, use the gentlest effective method, and work from the outside of the mark inward with a blotting motion rather than aggressive scrubbing. For 80% of everyday marks on satin or higher-sheen paints, warm soapy water and a microfiber cloth are all you need.

For persistent or recurring mark problems — particularly in high-traffic corridors, children's rooms, or kitchens — the longer-term answer is a surface that does not require careful cleaning protocols. Modern Decorative Wall Panels, whether PVC, acrylic, or laminate-faced, eliminate the cycle of cautious cleaning and repainting entirely. Their durability, ease of maintenance, and increasingly sophisticated aesthetic options make them a practical upgrade for any area of the home where wall marks are a recurring frustration.

The goal is not just to clean walls — it is to have walls that stay clean without becoming a source of ongoing effort and cost. Choosing the right combination of paint finish, surface material, and cleaning technique makes that achievable in every room.