
 English
 русский
 عربى
عربى
A set of design, research and development, production, sales, installation in one of the professional new decorative materials enterprises.
Content
- 1 How to Make Wood Panels for Walls: The Direct Answer
- 2 Types of Wood Wall Panels You Can Make or Buy
- 3 Tools and Materials You'll Need
- 4 Step-by-Step: How to Make and Install Wood Shiplap Panels
- 5 How to Install Wood Veneer Wall Paneling: A Complete Guide
- 6 Building DIY Raised Panel Wainscoting from Scratch
- 7 Selecting the Right Wood Species for Wall Paneling
- 8 Common Mistakes and How to Avoid Them
- 9 Design Considerations: Making Wood Wall Paneling Look Intentional
- 10 Maintaining Wood Wall Paneling Over Time
How to Make Wood Panels for Walls: The Direct Answer
Making wood panels for walls involves cutting boards or sheet goods to consistent dimensions, finishing the surfaces with stain or paint, and securing them to wall studs or a backer panel using construction adhesive, nails, or a combination of both. Most DIY wall paneling projects can be completed in a single weekend using basic tools — a miter saw, level, nail gun, and tape measure. Whether you're building traditional raised panels, a modern shiplap feature wall, or installing wood veneer wall paneling for a high-end finish, the fundamental process remains the same: prepare the wall, plan the layout, cut materials to size, and fasten them securely.
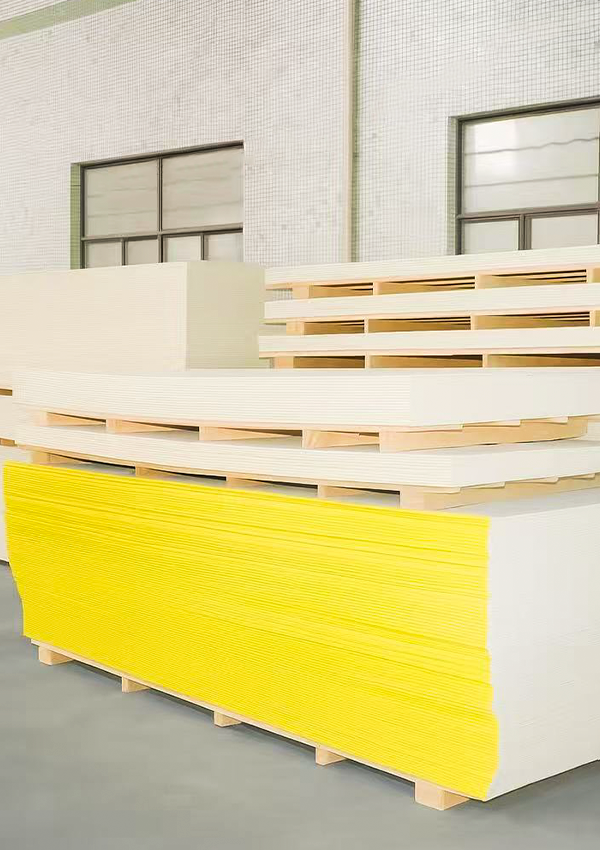
The choice between solid wood boards, MDF panels, and wood veneer wall paneling has a major impact on both cost and appearance. Solid hardwood delivers unmatched warmth and longevity but costs anywhere from $8 to $25 per square foot installed. MDF with a routed or painted finish runs closer to $3 to $7 per square foot. Wood veneer wall paneling — real wood sliced thin and applied to a stable substrate — sits comfortably in the middle, offering authentic grain patterns at a fraction of solid wood's price.
Types of Wood Wall Panels You Can Make or Buy
Before picking up a saw, it helps to understand the main categories of wood paneling available to homeowners and contractors. Each style has a distinct look and a different installation method.
Shiplap and Tongue-and-Groove Boards
Shiplap refers to boards with a rabbet (notch) cut along each edge so the boards overlap slightly when installed. Tongue-and-groove boards interlock with a protruding tongue on one edge fitting into a groove on the adjacent board. Both styles are sold pre-milled at most lumber yards in pine, cedar, and Douglas fir. A typical 1×6 pine shiplap board costs around $1.50 to $2.50 per linear foot. You can also cut your own shiplap using a table saw with a dado blade, which reduces material cost by 30 to 40 percent if you buy rough lumber and mill it yourself.
Raised Panel Wainscoting
Traditional raised panel wainscoting consists of a framework of stiles (vertical pieces) and rails (horizontal pieces) surrounding a raised or recessed center panel. It's the most labor-intensive of all wall paneling styles because each component must be precisely fitted. In a classic dining room, the wainscoting height typically lands between 32 and 36 inches — one-third of the wall height. MDF is the most common material for painted raised panels because it holds a crisp profile and doesn't expand and contract with humidity the way solid wood does. Router bits specifically designed for raised panel work cost between $40 and $120 per set.
Wood Veneer Wall Paneling
Wood veneer wall paneling uses a thin slice of real hardwood — typically 0.5 to 3 millimeters thick — bonded to a plywood, MDF, or particleboard substrate. The veneer provides all of the visual character of species like walnut, white oak, cherry, or teak while the substrate delivers dimensional stability. Pre-finished wood veneer wall paneling sheets commonly come in 4×8-foot panels, which makes installation faster than working with individual boards. Architects and interior designers frequently specify wood veneer wall paneling for commercial lobbies, hotel rooms, and executive offices because it allows matched grain patterns across an entire wall — something impossible with solid lumber.
You can also fabricate your own wood veneer wall paneling by purchasing raw veneer sheets (sold by the square foot or in rolls) and pressing them onto plywood using contact cement or a vacuum bag press. This approach unlocks exotic species that aren't sold as solid lumber — figured maple, zebrawood, or quilted sapele — for genuinely unique results.
Board and Batten
Board and batten uses wide vertical boards spaced evenly apart with narrower strips (battens) covering the seams. It's one of the simplest paneling styles to execute and works equally well in farmhouse, cottage, and contemporary interiors. The standard spacing between battens ranges from 12 to 18 inches on center. Using 1×8 boards and 1×2 battens in poplar — a paint-grade hardwood — costs roughly $2.50 to $4 per square foot in materials.
Slat Wood Panels
A growing trend in contemporary interiors, slat wood panels feature thin vertical or horizontal strips of wood mounted with consistent gaps between them. The three-dimensional shadow lines created by the gaps add visual depth that flat surfaces cannot achieve. Many slat panel products are sold as pre-assembled boards — you simply cut them to length and mount them to the wall. DIY versions involve ripping narrow strips on a table saw and attaching them to a plywood backer at regular intervals using a spacer jig.
| Panel Type | Material Cost (per sq ft) | DIY Difficulty | Best Finish |
|---|---|---|---|
| Shiplap (Pine) | $1.50 – $2.50 | Easy | Paint or whitewash |
| Tongue-and-Groove (Cedar) | $2.00 – $4.00 | Easy | Clear oil or stain |
| Raised Panel Wainscoting (MDF) | $3.00 – $7.00 | Advanced | Semi-gloss paint |
| Wood Veneer Wall Paneling | $4.00 – $14.00 | Moderate | Pre-finished or lacquer |
| Board and Batten (Poplar) | $2.50 – $4.00 | Easy–Moderate | Paint |
| Slat Wood Panels (Walnut) | $8.00 – $20.00 | Moderate | Natural oil or matte lacquer |
Tools and Materials You'll Need
Gathering everything before you start saves significant time. Missing a tool mid-project often results in mistakes from trying to improvise. The exact list varies by panel style, but the following covers virtually every wood wall paneling project.
Cutting Tools
- Miter saw (10-inch or 12-inch) — essential for accurate crosscuts and angle cuts at corners
- Table saw — needed for ripping boards to width and cutting slat strips
- Jigsaw — for cutting around outlets, switches, and irregular shapes
- Circular saw with a straightedge guide — alternative to a table saw for sheet goods like wood veneer wall paneling
- Pull saw or hand saw — useful for final trim cuts in tight spaces
Fastening and Layout Tools
- Finish nail gun (15-gauge or 16-gauge) with appropriate nails — 2-inch nails for ¾-inch boards going into studs
- Construction adhesive (Liquid Nails or Loctite PL) — critical when studs are not accessible
- 4-foot level and laser level — ensures boards run perfectly horizontal or vertical
- Stud finder — locates framing to ensure nails have something to bite into
- Chalk line — marks long reference lines across the full wall
- Tape measure and combination square
Finishing Supplies
- 120-grit and 220-grit sandpaper or a random orbit sander
- Wood filler or spackle for nail holes
- Painter's tape and drop cloths
- Stain, paint, or clear finish appropriate for your chosen wood species
- Caulk gun and paintable caulk for filling gaps along edges and corners
Step-by-Step: How to Make and Install Wood Shiplap Panels
Shiplap is the best starting point for anyone new to wood wall paneling because the individual boards are manageable, the installation is forgiving, and the result looks polished even when the execution isn't perfect. The following process applies to a standard 10×10 accent wall, which requires approximately 100 linear feet of 1×6 boards.
Step 1 — Prepare the Wall Surface
Start by removing outlet covers and switch plates. Use a stud finder to locate all wall studs and mark them with vertical pencil lines extending from floor to ceiling. Studs in residential construction are almost always spaced 16 inches on center, though older homes sometimes use 24-inch spacing. Knowing exactly where the studs are lets you nail directly into framing, which is far more reliable than relying on adhesive alone.
If the existing wall has significant texture or damage, apply a skim coat of joint compound and sand it smooth. Wood paneling installed over a lumpy substrate will rock and develop gaps over time. The wall doesn't need to be perfect, but eliminate any high spots greater than ¼ inch.
Step 2 — Acclimate Your Wood
This step is skipped by most beginners and causes the majority of paneling failures. Wood expands and contracts with changes in humidity. If you install boards fresh from a cold lumber yard into a warm, humid home, they will swell after installation, causing boards to buckle or seams to close up completely. Stack the boards flat in the room where they will be installed for a minimum of 48 hours — 72 hours is better. This allows the wood to reach equilibrium moisture content with the room's environment. The same rule applies to wood veneer wall paneling sheets, which can warp dramatically if moved from a climate-controlled warehouse into an unheated space.
Step 3 — Establish a Level Starting Line
Floors and ceilings are almost never level. If you simply butt the first board against the floor, any deviation will compound itself board by board until the top of the wall looks dramatically off. Instead, measure up from the floor at several points across the wall and find the lowest measurement. Add the width of one board to that measurement, then snap a chalk line at that height. This becomes your reference line for the first board. The small gap between the first board and the floor will be covered by baseboard trim.
Step 4 — Cut and Install the First Row
Measure the wall width and cut the first board to length on the miter saw. Apply a bead of construction adhesive to the back of the board in a zigzag pattern, then press it firmly against the wall with its top edge aligned to your chalk line. Drive 2-inch finish nails through the board face at each stud location. Set the nail heads just below the surface using a nail set — these small dents will be filled later. If you're using a nail gun, adjust the depth setting until the nail head is just below the wood surface without blowing through.
For shiplap specifically, the rabbet on the top edge of the board will accept the rabbet on the bottom of the next board. The overlap is typically ⅛ to ¼ inch and creates a clean shadow line between boards.
Step 5 — Work Your Way Up the Wall
Continue installing rows upward, checking for level every three or four boards. Even when boards appear level by eye, small errors accumulate. A digital level or a 4-foot spirit level pressed against the face of the most recently installed board catches drift early before it becomes uncorrectable. Stagger vertical seams by at least 24 inches between rows — never stack seams directly above one another, as this creates a visible vertical line that draws the eye in an unflattering way.
When you encounter an electrical outlet or switch, measure its position carefully relative to the board being cut. Transfer those measurements to the board face and use a jigsaw to cut the opening. Cut openings ¼ inch larger than the box on all sides — the outlet cover plate will hide the gap, and a generous cutout is far easier to manage than a too-tight hole that requires repeated trimming.
Step 6 — Handle Corners Properly
Inside corners are handled by simply butting one board flush into the adjacent wall, then overlapping the perpendicular board on top. Outside corners — where two paneled walls meet at a protruding 90-degree angle — require either a 45-degree miter cut on each board or a corner molding that caps the joint. Mitered outside corners look cleaner but require precise cutting; a discrepancy of even 1 to 2 degrees creates a visible gap. Corner moldings are more forgiving and actually preferred in traditional styles.
Step 7 — Fill Nail Holes and Finish
Once all boards are installed, fill nail holes with color-matched wood filler for stained finishes or spackle for painted finishes. Allow it to dry completely — typically 2 to 4 hours — then sand smooth with 220-grit sandpaper. Caulk any gaps along the ceiling line, around window and door trim, and in outside corners. Apply your finish in thin, even coats. For raw pine or poplar, a primer coat before painting prevents bleed-through and ensures even color. Most painted walls look significantly better with two finish coats rather than one heavy coat.
How to Install Wood Veneer Wall Paneling: A Complete Guide
Wood veneer wall paneling deserves its own detailed treatment because it differs fundamentally from board paneling in how it's handled, cut, and attached. The large sheet format — most commonly 4×8 feet but available up to 4×10 feet — means fewer seams and a more seamless appearance, but also means mistakes are harder to hide and the sheets themselves are awkward to maneuver alone.
Choosing the Right Wood Veneer Wall Paneling Product
Wood veneer wall paneling falls into three broad categories based on the substrate and veneer thickness. Rotary-cut veneer is the most common and least expensive — the log is peeled like a lathe, producing a repeating swirled grain pattern. Flat-cut (also called plain-sliced) veneer produces the classic straight grain you see in high-end furniture and architectural millwork. Quarter-sawn veneer, cut at roughly 90 degrees to the growth rings, produces an exceptionally stable panel with a distinctive ray-fleck pattern in oak and other ring-porous species.
For a residential accent wall, flat-cut white oak or walnut veneer on a ¾-inch plywood substrate is currently the most popular combination, driven largely by the influence of Scandinavian and Japanese interior design aesthetics. These panels are widely available at specialty lumber dealers and online suppliers in thicknesses ranging from ¼ inch to ¾ inch. Pre-finished options save considerable time; unfinished panels give you full control over the final stain color and sheen level.
Grain Matching for a Professional Look
The visual power of wood veneer wall paneling comes from the ability to match grain patterns across multiple sheets — a technique called book matching or slip matching. In book matching, adjacent veneer sheets are opened like a book, creating a mirror-image pattern at the seam. In slip matching, each sheet is the same orientation, creating a repeating pattern. Most high-end architectural installations use book matching for feature walls. When ordering wood veneer wall paneling for a matched installation, always purchase all panels from the same flitch — a sequentially sliced set of veneers from the same log section. Mixing flitches from different logs makes matching impossible.
Installing Wood Veneer Wall Paneling Sheets
Mark stud locations on the wall before starting. Dry-fit all panels in position without adhesive first, marking which panel goes where and confirming that seams land at stud locations wherever possible. Seams in wood veneer wall paneling that fall in the middle of a stud bay are unsupported and prone to separating over time unless the panel is thick enough (¾-inch plywood substrate) to be sufficiently rigid.
Apply a ⅜-inch bead of construction adhesive in a serpentine pattern across the entire back of the panel, then press it firmly into position. Drive 1⅝-inch finish nails through the veneer panel face at each stud location — one nail every 12 inches vertically at studs, and one nail every 8 inches along top and bottom edges. Use a rubber mallet and a scrap block to seat the panel fully against the wall. The combination of adhesive and mechanical fasteners prevents the edges from lifting as the adhesive cures.
Between panels, maintain a 1/16-inch expansion gap on all sides. This allows for seasonal wood movement without buckling. The gap is nearly invisible from a normal viewing distance and much less objectionable than panels that push together and bow out at the seams six months after installation.
Finishing Raw Wood Veneer Wall Paneling
Unfinished wood veneer wall paneling accepts stain, oil, and lacquer in the same way as solid wood because the surface is genuine wood fiber. Hardwax oil finishes — Rubio Monocoat and Osmo Polyx are the most popular — penetrate the veneer fibers rather than building a film on top. This means the wood retains its natural texture and can be spot-repaired without leaving visible sheen differences. Apply hardwax oil in a single thin coat, work it into the grain with a white 3M pad, then wipe off the excess after 30 minutes. The panel is ready for light use in 24 hours and fully cured in 7 days.
Water-based lacquer is the correct choice when you want a harder, more washable surface or when the substrate might be exposed to occasional moisture, such as in a mudroom or powder room. Apply two to three coats with a foam roller, allowing full dry time between coats and sanding lightly with 320-grit paper between the first and second coats to knock down any grain raise.
Building DIY Raised Panel Wainscoting from Scratch
Raised panel wainscoting is the most architecturally formal of all wood wall panel treatments. Done well, it adds genuine character to dining rooms, home offices, foyers, and libraries. Done poorly, it looks cheap and amateurish. The difference comes down to proportional planning and careful measurement before a single board is cut.
Planning the Panel Layout
The most common mistake in wainscoting installation is not planning the panel layout in advance. The goal is panels of equal width across the full wall, with no awkwardly narrow partial panels at the ends. Start by measuring the total wall width and subtracting the width of two vertical stiles (one at each end) and the bottom rail width. Divide the remaining space by the desired number of panels. Adjust the number of panels until each one falls between 16 and 30 inches wide — panels narrower than 16 inches look cramped, and panels wider than 30 inches lack visual rhythm.
For example, on a 144-inch (12-foot) wall with 3.5-inch-wide stiles and rails: subtract the two end stiles (7 inches total) from 144 inches, leaving 137 inches. With five panels, each panel plus its intermediate stile would be 137 ÷ 5 = 27.4 inches. Subtract one 3.5-inch intermediate stile to get a panel opening of about 23.9 inches — a pleasing proportion.
Cutting and Routing the Components
Cut all stiles and rails to width on the table saw, then to length on the miter saw. The critical joint between stiles and rails is either a simple butt joint with glue and biscuits (simple but adequate) or a true mortise-and-tenon (traditional and extremely strong). For MDF wainscoting that will be painted, biscuit joints are perfectly appropriate — the paint and caulk hide any minor gaps. For stained wood wainscoting, the quality of the joinery is visible and mortise-and-tenon is worth the additional effort.
The raised center panel itself is routed on a router table using a raised panel bit set. The bit creates a sloping bevel around the perimeter of the panel that fits into the grooved edges of the stiles and rails. Never glue the raised panel into its frame — it must float freely to expand and contract with humidity changes. A panel glued in place will crack within one heating season in a climate with significant seasonal humidity swings.
Installing Wainscoting on the Wall
Pre-assemble each panel section off the wall, checking for square with a diagonal measurement. The two diagonal measurements should be equal — a difference greater than ⅛ inch means the assembly is racked and will look crooked when installed. Attach each assembled panel section to the wall using construction adhesive and finish nails driven into studs through the stiles. Cap the top of the wainscoting with a chair rail molding, and cover the bottom edge with a baseboard. The combination of baseboard at the bottom and chair rail at the top visually frames the wainscoting and hides any small gaps at the floor and ceiling lines.
Selecting the Right Wood Species for Wall Paneling
The wood species you choose determines nearly everything about how the finished wall looks, feels, and behaves over time. Not all species are equally suitable for wall applications, and understanding the differences prevents costly mistakes.
Pine and Spruce
Southern yellow pine, Eastern white pine, and spruce are the most budget-friendly solid wood options. They paint beautifully and take stain reasonably well, though the soft grain soaks up stain unevenly, which is why a gel stain or a pre-stain conditioner is always recommended for pine before applying oil-based stain. Pine's relatively low hardness — it ranks around 870 on the Janka hardness scale — means it dents and dings more easily than hardwoods, but this is rarely a concern for wall paneling since walls don't receive the same foot traffic as floors.
White Oak
White oak has become the dominant premium wood for interior architecture over the past decade. Its distinctive ray fleck pattern — the silvery streaks running perpendicular to the grain in quarter-sawn cuts — creates a texture that photographs beautifully in natural light. White oak takes water-based finishes well and responds particularly favorably to fuming (ammonia fuming darkens the tannins in oak without any pigment) for achieving a rich, museum-quality gray-brown tone. As both solid boards and as wood veneer wall paneling, white oak commands a premium: expect to pay $8 to $14 per square foot for pre-finished white oak veneer panels.
Walnut
Black walnut delivers a naturally dark, chocolaty color that requires no stain — a clear oil or lacquer finish lets the inherent richness of the wood speak for itself. Walnut is moderately hard at 1010 on the Janka scale and machines cleanly on a table saw or miter saw. It's the species most often seen in high-end executive office paneling, home theaters, and luxury residential libraries. Walnut wood veneer wall paneling is the most popular specification for commercial interior applications precisely because its consistent dark tone doesn't require staining and looks equally at home under warm incandescent lighting and cool LED lighting.
Cedar and Redwood
Western red cedar and redwood are naturally resistant to moisture and insects, making them the best choices for basement feature walls, bathroom wainscoting (in lower-moisture applications), and any space where humidity fluctuates. Cedar's aromatic scent adds a sensory dimension that no other paneling material provides. It's a softwood but holds finish well when sealed properly. One note of caution: cedar's natural oils can bleed through paint unless a shellac-based primer is applied first.
MDF as a Substitute
Medium-density fiberboard is not a wood species but deserves mention because it's the material of choice for any painted paneling application. MDF has no grain, no knots, and no tendency to split or warp in climate-controlled interiors. It accepts paint with a flawlessly smooth surface that solid wood can rarely match without extensive preparation. For painted raised panel wainscoting, MDF is objectively the better material choice compared to solid poplar or pine, and at $1.50 to $2.50 per sheet for ¾-inch MDF, it's also less expensive. Its two significant limitations are weight (a 4×8 sheet of ¾-inch MDF weighs approximately 97 pounds) and susceptibility to water damage — never use unfinished MDF in bathrooms or basements.
Common Mistakes and How to Avoid Them
Every experienced woodworker has made most of these mistakes at least once. Knowing about them in advance is far less painful than discovering them mid-project.
Not Buying Enough Material
Calculate your square footage, then add a minimum of 15 percent for waste. For diagonal installations, patterns, or highly figured wood veneer wall paneling where grain matching is important, add 20 to 25 percent. Running out of material mid-project and needing to order more almost guarantees a color or grain mismatch — new lumber or veneer panels from a different batch will rarely match the original exactly, especially after the first batch has been exposed to light and begun its natural color shift.
Skipping the Primer on Knots
Pine and other resinous softwoods have knots that bleed amber-colored resin through paint, creating yellow rings that no number of top coats will cover. Seal every knot with a shellac-based primer (Zinsser BIN is the standard) before applying any latex or oil-based paint. One coat of shellac primer is enough — the shellac seals the resin permanently.
Installing Horizontally Without Checking Level Constantly
The cumulative effect of small errors is the most insidious problem in board paneling. Each board that deviates even ⅛ inch from level passes that error to the next board. After twenty boards, the top of the wall can be noticeably off. Check level every three or four boards using a 4-foot level or laser level, and correct any drift by taping a thin wood shim to one edge of the next board before nailing it into place.
Forgetting to Account for Electrical Box Depth
Adding wood paneling to a wall moves the wall surface forward by the thickness of the paneling — typically ¾ inch for boards or ¼ to ¾ inch for wood veneer wall paneling sheets. This means existing electrical boxes may no longer be flush with the new wall surface. Electrical boxes must be flush with or slightly proud of the finished wall surface per NEC code. Box extenders — inexpensive plastic rings that clip onto existing boxes — solve this problem without requiring any rewiring. Always check box depth before finishing installation.
Using the Wrong Adhesive
Not all construction adhesives work equally well on all substrates. Standard Liquid Nails bonds well to drywall and plywood but can fail on painted surfaces. For paneling over painted walls, use an adhesive specifically labeled for painted surfaces or roughen the paint with 80-grit sandpaper in a crosshatch pattern before applying adhesive. On tile or other non-porous surfaces, use a heavy-duty construction adhesive rated for smooth surfaces, such as Loctite PL Premium.
Design Considerations: Making Wood Wall Paneling Look Intentional
Technical execution matters less than design intent when the goal is a wall that stops guests in their tracks. The most flawlessly installed paneling can still look wrong if the design decisions don't suit the space.
Panel Orientation: Horizontal vs. Vertical
Horizontal board orientation (like shiplap) draws the eye along the length of the wall, making a room feel wider but can make ceilings feel lower. Vertical board orientation pulls the eye upward, making rooms feel taller — a benefit in rooms with 8-foot ceilings. Wood veneer wall paneling with vertically oriented grain is inherently neutral and works in either direction. Diagonal installations at 45 degrees add energy and movement but require significantly more material and waste, and look best in contemporary or industrial spaces rather than traditional ones.
Full Wall vs. Accent Wall vs. Wainscoting Height
Floor-to-ceiling paneling on a single accent wall creates a dramatic focal point without overwhelming the room. Paneling all four walls works beautifully in libraries, studies, and formal dining rooms where a rich, enveloping atmosphere is the goal — but requires careful lighting design, since paneled rooms absorb more light than painted rooms and can feel dark without adequate fixtures. Wainscoting covering only the lower third of the wall (24 to 36 inches) is the most versatile approach, suitable for almost any room and style, and protects the wall from furniture scuffs and chair backs simultaneously.
Mixing Wood Tones with Existing Finishes
Wood wall paneling reads differently depending on the other tones in the room. Light-toned oak or ash paneling pairs naturally with white trim and warm beige or greige wall colors. Dark walnut paneling creates a moody, grounding backdrop that works well with brass or unlacquered bronze hardware and rich jewel-toned textiles. Painted paneling, because it introduces no additional wood tone, integrates with essentially any color palette — which is why it remains the most popular choice for traditional interiors where the focus is on architectural detail rather than material texture.
When using stained wood veneer wall paneling in a room that already has hardwood floors, try to keep the stain tones within two steps of each other on a value scale — very light veneer panels can look disconnected from dark floors, while matching them too precisely flattens the visual hierarchy. The wall and floor should complement each other without competing or blending into one uniform tone.
Maintaining Wood Wall Paneling Over Time
Well-installed wood paneling — whether solid boards or wood veneer wall paneling — is extraordinarily durable. Walls paneled in the 1920s are still found in excellent condition in period homes across the country. The key to longevity is appropriate finishing at installation and basic ongoing maintenance.
Routine Cleaning
For sealed or lacquered panels, wipe with a barely damp cloth to remove dust and marks. Never use silicone-based furniture polishes on wood paneling — they build up a greasy film that prevents future refinishing. For hardwax-oiled surfaces like Rubio Monocoat-finished wood veneer wall paneling, the manufacturer's soap (Rubio Universal Surface Cleaner) is the recommended cleaner; standard household cleaners can strip the finish over time.
Repairing Dents and Scratches
Small dents in unfinished or oil-finished wood can often be raised by placing a damp cloth over the dent and applying a hot iron briefly — the steam causes the compressed wood fibers to swell back toward their original position. This works reliably on solid wood but not on wood veneer wall paneling, where the veneer layer is too thin to tolerate the steam without risking delamination. For veneer panels, fill dents with a color-matched wax filler stick and buff smooth. Wax fill sticks are available in dozens of wood tones and are invisible when matched correctly.
Refinishing When Needed
Painted paneling can be repainted when the finish begins to look tired — every 7 to 10 years in normal residential use. Lightly sand the surface with 220-grit paper, clean with a tack cloth, and apply two fresh coats of your chosen paint. Oil-finished wood veneer wall paneling can be refreshed by cleaning the surface thoroughly and applying a new maintenance coat of hardwax oil. The new coat bonds chemically to the existing finish without any need to strip or sand — a significant advantage over lacquered or polyurethane-coated panels, which require full stripping and re-sanding when they reach the end of their useful life.


 ++86-18906857262 / ++86-13754347028
 No.49, Tunnan Industrial Zone, Daohui Street, Shangyu District, Shaoxing City, Zhejiang Province, China