

 English
 русский
 عربى
عربى

A set of design, research and development, production, sales, installation in one of the professional new decorative materials enterprises.
Content
- 1 Wainscoting Installation at a Glance: Six Steps
- 2 Tools and Materials Checklist
- 3 How to Measure a Wall for Wainscoting
- 4 Preparing the Wall Surface: The Step That Decides the Final Look
- 5 Step-by-Step Wainscoting Installation Process
- 6 Standard Wainscoting Heights and Proportions
- 7 Adhesive, Nails, or Both?
- 8 Common Wainscoting Installation Mistakes and How to Avoid Them
- 9 Choosing the Right Wainscoting Material
- 10 Cost and Budget Planning
- 11 Wainscoting Installation FAQ
- 11.1 Can I install wainscoting directly over painted drywall?
- 11.2 How long does installing wainscoting take?
- 11.3 Do I need to remove the baseboards before installing wainscoting?
- 11.4 Can I install wainscoting in a bathroom or laundry room?
- 11.5 What is the best adhesive for wainscoting panels?
- 11.6 Do panels need an expansion gap?
- 12 Before You Start: Final Checklist
Before you buy a single panel, here is the direct conclusion: wainscoting is a project a careful DIY owner can install in one weekend without a contractor. The order of work never changes: measure, prepare, lay out, cut, adhere, fasten, and finish. That same sequence works for MDF boards, wood veneer panels, and flexible stone sheets.
What separates a professional result from an obvious DIY job is rarely cutting skill. It is wall preparation and layout marking. A wall that bows more than 3 mm over a 2 m span creates uneven reveal lines no matter how straight your cuts are. Level the wall first, and the panels will fall into place.
Wainscoting Installation at a Glance: Six Steps
Keep this roadmap in front of you before touching a saw. Each step includes a practical tolerance that stops the most common rework.
| Step | Task | Key Tolerance |
|---|---|---|
| 1 | Measure the wall | Width at top, middle, bottom; use largest |
| 2 | Prepare the surface | Flat within 3 mm over 2 m |
| 3 | Plan the layout | Split extra width between both ends |
| 4 | Cut the panels | Leave 2-3 mm expansion gap at edges |
| 5 | Adhere and fasten | Even adhesive beads; nail the top edge |
| 6 | Finish and trim | Fill holes, caulk seams, install trim |
Tools and Materials Checklist
You do not need a workshop full of equipment. These are the essentials for a clean installation, with the items that most affect the final result called out.
- Tape measure at least 5 m long; take every measurement twice
- Laser level or a 600 mm spirit level for the top edge line
- Circular saw or track saw with a fine-tooth blade, 80 teeth or more for veneer
- Construction adhesive, waterproof type for bathrooms or laundry rooms
- Finish nailer, or a hammer with 16-gauge finish nails
- Painter's caulk and quick-dry wood filler
- Sandpaper in 120 and 220 grit
- Panels, chair rail trim, baseboard, and trim adhesive
How to Measure a Wall for Wainscoting
Measure the width of the wall at three heights: 300 mm from the floor, at mid-height, and just below the ceiling. Walls rarely have a constant width. Use the largest reading for your panel count, and handle the difference during layout. For height, measure from the floor to the intended top line at every panel position; floors slope too.
Here is a practical example: a 3.6 m wall using 600 mm wide panels takes six panels to cover the width exactly. Adding a 10 percent waste allowance for cuts and future repairs means ordering seven panels. In a 2.4 m high room with wainscoting set at 1.1 m, the covered surface is about 3.96 m², so roughly 4.4 m² of panel material is needed after waste.
Preparing the Wall Surface: The Step That Decides the Final Look
- Check flatness with a 2 m straightedge. Gaps up to 3 mm are acceptable; anything larger needs a leveling compound
- Remove wallpaper, grease, loose paint, and dust so the adhesive bond will not fail at a weak interlayer
- Fill cracks and holes with filler, then sand flush
- In bathrooms, use waterproof adhesive and a surface-sealed base board; raw drywall alone will wick moisture
- Let fresh plaster cure completely, typically 28 days, before fixing panels; rushing this creates adhesive failure
Step-by-Step Wainscoting Installation Process
Step 1: Mark the Layout on the Wall
Laser-mark or snap a line at the chosen wainscoting height. If the floor slopes, keep the top line level and cut the bottom of each panel to follow the floor. Cutting the bottom is easier than explaining a sloping top line.
Step 2: Cut Each Panel Individually
Measure each panel position separately instead of cutting a whole batch from the first reading. Mark with the finished face up for a circular saw and face down for a track saw. Apply masking tape along the cut line to minimize chipping. For factory-finished wood veneer panels, the surface film already provides the final color and scratch protection, so you do not need to paint after installation.
Step 3: Apply Adhesive in a Controlled Pattern
Lay a continuous adhesive bead around the edges of the panel and a zigzag pattern in the middle, with spacing of roughly 150 mm between lines. Full-surface bonding avoids hollow spots and stops the face from flexing when you press it.
Step 4: Press, Slide, and Fasten
Press the panel onto the wall, slide it 1-2 mm to spread the adhesive, then seat it with light mallet taps. Drive finish nails along the top and bottom edges. The top edge carries the most load while the adhesive cures, so do not skip it.
Step 5: Handle Corners and Edges Correctly
At inside corners, cut with a precise measurement taken from the corner; filling a wrong gap with caulk looks like a repair. At outside corners, use a 45-degree mitre or a corner trim profile. In tight spots and curved areas, flexible stone sheets bend where rigid panels cannot.
Step 6: Fill, Caulk, and Finish
Fill nail holes with wood filler and let them dry before sanding. Run a smooth caulk line along every seam and along the top edge where the panel meets the wall. Install the chair rail or trim last so nail holes sit on the trim, then apply the final topcoat or leave the factory finish as it is.
Standard Wainscoting Heights and Proportions
The classic rule is to set the wainscoting top at one-third of the total wall height. For modern rooms, the practical range is 900 to 1200 mm. Bathrooms often use 1200 to 1500 mm because the lower part of the wall needs splash protection.
| Room Type | Typical Ceiling | Recommended Height |
|---|---|---|
| Bedroom | 2.4 m | 900-1100 mm |
| Dining room | 2.7 m | 1000-1200 mm |
| Bathroom | 2.4 m | 1200-1500 mm |
| Hallway | 2.4-2.7 m | 900-1200 mm; full height in narrow halls |
Adhesive, Nails, or Both?
The fixing method changes with panel size and wall condition. Here is the honest comparison.
| Method | Best For | Watch Out For |
|---|---|---|
| Adhesive only | Large thin panels on flat walls | Wall must be flat; long curing time |
| Nails only | Light trim and small panels | Weak hold for large boards |
| Adhesive plus nails | Most wainscoting installations | Needs a nailer; most secure option |
For most rooms, adhesive plus nails is the right answer. The adhesive carries the load; the nails hold the panel in position while the adhesive cures. That combination works for boards and panels up to 1200 mm wide.
Common Wainscoting Installation Mistakes and How to Avoid Them
These five errors cause most of the poor results seen in renovated rooms. Each one is easy to prevent during the installation.
| Mistake | Result | Fix |
|---|---|---|
| Skipping the flatness check | Wavy seams and reveal gaps | Straightedge check; leveling compound |
| Cutting all panels in one batch | Gaps at tapered corners | Measure and cut each position |
| Applying too much adhesive | Squeeze-out stains on the face | 150 mm spacing, controlled beads |
| No expansion gap | Panels push and buckle in humidity | 2-3 mm gap at edges and corners |
| Caulking before filler dries | Cracks appear in the finish | Let filler dry overnight, then caulk |
Choosing the Right Wainscoting Material
The material determines how easy the installation is, how the panel reacts to moisture, and how often you have to repaint. Four options cover most projects.
- Solid wood: classic look, but expensive and prone to movement with humidity; it needs careful acclimation before installation
- MDF: the cheapest option and dimensionally stable, but weak against moisture; best in dry rooms
- Wood veneer panels with a base board and PVC/PET film: the structure stays stable, the surface resists scratches, and there is no need for painting
- Flexible stone panels: thin stone-effect sheets that bend around curves and follow slight wall irregularities, ideal for feature walls and half walls
For a stable, uniform substrate that will not telegraph minor wall imperfections, install the panels over a dedicated base board.
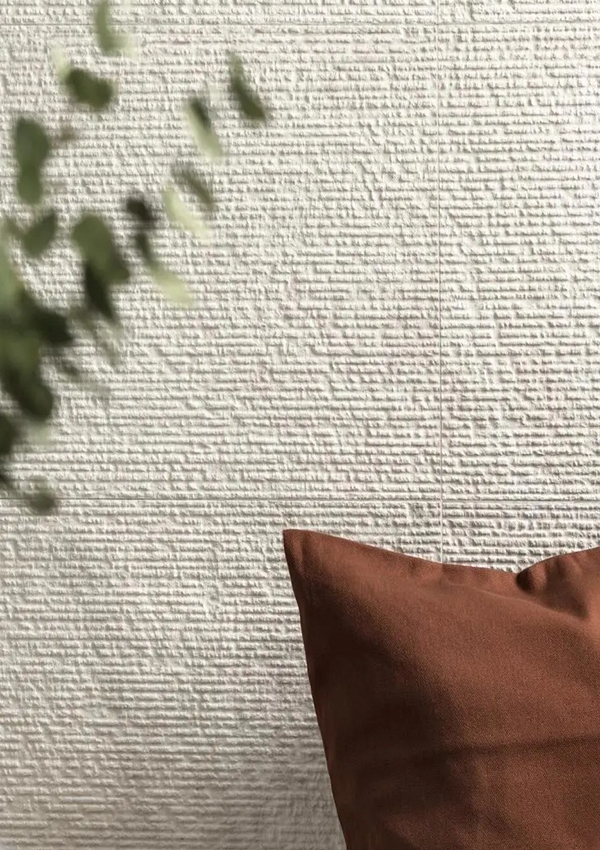 Wood Veneer Paneling Base Board for Stable SubstrateThis base board provides a uniform, stable surface that prevents minor wall imperfections from showing through. Its surface film durability is key for high-traffic areas like dining rooms where walls endure daily contact.View Product →
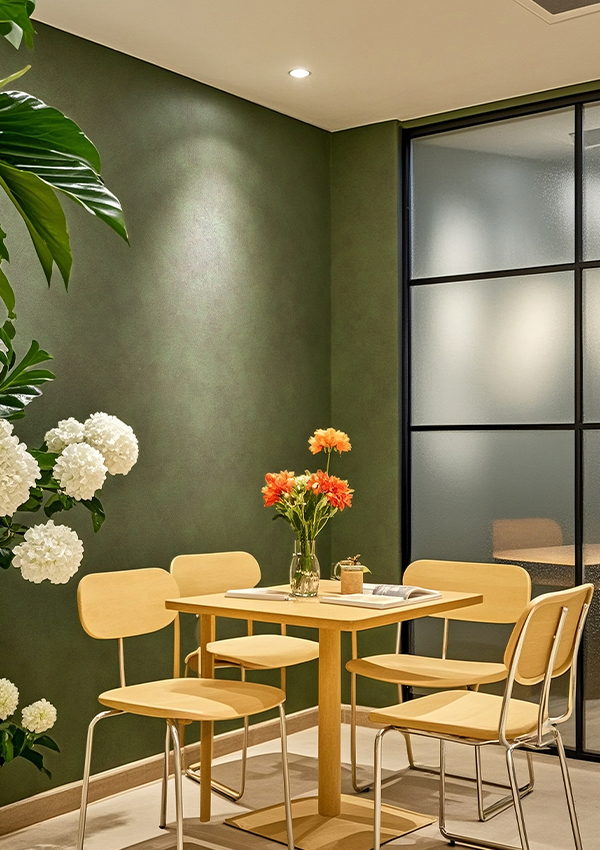
In a dining room where chairs hit the wall every day, the surface film decides how long the wainscoting stays presentable. Our wood veneer paneling knowledge encyclopedia explains how surface films differ in scratch resistance and texture if you want to compare options in detail.
For an entrance hall or a powder room where you want the texture of natural stone without its weight, flexible stone panels are the practical alternative.
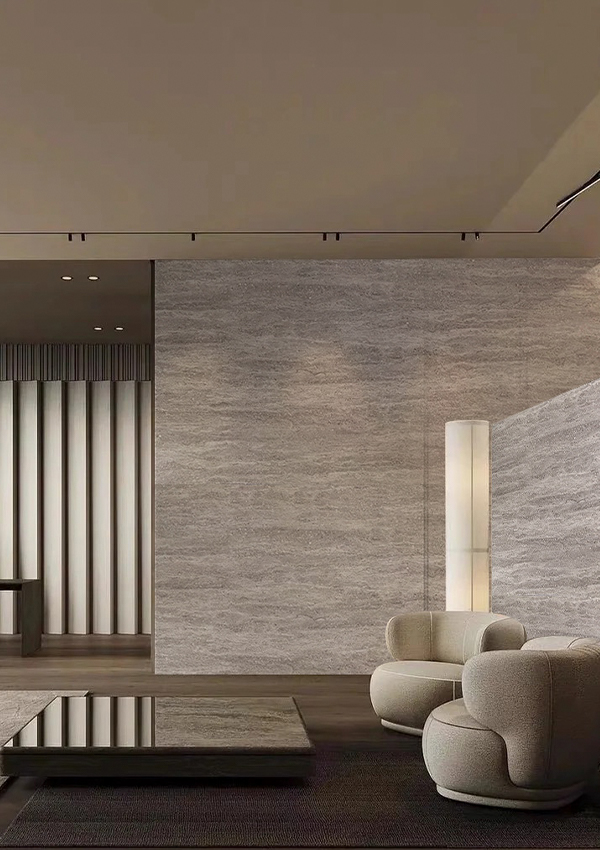 Lightweight Travertine Flexible Stone Wall PanelIdeal for entrances or powder rooms, this flexible stone panel delivers natural travertine texture without the weight of real stone. Its adaptability to curved surfaces and simple installation make it a practical choice, with cost details discussed in the following section.View Product →
Cost and Budget Planning
Material cost is the largest variable. The numbers below are typical market ranges observed in residential renovation supply; they are estimates, not prices from a specific supplier.
| Material | Typical Price per m² | Durability | Moisture Resistance |
|---|---|---|---|
| MDF panel | $8-15 | Medium | Low |
| Wood veneer panel with base board | $20-50 | High | Medium-high |
| Flexible stone panel | $30-80 | High | High |
On top of the panel, budget for adhesive, nails, chair rail, baseboard, filler, and caulk. For a 4 m² wainscoting section, these consumables usually add $40-80. Labor, if you hire someone, typically doubles the total cost; doing it yourself keeps the project inside the material budget.
Wainscoting Installation FAQ
Can I install wainscoting directly over painted drywall?
Yes. As long as the surface is flat, clean, dry, and the paint is firmly bonded, construction adhesive plus finish nails works directly on painted drywall. If the paint is peeling, scrape and prime the wall first.
How long does installing wainscoting take?
For a single wall about 3.6 m wide, plan for 4 to 8 hours of work, including cutting, fixing, and finishing. Add an overnight dry time for filler and caulk before the final topcoat.
Do I need to remove the baseboards before installing wainscoting?
Normally yes. Removing the existing baseboard lets the new panels sit flat on the floor while the chair rail handles the top transition. Leaving the baseboard creates a visible step that is difficult to finish neatly.
Can I install wainscoting in a bathroom or laundry room?
Yes, with the right material set. Use waterproof adhesive, a moisture-resistant base board, and a sealed surface film. Panels with a PVC/PET surface film handle splash zones better than raw MDF.
What is the best adhesive for wainscoting panels?
Use a construction adhesive matched to the substrate: plaster, drywall, wood, or masonry. For flexible stone panels, follow the adhesive guidance from the panel manufacturer, because some flexible panels need a stronger contact bond.
Do panels need an expansion gap?
Manufactured panels expand and contract slightly with humidity. Leave a 2-3 mm gap at edges, corners, and around outlets or pipes, then cover the gap with trim or flexible caulk. Do not fill it with rigid filler.
Before You Start: Final Checklist
- Check wall flatness with a 2 m straightedge; the gap must be 3 mm or less
- Clean, repair, and prime the wall
- Mark the top line with a laser level
- Allow panels to acclimatize in the room for 48 hours before cutting
- Measure and cut panel by panel, with masking tape on veneer cut lines
- Apply adhesive in a continuous edge bead plus 150 mm zigzag lines
- Nail the top and bottom edges; set nail heads below the surface
- Caulk seams and fill holes; let everything cure overnight before painting
If you follow this sequence, the result is a straight, stable wainscoting that looks intentional rather than improvised.


 ++86-18906857262 / ++86-13754347028
 No.49, Tunnan Industrial Zone, Daohui Street, Shangyu District, Shaoxing City, Zhejiang Province, China