

 English
 русский
 عربى
عربى

A set of design, research and development, production, sales, installation in one of the professional new decorative materials enterprises.
Content
- 1 The Direct Answer: How To Stop Wallpaper Cleanly Mid-Wall
- 2 Why Wallpaper Sometimes Has To Stop Mid-Wall
- 3 Method One: The Double-Cut Seam For A Paper-Only Stop
- 4 Method Two: Trim, Molding, And Decorative Wall Panels As A Stop Line
- 5 Planning The Height Or Line Before You Start Hanging
- 6 Tools That Make A Clean Termination Line Realistic
- 7 Common Mistakes That Cause A Mid-Wall Edge To Fail
- 8 Keeping A Mid-Wall Edge Looking Sharp Over Time
- 9 Frequently Asked Questions
- 9.1 Can wallpaper end without any trim or panel at all?
- 9.2 What height should I stop wallpaper if I am pairing it with Decorative Wall Panels?
- 9.3 Will the wallpaper edge show through if I install Decorative Wall Panels afterward instead of before?
- 9.4 Does the wallpaper need to overlap the trim or panel, or should it butt against it?
- 9.5 What is the biggest reason a mid-wall wallpaper edge lifts after a few months?
The Direct Answer: How To Stop Wallpaper Cleanly Mid-Wall
The cleanest way to end wallpaper in the middle of a wall is to stop the paper at a straight vertical or horizontal line that is reinforced by a physical break, such as a piece of trim, a chair rail, a painted band, or a run of Decorative Wall Panels. Wallpaper edges left exposed on open drywall almost always lift within a few months because the raw edge has nothing to grip and nothing to hide behind. A termination line gives the paper a mechanical stop and gives the eye a reason for the change, so the transition reads as designed rather than unfinished.
There are three reliable techniques used by paperhangers to close out a wallpaper run partway up or across a wall: the double-cut seam for paper-to-paper transitions, a trim-backed edge for paper-to-paint transitions, and a panel-backed edge when the stopping point also needs to carry texture or protection, which is where Decorative Wall Panels come in. The rest of this guide walks through when to use each one and how to execute it so the seam stays flat for years.
Why Wallpaper Sometimes Has To Stop Mid-Wall
Full-wall coverage is not always the goal. Designers and installers intentionally stop wallpaper partway up a wall for several practical reasons:
- Budget: papering only the upper or lower half of a wall can cut material cost nearly in half on a tall room.
- Durability: the lower third of a wall in a hallway, stairwell, or dining room takes the most contact from furniture, bags, and foot traffic, so a tougher surface belongs there.
- Moisture exposure: bathrooms and kitchens often need a water-resistant lower section even when the upper wall is papered.
- Layered design: pairing a printed paper above a paneled or wainscoted lower wall is one of the most requested looks in current interior projects.
In every one of these cases, the stopping point needs a plan before the first strip of paper goes up, not after.
Method One: The Double-Cut Seam For A Paper-Only Stop
When wallpaper needs to end against bare drywall with no trim at all, professionals rarely just cut the paper and press it down. A raw cut edge on drywall has almost nothing holding it flat, and drywall paint or primer does not bond as strongly to paper adhesive as another layer of paper does. The double-cut method solves this by overlapping the last strip onto a scrap piece, cutting through both layers at once with a sharp blade and a straight edge, then removing the offcuts so the two edges meet in a hairline seam with full adhesive contact on both sides.
Steps For A Double-Cut Termination Line
- Hang the final strip past the intended stopping line by at least two inches.
- Snap a level chalk line or use a laser level at the exact height or position where the paper should end.
- Score through the paper only, using light pressure, along that line with a sharp snap-off blade against a metal straight edge.
- Peel away the excess strip above the score line while the paste is still workable.
- Wipe the cut edge with a damp sponge to remove any paste residue, then roll the seam gently with a plastic seam roller.
This method keeps the edge razor straight, which matters because the eye catches even a two-millimeter waver in a horizontal cut line far more easily than it catches a waver in a vertical one.
Method Two: Trim, Molding, And Decorative Wall Panels As A Stop Line
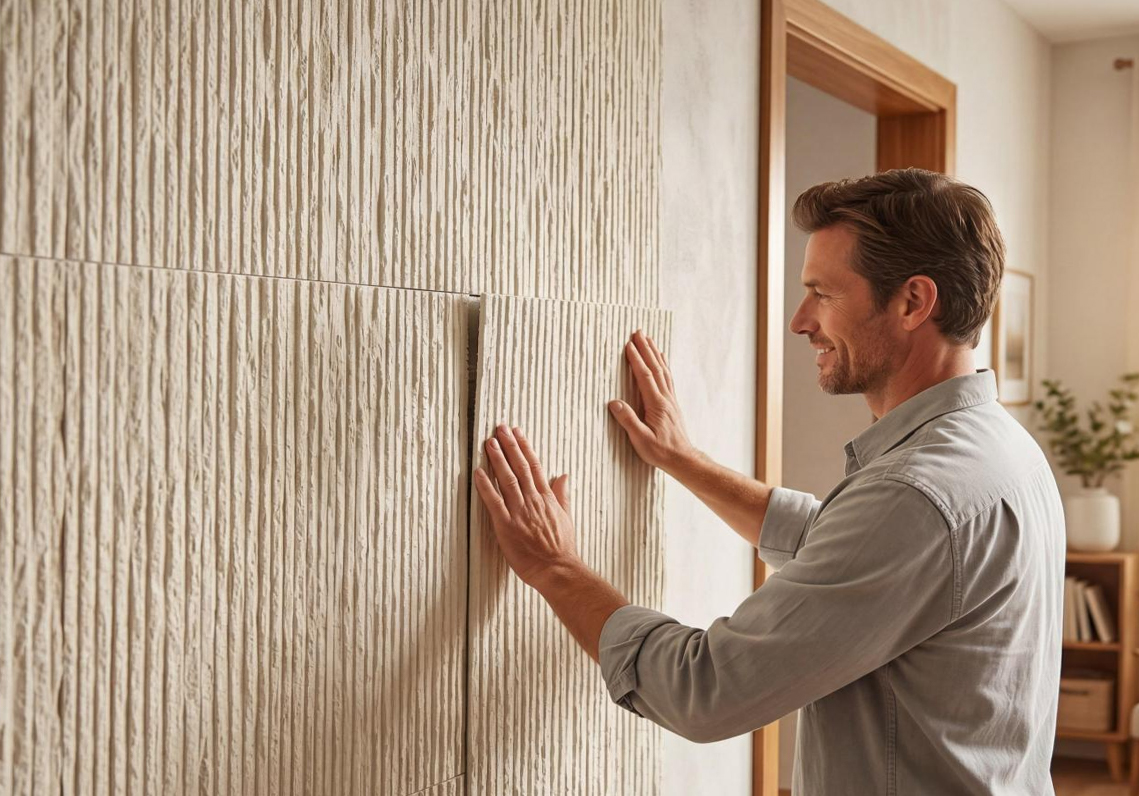
The far more forgiving option, and the one most homeowners choose, is to end the wallpaper against a physical strip of material. This can be picture rail, a chair rail, quarter-round, flat MDF strips, or a run of Decorative Wall Panels installed as wainscoting. The trim does two jobs at once: it hides the raw paper edge under its lip, and it gives the wall a deliberate visual break instead of an abrupt one.
Decorative Wall Panels in particular have become a common partner for wallpaper because they add dimension below the chair-rail line while the wallpaper carries pattern and color above it. A panel profile that is at least half an inch proud of the wall surface is enough to fully conceal a wallpaper edge tucked behind it, and the panel's own shadow line does the work of disguising any minor unevenness in the paper cut.
How To Install Paper Against Trim Or Panels
- Install the trim, chair rail, or Decorative Wall Panels first, and let any caulk or filler fully cure before papering.
- Hang wallpaper strips so the bottom or side edge overlaps the top or edge of the trim by roughly a quarter inch.
- Use a smoothing tool to crease the paper firmly into the corner where it meets the trim.
- Trim the excess paper with a sharp blade run along the top edge of the trim itself, using the trim as the straight edge.
- Caulk the tiny gap between paper and trim with a paintable, flexible caulk in a matching color to seal out dust and moisture.
| Method | Best Used When | Visible Seam Risk | Approximate Skill Level |
|---|---|---|---|
| Double-cut seam | Paper stops against bare wall or a painted band | Low if cut is straight | Intermediate |
| Trim or chair rail backed | Formal rooms, hallways, stairwells | Very low, edge is hidden | Beginner to intermediate |
| Decorative Wall Panels backed | Dining rooms, entryways, feature walls needing texture below the line | Very low, panel lip conceals edge | Beginner with panel kit, intermediate for custom builds |
Planning The Height Or Line Before You Start Hanging
Every experienced installer picks the stopping line before buying a single roll of paper, because it changes how much material is needed and where the pattern repeat falls. A few planning rules keep the result looking intentional:
- Standard chair rail height sits between 32 and 36 inches off the finished floor, and this remains the most common stopping point for a lower Decorative Wall Panels section topped with wallpaper above.
- Never let the stopping line land at the same height as a window sill or a light switch plate, since the eye reads that as a coincidence rather than a design choice.
- If working with a large pattern repeat, dry-lay a strip against the wall first to check where a full motif falls at the intended cut line, adjusting the height by an inch or two if needed to avoid slicing a motif in half awkwardly.
Tools That Make A Clean Termination Line Realistic
A crisp mid-wall stop depends more on the tools used for the cut than on the wallpaper itself. A dull blade is the single most common cause of a ragged edge, since it drags fibers instead of slicing them.
| Tool | Purpose |
|---|---|
| Snap-off utility blade | Fresh, sharp edge for every cut; replace the blade every one to two strips |
| Metal straight edge or smoothing knife | Guides the blade in a true line without denting soft drywall |
| Laser level or chalk line | Marks the stopping height accurately across the full wall run |
| Plastic seam roller | Seats the cut edge flat without shining the paper's surface |
| Flexible paintable caulk | Seals the gap where paper meets trim or Decorative Wall Panels |
Common Mistakes That Cause A Mid-Wall Edge To Fail
Most lifting or peeling at a termination line traces back to one of a handful of repeatable mistakes rather than a fault in the paper itself.
Cutting With A Dull Or Reused Blade
A blade that has already cut two or three strips starts to tear rather than slice, leaving fuzzy fibers along the edge that catch moisture and lift first.
Skipping The Caulk Line At Trim Or Panel Joints
Leaving a bare gap between the paper edge and the trim or Decorative Wall Panels lets humidity and dust behind the paper, which is the single most common reason a clean edge starts curling within a year.
Choosing An Adhesive That Does Not Match The Paper Weight
Heavier vinyl or textured papers need a stronger, often clay-based paste, while light non-wovens need a thinner wheat or cellulose paste; using the wrong strength paste weakens grip exactly at the vulnerable cut edge.
Ending The Line At An Uneven Reference Point
Using the floor or an existing baseboard as the reference for the cut height, instead of a level line, transfers any floor unevenness straight into the wallpaper edge.
Keeping A Mid-Wall Edge Looking Sharp Over Time
Once the paper is trimmed and sealed, a termination line still needs a small amount of upkeep, especially in high-traffic areas paired with Decorative Wall Panels below the line.
- Recaulk the paper-to-trim or paper-to-panel joint if the seal starts to look chalky or if a gap opens, typically every three to five years depending on humidity swings in the room.
- Wipe the edge with a barely damp cloth rather than a wet one; standing moisture at the seam is what causes bubbling, not general humidity in the air.
- Touch up any nail pops or small dents in adjoining Decorative Wall Panels quickly, since movement in the panel can telegraph into the paper edge above it.
Frequently Asked Questions
Can wallpaper end without any trim or panel at all?
Yes, using the double-cut seam method against bare wall, but the cut line needs to be perfectly level or plumb and finished with a matching paint color above it, since there is nothing physical to hide a wavering edge.
What height should I stop wallpaper if I am pairing it with Decorative Wall Panels?
Most rooms look best with the panel line set between 32 and 36 inches from the floor, matching traditional chair rail height, though taller ceilings can push this closer to 40 inches for better proportion.
Will the wallpaper edge show through if I install Decorative Wall Panels afterward instead of before?
It is much harder to get a clean result this way, since the panel has to be scribed exactly to an already-cut paper edge; installing the panels first and papering down to them gives a far more forgiving fit.
Does the wallpaper need to overlap the trim or panel, or should it butt against it?
A slight overlap of about a quarter inch that gets trimmed flush after hanging is more reliable than trying to butt the paper edge exactly to the trim, since a precise butt joint rarely stays gap-free as the paper dries and shrinks slightly.
What is the biggest reason a mid-wall wallpaper edge lifts after a few months?
An unsealed gap at the termination line letting in humidity, combined with a dull-blade cut that left frayed fibers, accounts for the large majority of lifted edges reported by installers.

 ++86-18906857262 / ++86-13754347028
 No.49, Tunnan Industrial Zone, Daohui Street, Shangyu District, Shaoxing City, Zhejiang Province, China