
 English
 русский
 عربى
عربى
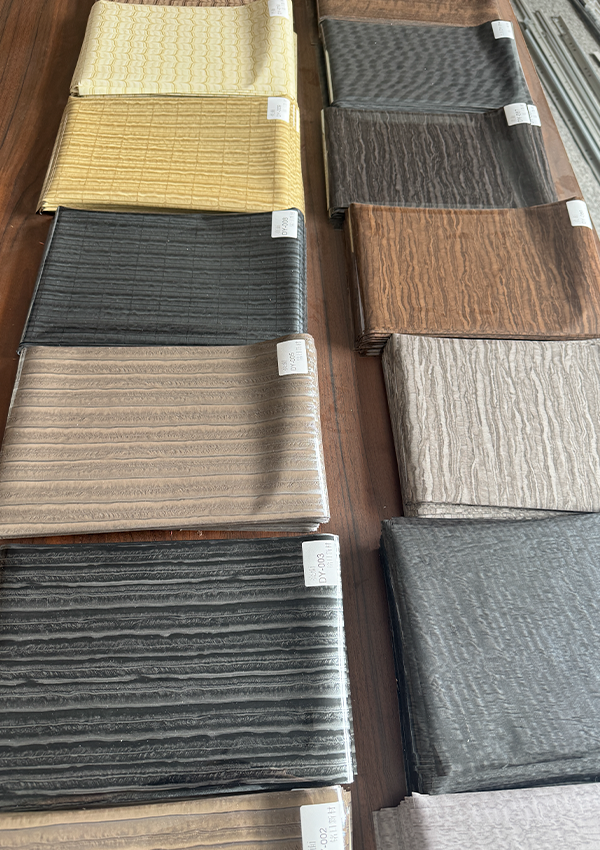
A set of design, research and development, production, sales, installation in one of the professional new decorative materials enterprises.
Content
- 1 The Short Answer: How to Clean Wood Walls and Paneling
- 2 Why Wood Wall Paneling Requires a Different Approach Than Floors or Furniture
- 3 Identifying Your Wood Paneling Type Before You Clean
- 4 Essential Tools and Supplies for Cleaning Wood Walls
- 5 Step-by-Step: Routine Cleaning for Wood Walls and Paneling
- 6 Deep Cleaning: Removing Grease, Stains, and Heavy Buildup
- 7 Cleaning Wood Veneer Wall Paneling: Special Considerations
- 8 Cleaning by Room Type: Specific Challenges and Solutions
- 9 Products That Work — and Products to Avoid
- 10 Maintaining Wood Paneling Long-Term: Prevention Is Cheaper Than Restoration
- 11 When DIY Cleaning Is Not Enough: Signs You Need Professional Help
- 12 Cleaning Painted Wood Paneling vs. Stained or Natural Wood Paneling
- 13 Frequently Asked Questions About Cleaning Wood Walls
- 13.1 How often should wood walls and paneling be cleaned?
- 13.2 Can I use a Magic Eraser on wood paneling?
- 13.3 My wood veneer wall paneling has a bubble or raised section — can I fix it without replacing the panel?
- 13.4 Is vinegar safe to use on wood paneling?
- 13.5 How do I clean the dark grooves in traditional V-groove wood paneling?
The Short Answer: How to Clean Wood Walls and Paneling
Cleaning wood walls and paneling comes down to one non-negotiable rule: use as little moisture as possible. A damp — never wet — microfiber cloth paired with a mild wood-safe cleaner handles the vast majority of everyday dirt, grease, and grime without warping panels, raising grain, or stripping finish. For Wood Veneer Wall Paneling specifically, this low-moisture principle is even more critical because veneer layers can be as thin as 0.5 mm, meaning excess water causes delamination within minutes.
Here is what works, broken down by paneling type, soil level, and finish — with specific product recommendations, dilution ratios, and step-by-step methods that actually produce results without damaging your investment.
Why Wood Wall Paneling Requires a Different Approach Than Floors or Furniture
Most people clean wood walls the same way they clean painted drywall — a bucket of soapy water and a sponge. That approach works fine on latex paint, but it is actively destructive on wood. Here is why wood paneling behaves differently:
- Wood is hygroscopic, meaning it absorbs and releases moisture constantly. Vertical panels absorb water along their edges and grooves, where the finish is thinnest.
- Water runs downward on walls, pooling at panel edges, trim joints, and floor-level molding — exactly where adhesives and tongue-and-groove joints are most vulnerable.
- Many wall panels, especially Wood Veneer Wall Paneling, use MDF or plywood substrates that swell dramatically when wet, even through a seemingly intact finish.
- Grooves and V-joints in traditional paneling trap moisture, detergent residue, and dirt simultaneously — requiring a targeted approach, not a broad wipe-down.
Understanding the finish on your paneling is equally important. Polyurethane-coated panels tolerate slightly more moisture than oil-finished or wax-finished wood. Unfinished raw wood is the most delicate of all. Identify your finish before choosing a cleaning method — getting this wrong can mean refinishing an entire wall.

Identifying Your Wood Paneling Type Before You Clean
Cleaning method selection depends entirely on what you are working with. The three most common residential wall paneling types each have different tolerances:
Solid Wood Paneling
Solid wood panels — typically tongue-and-groove planks of pine, cedar, oak, or walnut — are the most forgiving because the wood runs all the way through. Scratches can be sanded and refinished. They still dislike excess moisture but will not delaminate. Common in cabins, older homes, and feature walls installed before the 1980s.
Wood Veneer Wall Paneling
Wood Veneer Wall Paneling consists of a thin slice of real hardwood — typically 0.5 mm to 3 mm thick — bonded to a plywood, MDF, or particleboard core. It delivers the appearance of expensive solid hardwood at a fraction of the cost and is widely used in contemporary interiors, office spaces, hotel lobbies, and upscale residential projects. Because the veneer layer is thin, any cleaning method involving standing moisture, steam, or alkaline cleaners will cause bubbling, edge-lifting, or complete delamination. This is the type that demands the most careful approach.
Sheet Paneling (Plywood or Hardboard with Printed Woodgrain)
Common in homes built between the 1950s and 1970s, these 4×8 sheets have either a photographic woodgrain printed surface or a very thin veneer. They are often finished with a lacquer coating. While they look like wood, some versions are closer to laminate and can tolerate slightly more aggressive cleaning — though it is still wise to treat them as delicately as real veneer panels.
| Paneling Type | Core Material | Moisture Tolerance | Recommended Cleaner |
|---|---|---|---|
| Solid Wood | 100% wood | Moderate (damp cloth OK) | Murphy Oil Soap diluted 1:10 |
| Wood Veneer Paneling | MDF / Plywood | Very Low (nearly dry only) | pH-neutral wood cleaner, barely damp |
| Sheet / Printed Grain | Hardboard / Plywood | Low-Moderate | Mild dish soap solution |
| Raw / Unfinished Wood | Solid or Plywood | Extremely Low | Dry methods only; mineral spirits for stains |
Essential Tools and Supplies for Cleaning Wood Walls
Having the right materials on hand prevents the common mistake of grabbing whatever is convenient — which often means the wrong product. Here is what you actually need:
- Microfiber cloths (multiple): More effective than cotton rags at lifting dust and dirt without scratching. Use separate cloths for washing and drying — never let moisture sit.
- Soft-bristle brush or vacuum with brush attachment: For grooves, V-joints, and panel edges where dust accumulates in layers.
- pH-neutral wood cleaner: Products like Bona Hardwood Floor Cleaner, Method Wood for Good, or a diluted Murphy Oil Soap solution (1 tablespoon per quart of water). Avoid anything with ammonia, bleach, or citrus solvents.
- Two buckets: One for your cleaning solution, one for clean rinse water. This prevents spreading dirty water back onto the panels.
- Cotton swabs or toothbrush: For cleaning inside deep grooves in traditional paneling without saturating the wood.
- Wood conditioner or furniture polish (wax-free): Applied after cleaning to restore any oils stripped during washing. Howard Feed-N-Wax is a reliable choice for finished panels.
- Mineral spirits: For stubborn grease or adhesive residue on finished panels. Apply with a cotton ball, not a cloth, to control the amount used.
What you should not use: steam cleaners, abrasive sponges (including the soft side of a standard kitchen sponge, which is more abrasive than it looks), vinegar solutions, all-purpose sprays containing ammonia, or furniture polish sprays with silicone — the last of which creates a build-up layer that prevents future refinishing.
Step-by-Step: Routine Cleaning for Wood Walls and Paneling
Routine cleaning — done every one to three months depending on the room — prevents the buildup of grease and grime that requires more aggressive (and riskier) deep-cleaning later. Follow this sequence:
- Dust first, always. Use a soft-bristle brush attachment on your vacuum to remove loose dust, cobwebs, and debris from the entire wall, including grooves and corners. Work top to bottom so dislodged dust falls onto areas not yet cleaned. Skip this step and you will drag abrasive grit across the finish during washing.
- Mix your cleaning solution. For finished wood paneling, combine 1 tablespoon of pH-neutral cleaner (Murphy Oil Soap is the industry standard for home use) with 1 quart of warm water. For Wood Veneer Wall Paneling, reduce this to 1 teaspoon per quart to minimize moisture content.
- Wring the cloth thoroughly. Dip a microfiber cloth into the solution and wring it so hard that no drops fall from it when you hold it up. The cloth should feel barely damp, not wet.
- Wipe with the grain. Always move your cloth in the direction of the wood grain to avoid cross-grain scratching. Work in small sections — roughly 2-foot by 2-foot areas — before moving to the next. Do not scrub; use light to moderate pressure.
- Dry immediately. Follow each damp section with a dry microfiber cloth. Do not allow any moisture to sit on the surface, especially near panel joints and grooves. For veneer paneling, this drying step is not optional — it is the most important step in the entire process.
- Address grooves separately. Use a cotton swab dampened (not soaked) with the cleaning solution to run along grooves and V-joints. Follow immediately with a dry cotton swab or soft cloth edge.
- Apply conditioner if needed. On oil-finished or older panels, apply a thin coat of wood conditioner with a clean cloth once the wall is fully dry. Buff lightly to prevent a greasy appearance.
Total time for a standard 10×10 feature wall: approximately 30 to 45 minutes done properly. Rushing this process accounts for most cases of warped paneling and lifted veneer edges.
Deep Cleaning: Removing Grease, Stains, and Heavy Buildup
Kitchen-adjacent walls, dining areas, and high-traffic hallways accumulate a mixture of cooking grease, fingerprint oils, and atmospheric dust that bonds to the wood finish over time. This compound layer requires a targeted approach — more than a routine wipe-down, but still moisture-controlled.
Grease and Cooking Oil Buildup
Mix 1 tablespoon of dish soap (not antibacterial — choose a basic formula like original Dawn) with 2 cups of warm water. Apply to a microfiber cloth, wring thoroughly, and work the greasy area using light circular motions followed by a grain-direction pass. The dish soap's degreasing surfactants cut through oil bonds without damaging most polyurethane finishes. Rinse the area with a barely damp clean cloth, then dry immediately. For veneer wood wall paneling, apply this solution with a cotton ball rather than a cloth to keep moisture localized.
Crayon, Marker, and Scuff Marks
A small amount of mineral spirits (also called white spirit) on a cotton ball removes crayon, permanent marker, and rubber scuff marks from finished wood paneling without affecting the finish layer underneath. Apply to the mark only — not the surrounding area — and wipe with light pressure in the grain direction. Follow with a clean damp cloth, then dry. This works on both solid wood and veneer paneling because mineral spirits evaporate quickly and do not penetrate sealed surfaces.
Water Stains and Ring Marks
Ironically, water stains on wood are among the trickiest to remove because adding more moisture can worsen the mark. On finished panels, try rubbing the stain gently with a cloth dampened with a small amount of mayonnaise or petroleum jelly — the oil displaces the water trapped beneath the finish. Leave for 15 minutes, then wipe clean. On unfinished or oil-finished wood, fine-grit sandpaper (220-grit) applied very lightly along the grain can remove surface water stains, followed by re-oiling the area.
Mold and Mildew on Wood Paneling
Mold on interior wood walls is a more serious problem requiring careful handling. Do not use bleach on wood — it damages lignin (the structural compound in wood), causes discoloration, and does not kill mold at the root level on porous surfaces. Instead, use a solution of 1 cup white vinegar diluted in 1 cup water applied with a barely damp cloth. Work in small sections and dry thoroughly. If mold has penetrated into the wood grain or substrate — visible as black spots that remain after surface cleaning — the panel may need professional remediation or replacement, as mold growth inside veneer substrates is a structural concern, not just a cosmetic one.

Cleaning Wood Veneer Wall Paneling: Special Considerations
Wood Veneer Wall Paneling is found in a huge range of applications — from high-end residential feature walls using book-matched walnut or white oak veneer to commercial interiors with reconstituted veneer panels in beech or wenge finishes. Regardless of species, all veneer-faced panels share the same vulnerability: the bond between the veneer face and its substrate is adhesive-based, and that adhesive is the first thing to fail under moisture stress.
Key rules specific to veneer wall paneling:
- Never spray cleaner directly onto veneer panels. Always apply to the cloth first. Spray mist travels into gaps, seams, and around panel edges instantly.
- Avoid cleaning near panel seams and edges more than necessary. These are the delamination risk points.
- If you notice an edge starting to lift, do not press it down with a wet finger. Let the area dry completely, then re-bond with a veneer repair adhesive (PVA-based, applied with a thin spatula) and clamp or press until cured.
- Veneer panels in high-humidity rooms (bathrooms, utility rooms) require a quarterly application of a penetrating oil or furniture wax to maintain the moisture barrier on the face. Neglecting this over 2 to 3 years allows the finish to degrade to the point where routine cleaning itself becomes a delamination risk.
- For panels with an open-pore finish (common with natural oak and ash veneer paneling), use a slightly stiffer brush attachment when vacuuming to pull dust from the pores rather than pushing it deeper in.
Real wood veneer wall paneling — as opposed to PVC wood-effect cladding or melamine-faced boards — can be identified by its grain variation. No two adjacent veneer sheets have identical grain patterns, and the grain is three-dimensional in appearance rather than flat and printed. This visual complexity is worth protecting with the additional care it requires.
Cleaning by Room Type: Specific Challenges and Solutions
Living Rooms and Bedrooms
The primary challenge here is dust accumulation and the occasional fingerprint or pet hair deposit. Routine dusting every two to three weeks with a microfiber duster or vacuum brush attachment, combined with a full damp-wipe cleaning every two to three months, is sufficient. Focus on areas behind furniture and near air vents, where dust collects fastest due to airflow patterns.
Kitchens and Dining Areas
Wood paneling in or adjacent to kitchens accumulates airborne grease at a significantly higher rate. Monthly cleaning is typically necessary for kitchen-facing wood wall paneling to prevent grease from bonding permanently to the finish. Backsplash-area paneling (if present) should be considered a separate zone and cleaned after every cooking session using the dish soap method described above.
Hallways and Staircases
High-traffic corridor paneling collects scuffs, handprint marks, and shoe contact stains at approximately chair-rail height and below. These areas benefit from a mineral spirits pre-treatment on scuff marks before the routine damp-wipe clean. Wainscoting (lower-wall paneling) in these spaces should be cleaned more frequently than full-height panels above — roughly twice as often.
Home Offices and Libraries
These spaces often feature premium wood paneling — including book-matched wood veneer wall paneling — and typically accumulate less grime than kitchens or hallways. Quarterly cleaning with a pH-neutral cleaner and an annual conditioning treatment keeps these panels in excellent long-term condition. Avoid placing humidifiers or plants directly against paneled walls, as the localized moisture increase damages the finish over time.
Products That Work — and Products to Avoid
| Product / Ingredient | Safe for Wood Paneling? | Notes |
|---|---|---|
| Murphy Oil Soap (diluted) | Yes | Industry standard; use 1 tbsp per quart |
| Bona Hardwood Cleaner | Yes | pH-neutral; spray on cloth, not surface |
| Mineral spirits | Yes (spot use only) | For scuffs and adhesive residue; ventilate room |
| White vinegar (straight) | No | Etches finish over time; dries out wood |
| Ammonia-based cleaners | No | Strips finish; causes discoloration |
| Bleach solutions | No | Destroys lignin; permanent discoloration |
| Silicone furniture spray | No | Build-up prevents refinishing |
| Steam cleaners | No | Instant delamination risk on veneer panels |
| Howard Feed-N-Wax | Yes (conditioning) | Post-cleaning conditioner; enhances grain |
Maintaining Wood Paneling Long-Term: Prevention Is Cheaper Than Restoration
Cleaning is reactive. Maintenance is proactive. These habits extend the life of any wood wall paneling — including high-investment wood veneer wall paneling installations — significantly:
- Control indoor humidity. Wood is stable between 35% and 55% relative humidity. Below 35%, panels dry out, crack, and develop gaps. Above 55%, they swell and finishes blister. A basic hygrometer costs under $15 and can prevent thousands in panel replacement costs.
- Apply a conditioning treatment annually. On oil-finished or wax-finished panels, an annual re-oiling or re-waxing maintains the protective layer. On polyurethane-coated panels, a non-silicone furniture polish used twice a year is sufficient.
- Address chips and scratches promptly. A small scratch left unaddressed allows moisture to enter the unprotected wood, creating a progressive damage cycle. Touch up with a wood repair marker in the matching stain color, or with a blend of clear nail polish for veneer surfaces.
- Keep furniture away from paneling. Direct contact between furniture edges and wood paneling causes localized finish wear within months. A 1-inch clearance is enough to prevent this.
- Inspect wall-penetration points. Electrical outlets, light switch plates, and HVAC grilles embedded in wood paneling are moisture entry points. Check annually that escutcheon plates are sealed tightly and that no condensation is occurring around HVAC openings.
For Wood Veneer Wall Paneling in commercial or high-visibility spaces, a professional cleaning and conditioning service every two to three years is a reasonable investment for installations valued at several thousand dollars or more. Professional wood care technicians use museum-grade products and application methods that are difficult to replicate with consumer-grade tools.
When DIY Cleaning Is Not Enough: Signs You Need Professional Help
Most wood wall paneling cleaning tasks are within the capability of any careful homeowner. However, there are situations where DIY cleaning risks making the problem significantly worse:
- Delaminated veneer edges covering more than 6 inches of a panel run. Small edge lifts can be re-bonded, but widespread delamination indicates substrate moisture damage that requires panel replacement, not just re-gluing.
- Persistent musty odor after cleaning. This indicates mold growth behind the panels or within the substrate. Mold remediation in wall cavities requires professional assessment and often involves removing panels, treating the structure, and reinstalling with new material.
- Deep finish clouding or white haze across large sections. This is typically moisture trapped beneath the finish layer and cannot be removed with surface cleaning. It requires professional stripping and refinishing.
- Historic or antique paneling with unknown finish. Pre-1960s paneling may have shellac, lacquer, or lead-based paint finishes that react unpredictably to modern cleaning products. A professional conservator is the right call for irreplaceable historic woodwork.
The cost of professional wood wall cleaning and refinishing varies widely — from approximately $200 to $600 for a single-room feature wall, up to several thousand for full-room wood veneer paneling in large commercial spaces. Compared to full replacement costs, professional cleaning and restoration is almost always the economical choice.
Cleaning Painted Wood Paneling vs. Stained or Natural Wood Paneling
A significant portion of older wood paneling — particularly the tongue-and-groove plank paneling common in homes built between 1940 and 1980 — has been painted over at some point. Painted wood paneling behaves very differently from stained or natural-finish panels:
- Latex-painted wood paneling can tolerate a slightly wetter cloth and more aggressive scrubbing without damaging the underlying wood — though heavy scrubbing will dull the paint sheen over time.
- Oil-based painted paneling requires more careful handling because solvents can soften old oil-based paint, causing smearing rather than cleaning.
- Cleaning painted paneling still requires drying promptly, because paint applied over wood (rather than drywall) does not fully block moisture transfer into the wood underneath.
- A diluted all-purpose cleaner (1 teaspoon per quart of water) or a gentle dish soap solution works well on painted paneling in most cases.
If you are considering painting over stained or natural-finish paneling, clean and degrease it thoroughly first — residual oils or wax from conditioning products will prevent paint adhesion and cause peeling within months.
Frequently Asked Questions About Cleaning Wood Walls
How often should wood walls and paneling be cleaned?
Dust every two to three weeks with a dry microfiber duster. Do a full damp-wipe clean every two to three months in living areas, monthly in kitchens or high-use hallways. Apply conditioning treatment every six to twelve months depending on the finish type.
Can I use a Magic Eraser on wood paneling?
No. Magic Erasers are micro-abrasive — they work by physically abrading the surface. On wood paneling, they remove not just the dirt but the finish layer itself, leaving dull, hazy patches that are difficult to blend without complete refinishing. Stick to microfiber cloths.
My wood veneer wall paneling has a bubble or raised section — can I fix it without replacing the panel?
Sometimes. If the bubble is small (under 3 inches), you can inject PVA wood glue under the veneer using a syringe or palette knife, press the veneer flat, and hold with masking tape for 24 hours. For larger bubbles or areas where the veneer has fully delaminated, professional re-veneering or panel replacement is a more reliable solution. Never attempt to iron down a bubble — the heat will cause additional delamination.
Is vinegar safe to use on wood paneling?
Vinegar is acidic (typically pH 2.5) and etches wood finishes over time, even when diluted. Despite its popularity as a natural cleaner, it is one of the most commonly cited causes of finish degradation on wood surfaces. The 1:1 vinegar-water solution sometimes recommended for mold is acceptable as a one-time spot treatment, but it should never be used as a regular cleaning method on any wood paneling, including wood veneer wall paneling.
How do I clean the dark grooves in traditional V-groove wood paneling?
Use a cotton swab or a soft-bristle toothbrush dampened with your cleaning solution. Run it along the groove in a single direction, then follow immediately with a dry cotton swab. For very packed-in dust, a vacuum crevice tool run lightly along the groove first loosens the bulk of the debris before you apply any liquid. Never spray cleaner directly into grooves.


 ++86-18906857262 / ++86-13754347028
 No.49, Tunnan Industrial Zone, Daohui Street, Shangyu District, Shaoxing City, Zhejiang Province, China