

 English
 русский
 عربى


A set of design, research and development, production, sales, installation in one of the professional new decorative materials enterprises.
Content
- 1 1. Tools and Materials: Prepare Everything Before You Open the Adhesive
- 2 2. Match the Installation Method to the Panel Type
- 3 3. Surface Preparation: The Stage That Prevents Most Failures
- 4 4. Measure Twice, Cut Once: Layout Planning and Joint Gaps
- 5 5. Cutting Techniques for Flexible Stone and Wood Veneer
- 6 6. Adhesive Application: Coverage, Pattern, and Open Time
- 7 7. Step-by-Step Installation Workflow
- 8 8. Corners, Outlets, Trim, and Edges
- 9 9. Common Installation Mistakes and How to Avoid Them
- 10 10. Cleaning and Maintaining Installed Paneling
- 11 11. Frequently Asked Questions
- 11.1 Can I install decorative wall paneling directly over drywall?
- 11.2 Can decorative wall paneling be installed over old tile?
- 11.3 Do I need to leave gaps between decorative wall panels?
- 11.4 Can flexible stone wall panels bend around corners?
- 11.5 Should I use adhesive or nails to install wall paneling?
- 11.6 How long does it take to install decorative wall paneling in one room?
The short answer: Installing decorative wall paneling is a linear process: check the substrate, prepare the wall, plan the layout, cut the panels, apply adhesive, press and roll, then finish the seams and edges. The two steps that decide most of the final quality are substrate flatness and layout planning. Everything else is technique.
With a prepared wall and pre-cut material, one installer can cover roughly 250 to 350 square feet per day using 600 mm x 3000 mm flexible stone panels or 2440 mm x 1220 mm wood veneer panels, based on typical contractor productivity data. Retrofits over old tile, uneven plaster, or walls with several niches and windows will easily double the time budget. This guide explains the complete installation sequence with the tolerances, joint gaps, and adhesive rules that professional installers rely on, so the project can be planned with realistic expectations.
1. Tools and Materials: Prepare Everything Before You Open the Adhesive
A specialized workshop is not required to install decorative wall paneling. A standard carpentry kit, a clean notched trowel, and an adhesive matched to the panel backing are sufficient for both flexible stone and wood veneer panels. The table below is the complete checklist used on typical wall paneling jobs.
| Tool or Material | Role in the Installation |
|---|---|
| Laser level or 2 m spirit level | Establishes the vertical datum line that every row of panels follows |
| 2 m aluminum straightedge and tape measure | Checks flatness, marks cut lines, and measures openings |
| Utility knife with fresh blades | Scores and snaps flexible stone panels, trims film edges |
| Track saw or circular saw with fine-tooth blade | Cuts wood veneer panels cleanly without chipping the surface film |
| 5 mm and 6 mm notched trowels | Controls adhesive thickness and coverage rate |
| Rubber roller or veneer roller, 500 mm wide | Presses panels for even contact and removes trapped air |
| Oscillating multi-tool or hole saw | Cuts clean openings for outlets, switches, and pipes |
| High-solids acrylic primer | Seals porous gypsum, plaster, and old paint before adhesive |
| MS polymer adhesive | Bonds both flexible stone and wood veneer to most substrates |
| Sandpaper, 120 to 180 grit | Roughens glossy surfaces and smooths cut edges |
Buy the adhesive before the panels. Most installation failures come from using a generic construction adhesive instead of one matched to the panel backing. MS polymer, also called silane-modified polyether, is the safest default for decorative wall paneling because it bonds to gypsum, cement board, plywood, aluminum, and painted surfaces without a separate contact cement step.
2. Match the Installation Method to the Panel Type
The first decision is not the color or the pattern; it is the panel family. Two types of decorative wall paneling cover the vast majority of wall projects: flexible stone wall panels and rigid wood veneer panels. They follow the same basic installation sequence, but the cutting tools, joint gaps, and edge details are different.
Flexible stone wall panels are 1.5 to 3.5 mm thick and weigh about 1.5 to 3.5 kg per square meter, according to manufacturer technical specifications. A natural stone surface layer is bonded to a polymer composite backing, which lets the sheet follow curved walls with a minimum bending radius of approximately 100 mm. These panels are installed with adhesive only; nails and staples are not used because the material is too thin to hide fasteners. The backing layer needs a fully primed, dust-free substrate to bond correctly.
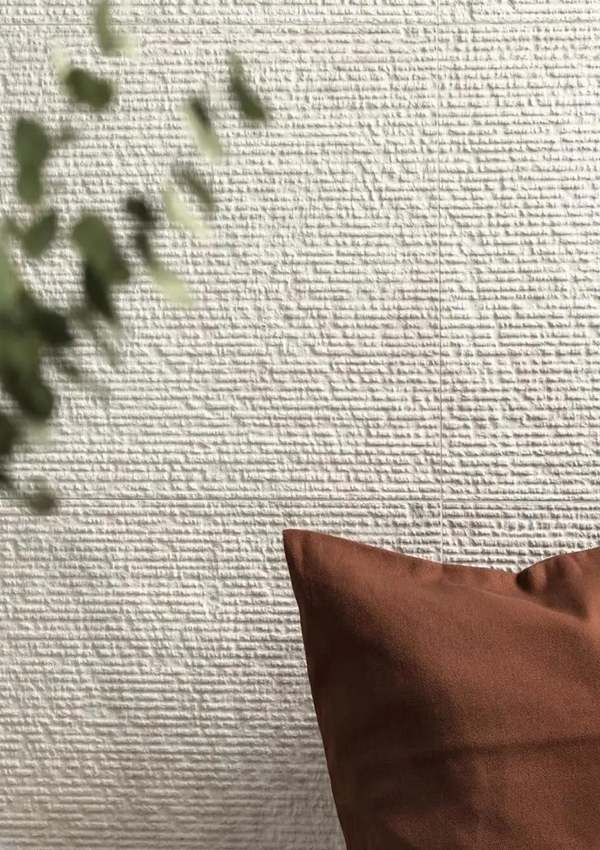 Flexible Stone Wall Panel Suppliers with Multiple Pattern OptionsThis product listing showcases flexible soft stone panels in patterns like ragged cloth, weaving, starry cloud, and coarse textures, ideal for curved wall applications requiring thin, lightweight stone surfaces.View Product →
Wood veneer paneling, by contrast, is a rigid board built from a base board of MDF, plywood, or a lightweight composite, covered with PVC, PET, wood-grain, or fabric-effect films. Standard sizes are 2440 mm x 1220 mm and 3000 mm x 600 mm. Rigid panels demand a straighter substrate, require a 2 to 3 mm expansion gap around the perimeter in rooms with humidity changes, and need sharp cutting tools to protect the surface film. The material structure of this product family is explained in more detail in our wood veneer paneling knowledge guide.
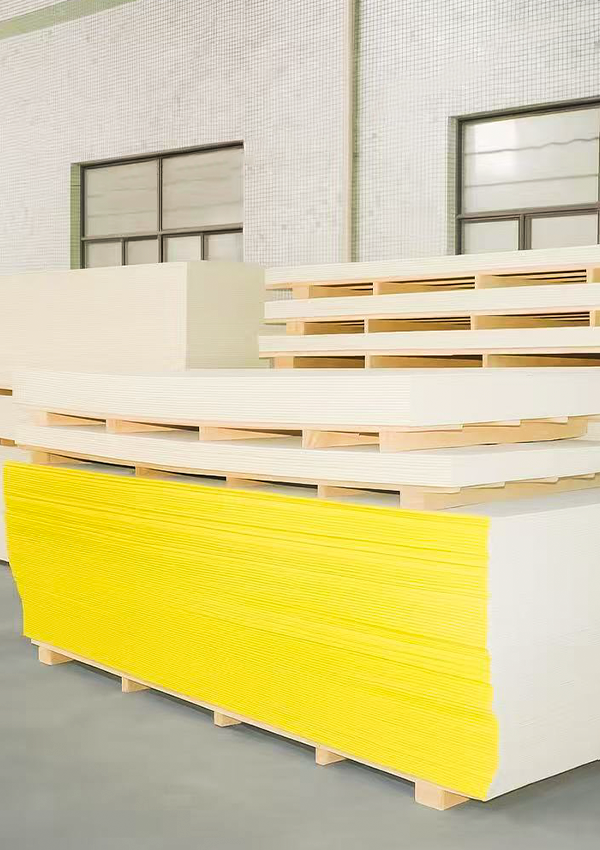 Wood Veneer Wall Paneling Suppliers with Film Finish OptionsExplore wood veneer paneling products featuring scratch-resistant PVC, PET, and fabric finishes, along with baseboard options, suited for straight substrates and humidity-controlled interiors.View Product →
How the panel type changes your workflow
- Flexible stone: score-and-snap cuts, adhesive only, butt joints in dry interiors, and the panel wraps around outside corners with a minimum radius.
- Wood veneer: masked saw cuts, adhesive plus temporary pinning for thicker boards, 2 to 3 mm perimeter gaps, and corner trims where the panels meet.
3. Surface Preparation: The Stage That Prevents Most Failures
Preparation decides adhesion, and adhesion decides the lifespan of the wall. If the primer is skipped on gypsum board, or the panels are installed on a wall that is out of flat, the result is hollow spots or edge peeling within the first year. Check these five things before opening the adhesive bucket.
- Flatness: run a 2 m straightedge across the wall in several directions. Deviations over 3 mm must be filled and sanded flat. For thin flexible stone panels, keep the wall within 2 mm over 2 m because the panel is too flexible to bridge hollows.
- Curing: new plaster needs at least 28 days of curing before any adhesive is applied. Installing earlier risks failure because moisture is still leaving the plaster body.
- Surface strength: remove loose paint and seal chalky surfaces with primer. Sand glossy paint with 120 to 180 grit to create a mechanical tooth for the adhesive.
- Porosity control: apply a high-solids acrylic primer to gypsum board before troweling adhesive. The primer stops the wall from absorbing the adhesive moisture too quickly, which would skin the adhesive before the panel is pressed.
- Temperature: keep the room between 10 and 30 degrees Celsius during installation and for 24 hours afterward. Low temperatures slow the cure; high temperatures shorten the open time.
If the wall has visible damp patches, efflorescence, or mold, solve the moisture problem before any panel touches the surface. Wall paneling over a wet wall only hides the defect until the adhesive fails.
4. Measure Twice, Cut Once: Layout Planning and Joint Gaps
Layout planning is where professional-looking jobs are won. The rule is simple: work from one fixed datum point, never from two or more sides of the room toward the middle. Starting from two directions causes a cumulative error that becomes visible at the last panel.
- Establish a vertical datum line with a laser level, placed 100 to 150 mm from the most visible corner or from the edge of a door frame.
- Dry-lay the first row on the floor to match patterns and check cut lengths before any adhesive is applied.
- Stagger the joints of wood veneer panels by at least 300 mm between adjacent rows. Flexible stone panels can be installed with aligned joints, but a staggered layout hides small dimensional differences better.
- For panels with strong relief, such as fine-coarse rammed earth flexible stone panels, plan the sequence so that joints fall inside the darker recessed lines of the texture rather than across a raised ridge.
- For exterior elevations with brick-style panels, keep the panel joints aligned with the simulated mortar lines. A 3D exterior wall brick flexible stone panel needs extra care near cuts so that the raised brick face is not broken.
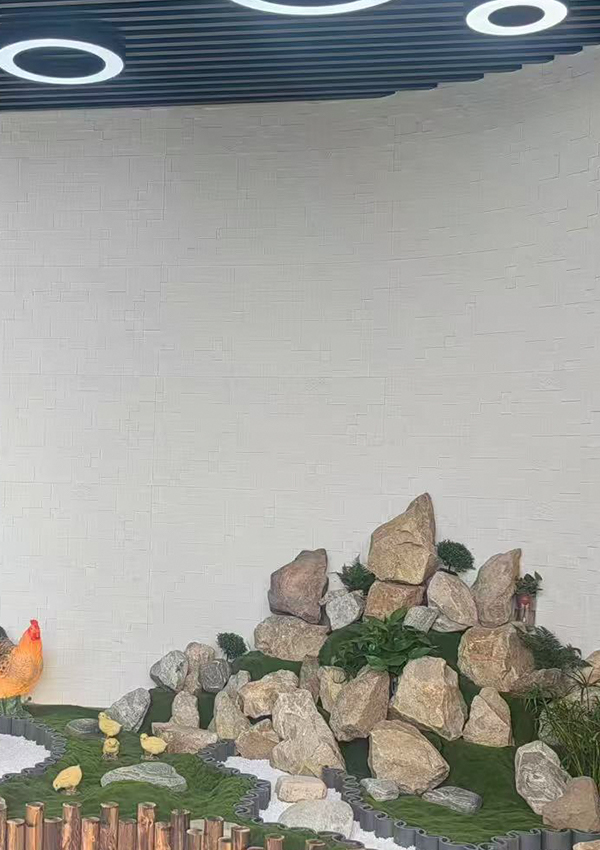 3D Exterior Wall Brick Flexible Soft Stone Wall PanelThis 3D brick wall panel offers a modular, textured surface with undulating thickness, combining weather resistance and rapid installation for facades, lobbies, and residential walls.View Product →
| Application | Panel Type | Joint Gap | Edge Treatment |
|---|---|---|---|
| Interior dry wall | Flexible stone | 0 to 2 mm butted | Stone powder paste or color-matched flexible filler |
| Exterior facade | Flexible stone | 3 to 5 mm | Backer rod and exterior-grade sealant |
| Dry room walls | Wood veneer panels | 1 to 2 mm butt joints, 2 to 3 mm perimeter | Acrylic flexible filler or painted trim |
| Bathroom or humid room | Wood veneer panels | 2 to 3 mm on all edges | Silicone sealant at corners and perimeter profiles |
5. Cutting Techniques for Flexible Stone and Wood Veneer
Cutting is the stage where material waste is created. The golden rule: cut flexible panels face up with a knife, cut wood-based panels face up with a taped line and a fine-tooth blade, and use an oscillating tool for openings.
Flexible stone straight and curved cuts
- Straight cut: mark the front side, score two or three times along a metal straightedge with a sharp utility knife, then snap the sheet over the edge of a clean work table.
- Curved cut: use sharp scissors or a knife. Curves tighter than a 100 mm radius should be avoided unless the manufacturer confirms a smaller bending limit.
- Openings: cut a cross in the marked area, then trim to the line with a knife after the panel is pressed, for the cleanest result.
Wood veneer panel cuts
- Apply masking tape along the cutting line on the decorative face. Use a track saw or circular saw with an 80-tooth carbide blade and a slow, steady feed, especially in the last 100 mm of the cut.
- For outlets and switches, drill a 10 mm starter hole in each corner of the marked rectangle, then complete the cut with an oscillating multi-tool.
- Deburr cut edges with 180 grit sandpaper for veneer-faced boards. Do not sand the decorative film itself; trim any loose film edge with a fresh blade instead.
6. Adhesive Application: Coverage, Pattern, and Open Time
Select the adhesive for the panel backing and the location. MS polymer adhesive is the most reliable default for both flexible stone and wood veneer paneling because it bonds to gypsum, cement board, plywood, and metal without a separate contact cement step.
Coverage is predictable: one 600 ml MS polymer cartridge spread with a 6 mm notched trowel covers approximately 4 to 6 square meters, based on typical values in adhesive manufacturers' technical datasheets. A 5 mm notched trowel extends coverage to roughly 6 to 8 square meters per cartridge, but it is only suitable for panels thinner than 2 mm or on perfectly flat walls.
Application rules that prevent hollow panels
- Spread the adhesive onto the wall in full vertical bands, not as dots. Dots create air pockets and can reduce the bonded area by 40 percent or more.
- Back-butter the edges of every wood veneer panel with a thin skin coat before pressing. Edges are the first place where peeling starts.
- Respect the open time. MS polymer requires the panel to be pressed within 10 to 20 minutes of troweling; after that, the adhesive forms a skin and no longer transfers properly.
- Press with a rubber roller from the center outward to the edges, then roll every edge a second time with firm pressure.
7. Step-by-Step Installation Workflow
The sequence below is the recommended method for a clean and durable result. It works for both flexible stone panels and rigid wood veneer panels; the only changes are the cutting technique and the joint gap.
- Mark the vertical datum line with a laser level and confirm it with a 2 m spirit level before any cutting.
- Test-fit the first full panel against the datum line without adhesive. Check plumb, overall height, and the gap to the floor.
- Apply adhesive to the wall area that is slightly larger than the first panel, keeping the trowel ribs vertical.
- Press the panel against the wall, align it with the datum, and place 2 to 3 mm spacers at the floor and ceiling lines.
- Roll the panel from the center to the edges, then press all four edges with a seam roller or the back of a trowel handle.
- Remove fresh adhesive squeeze-out with a damp cloth. Cured residue has to be cut off carefully with a knife.
- Install the next panel, matching the joint width with the same spacers, and check with a fingertip that the surface remains flush across the seam.
- After every third panel, run the straightedge across the face to catch any panel that is sitting proud before the adhesive cures.
- Cut and fix panels around windows, doors, and columns before the neighboring full panels so that the visible end of each run stays clean.
- After 24 hours, remove the spacers, fill the perimeter gaps with flexible filler or sealant, install the corner trims, and do the final cleaning.
8. Corners, Outlets, Trim, and Edges
Corners and openings are where the difference between a DIY look and a professional finish becomes visible. Handle them with the approaches below.
| Location | Recommended Approach |
|---|---|
| Inside corner, wood veneer | Use a 45-degree miter if the cuts are accurate, or install a matching corner trim profile. |
| Inside corner, flexible stone | Leave a 2 to 3 mm shadow gap and fill it with flexible sealant, or use a corner profile. |
| Outside corner, flexible stone | Fold the panel around the corner with a minimum radius of 100 mm. Place a thin fill behind the fold to avoid a hollow spot. |
| Outside corner, wood veneer | Use a mitered joint or an L-shaped aluminum profile that matches the panel finish. |
| Electrical outlets and switches | Switch off the power. Cut the panel opening 2 to 3 mm larger than the box. For flexible stone, scribe the position and trim after pressing. |
| Floor, ceiling, and room perimeter | Leave a 2 to 3 mm gap and cover it with a shadow base, quadrant molding, or a matching sealant bead. |
9. Common Installation Mistakes and How to Avoid Them
Most field failures come from a small set of repeatable errors. The table below lists the mistakes, the consequences, and the prevention for each one.
| Mistake | Result | Prevention |
|---|---|---|
| Skipping the primer on gypsum board | Adhesive skins too fast, poor bond, hollow panels | Always apply a high-solids acrylic primer and let it dry fully |
| No expansion gaps for wood veneer | Buckling and edge lifting in humid rooms | Keep 2 to 3 mm perimeter gaps and cover with trim or sealant |
| Applying adhesive in dots instead of full notched bands | Air pockets, hollow sound, uneven pressure points | Use a 5 or 6 mm notched trowel in vertical bands, plus back-buttering on edges |
| Pressing the panel without a roller | Trapped air, poor adhesive transfer, later peeling | Always roll from the center to the edges, then roll edges a second time |
| Starting from two ends toward the middle | Cumulative misalignment visible at the final panel | Work from one fixed vertical datum point only |
| Cutting flexible stone face down | Chipped mineral layer and rough visible edge | Score face up and snap over a straight edge |
10. Cleaning and Maintaining Installed Paneling
Correct maintenance starts in the first week after installation. Even after the adhesive feels dry, the bond strength continues to build for several days.
- During the first week, avoid washing the panel surface. Wipe dust with a dry microfiber cloth only.
- For flexible stone, clean with a soft cloth slightly dampened with plain water. Do not use acidic cleaners or high-pressure washing on the surface.
- Exterior flexible stone should be resealed every 12 to 24 months, depending on exposure, with a water-based impregnating sealer.
- For wood veneer panels with PVC or PET films, use mild soap and a non-abrasive cloth. Avoid acetone, solvent-based cleaners, and scouring pads on the film surface.
11. Frequently Asked Questions
Can I install decorative wall paneling directly over drywall?
Yes. Drywall is the most common substrate for decorative wall paneling. Check flatness with a 2 m straightedge, apply a high-solids acrylic primer, spread MS polymer adhesive with a notched trowel, and press the panels with a roller. This sequence works for both flexible stone and thin wood veneer panels.
Can decorative wall paneling be installed over old tile?
Yes, if the tile is fully bonded and has no hollow resonance when tapped. Sand the glossy face with 120 grit to create a mechanical key, vacuum the dust, and use MS polymer adhesive directly. Loose or hollow tiles must be removed and the area leveled before paneling.
Do I need to leave gaps between decorative wall panels?
It depends on the material. Flexible stone panels are butted with a 0 to 2 mm joint indoors and a 3 to 5 mm sealed joint outdoors. Wood veneer panels need a 1 to 2 mm butt joint and a 2 to 3 mm expansion gap around the perimeter, especially in humid rooms.
Can flexible stone wall panels bend around corners?
Yes. Standard flexible stone panels can follow curves with a minimum radius of about 100 mm. Strongly textured 3D patterns generally need a larger radius, so test the specific product on a sample corner before committing to the full run.
Should I use adhesive or nails to install wall paneling?
Adhesive is the primary fixing method for both panel families. Flexible stone panels must not be nailed because the material is too thin. Thick wood veneer panels above 9 mm can be reinforced with small pin nails in the top edge, hidden by the next panel or by trim, while the adhesive cures.
How long does it take to install decorative wall paneling in one room?
A single bedroom feature wall can be completed in one working day by one installer, including cutting and cleaning. A full living room with multiple openings usually takes two days: one day for layout and installation, and a short second visit to fill joints, fit trims, and clean. Adhesive curing time adds 24 hours before the wall should be touched.

 ++86-18906857262 / ++86-13754347028

 No.49, Tunnan Industrial Zone, Daohui Street, Shangyu District, Shaoxing City, Zhejiang Province, China
